Posts

Incorporate Mindfulness Into Your Training

Whether you’re training to be faster or are simply exercising to relax and destress, practicing mindfulness during your physical activities in order to better connect with your body is a great way to achieve a balanced state of mind and find joy in your training.

Often when we hear the word ‘mindfulness’ or ‘meditation’, we envision someone sitting on a yoga mat by the beach, practicing slow and thoughtful movements. But a mindful state can and should be achieved through any activity, especially in triathlon training.


What Do We Mean When We Say Mindfulness?

The simplest definition is the practice of being aware and present at the moment. When it comes to training it means we are being mentally connected to our bodies and train our minds and bodies together as one unit. When we only focus on our physical self without also training the mind, we can create a disconnect between the two, causing negative thoughts and a higher perceived exertion during an event.

Why is Mindfulness Important?

Mindfulness has been shown to help improve focus, decrease stress levels, and increase self-awareness. If you’re looking for a way to improve your performance, incorporating mindfulness into your training is definitely something you should consider. With mindfulness, you can learn how to be more patient, focused, and relaxed during physical activity- leading to better results overall.

How to Incorporate Mindfulness

1) Slow Down

Endurance activities are actually very conducive to achieving a meditative state of mind, and it starts with slowing down and focusing on your form. It’s important to be precise during swimming strokes and land lightly when running so that you can move more efficiently–don’t get frustrated if thoughts wander off while doing this! When we catch ourselves thinking about something else, just relax and refocus back onto the specific element of our movement.

2) Remember Your Goals

Also helpful while practicing mindfulness during workouts, is to have a goal for your workout and keep it top of mind. Maybe today’s goal is to add an extra mile on your run, or maybe it’s to focus on getting your core stronger. Whatever your reason may be for doing your workout, keep it locked in the forefront of your mind to help remind yourself why you’re doing the activity you’re doing.

3) Practice Belly Breathing

Another helpful tip is one we can learn from babies, which is the act of belly breathing. Inhale slowly, extending the belly outward. This helps draw the breath into the lower lungs and extend the diaphragm. By fully inflating the lungs, you’re also taking in the maximum amount of oxygen possible with each breath. These deeper inhalations keep the body relaxed and help you pace yourself and move most efficiently.


Mindfulness can be an important tool in your training arsenal, especially if you struggle with stress or focus. By practicing being aware and present, you can improve your connection to your body and train both the body and mind as one unit. When it comes to competition or a challenging workout, this can be the difference between success and failure. Give mindfulness a try and see how it impacts your performance!

 

How to Fix a Squeaky Bike

You manage to get ready, on your bike, and ready to zen out for some miles when all of a sudden you hear it – squeak… squeak… squeak… AND IT IS SUPER ANNOYING!

Many of us have been annoyed by having a squeaky bike from time to time. The question is, what is it and how do we stop it? There are a few things we can re-tighten and re-grease that make a world of a difference.

First, check your pedals. They do come loose and will make a creaking noise. You should re-tighten and re-grease your pedals periodically, especially if you travel or ride in the rain. Using a bike specific pedal wrench will make it easy to get enough leverage to tighten the pedals properly.

Second, check your shoes and cleats. They may need to be lubed and tightened. Loose cleats can not only lead to annoying squeaks but can also be the cause of pain while riding. Speedplay’s are notorious for having noisy and “sticky” cleats and pedals when they are not lubed properly.

Third, your brakes and wheel alignment. Check both your front and back brake to make sure they are centered. Realign the brakes by pushing them with your hand. If you find your wheel leaning to one side, simply release the quick release lever and let the wheel center itself.

Forth, your chain. Rub your fingers along your bike chain. You should have a light amount of chain lube come off on your fingers. While it may have some color to it, it should not be gritty or thick. If it is, it’s time for a bath or possibly a new chain. If it is dry, be sure to get some chain specific lube on it.

Fifth, your saddle. Check the railing on your seat. If your seat is broken or the railings are loose they will move each time you pedal. If this is the source of your squeaky bike, then don’t keep riding. A loose or broken seat can be dangerous.

Last but not least, check the bolts on your crank arms and cranks. They do come loose and need re-tightening and re-lubing from time to time. If you are uncomfortable with tightening any of these, just stop in your local bike shop. The mechanics are happy to help with a quick safety/squeak check.

Bike transportation is a big culprit when it comes to stuff getting knocked loose. Take your time when loading and unloading your bike. It is also a good idea to do a pre-ride safety check each time you ride. Also, lube is your bike’s friend and it’s not a bad idea to add it to your saddle bag.

Now you can stop the squeaking and enjoy your noise-free ride.


Resistance Bands: How to Use Them Effectively

Add resistance bands to your training and learn to use them effectively

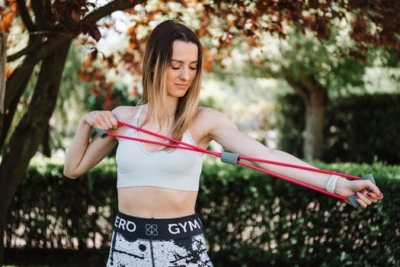
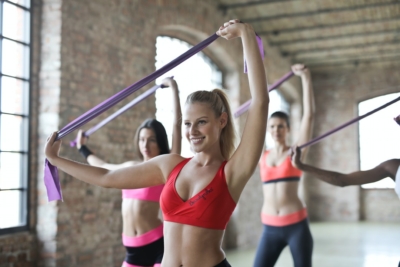
Resistance bands are known as workout bands or exercise bands. They’re used during training to build strength and increase flexibility. They can be beneficial whether you’re training for a triathlon or want another form of cross-training. They come in various lengths and different thicknesses. The two most common shapes you’ll encounter are flat and tubular-shaped resistance bands. The difference in shape and size helps people build strength in different areas of the body. Learn about the different types of bands. There are also a few exercises to get you started. They’re so easy you could complete them during your lunch break like these exercises.

Types of resistance bands

Therapy bands

Therapy bands are beneficial and have many uses.

Resistance bands were first used in physical therapy and rehabilitation. They still are, even though they’re now used in various ways during a workout. With a flat surface and no handles, therapy bands can be gentle on the body unless they bunch up and pinch the skin. They can be cut and tied together to create different lengths or used as one long piece.

Compact resistance bands

These tubular bands have two plastic handles and are typically longer than other bands. The additional length makes these bands ideal for upper- and lower-body workouts. The ability to strengthen most of the body makes these bands ideal for reaping the many benefits of cross-training.

Ring resistance bands

A small, tube-shaped ring with two soft handles on either side. It’s best used when working with the lower body. 

Figure 8 bands 

Figure 8 bands are good for strengthening the upper body.

These resistance bands come with two plastic handles that intertwine around each, giving the appearance of a figure 8. They’re shorter than other bands, making them a great tool for upper body strengthening. 

Fit loop bands 

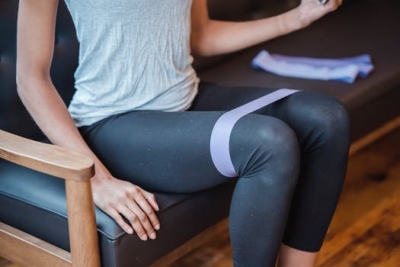
These are also known as mini bands. Similar to therapy bands, they are a flat, continuous loop. However, they come as one piece and are not tied together. Use these during training to help you target specific muscles groups like the hips and glutes and improve your run performance.

Lateral resistance bands

Unlike the other bands with handles, lateral bands have velcro cuffs on either end. The cuffs can wrap around the ankle or the wrist, depending on the exercise. Best used with lower body workouts, strengthening the hips and thighs.

3 exercises to add to your training

Lateral band walk

You can place the band above your knees for many lower body exercises.

Depending on the strength of the band, you can place it around your ankles and above your knees. Start with your feet shoulder-length apart. Extend your right leg out, place it on the ground, follow with your left leg. Repeat 10 steps to your right, then come back to the left. Best when using therapy bands (if tied together), fit loop bands, or lateral resistance bands.

Bicep curls

Hold the end of a band in either hand and put the other end underneath each foot. Lower your arms until they’re straight, then bend your elbows and raise your fists up. Repeat this for 10 reps. Best when using therapy or compact resistance bands.

Flutter kicks

This is a great core exercise. Lay down on your back on the ground or on a bench. Place your hands by your side or under your butt. Put a band around your ankles. Raise your feet a few inches off the ground, alternate kicking each foot 6-8 inches into the air. Repeat this for 10 reps with each leg. Best when using therapy bands (if tied together), fit loop bands, or lateral resistance bands. 

There’s no doubt you strengthen your body by swimming, cycling, and running. But working seldom-used muscle groups with resistance bands is just as important. It’ll allow other muscle groups the chance to recover as well. If you want to build a healthy physique with tone muscles, then resistance training could be exactly what you’re looking for.

Run these Austin Hills to Become a Stronger Runner

Build strength and stamina when you run these Austin hills

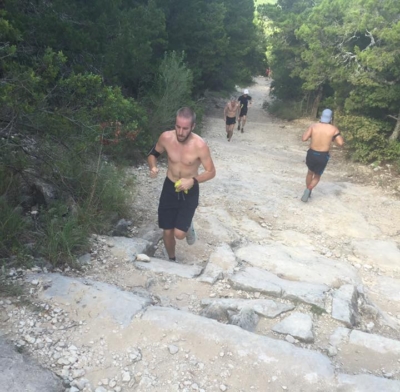
Very few people enjoy hill workouts. But you can’t deny the benefits of including hill workouts with your routine. Whether you’re training or maintaining, adding at least one hill-based workout has many benefits. Yes, your pace will be slower, but that’s okay. You’ll build stamina, strengthen your lower body, and increase your lung capacity. Add one workout a week on these different Austin hills to begin seeing a difference. If needed, make it every other week to begin. And yes it’s okay to run/walk these Austin hills when you first start. Pro tip: you’re asking your body to work harder, take care of it with these tips to beat the heat.

“Hills are speedwork in disguise.” – Frank Shorter (gold medalist, marathon, 1972 Summer Olympics; silver medalist, marathon, 1976 Summer Olympics)

Wilke

Climb Wilke and arrive at Rabb Road.

There are few people in Austin who haven’t heard of Wilke, a well-known classic in the Barton Hills neighborhood. The entire road itself is about .3 miles, but you can push that to nearly half a mile (and >100 feet elevation change) with this workout:

  • begin at Barton Hills and Wilke Drive
  • Run (against traffic) to the top of the Wilke, you’ll end at Rabb Road
  • turn around and head back down (make sure to control yourself!)
  • take a left on Barton Parkway; make a U-turn at the footbridge
  • return to your starting point, rest for 60 seconds, repeat as desired

Ladera Norte

To visit Ladera Norte head to northwest Austin, past Far West Boulevard. Many different routes can be created from this hill, but this workout is a ~1.3-mile lollipop route that has about 325 feet elevation change. Park at Ladera Norte and Valburn Drive. 

  • run south on Ladera Norte and control your stride
  • take a right on Backtrail Drive., it’ll end at Ladera Norte
  • take a left on Ladera Norte and begin your ascent; Pro tip: keep your head low, lean forward, pump your arms, and keep your feet moving
  • rest for 2:30 minutes at the top, repeat as desired

Hill of Life

Runners running up and down Hill of Life.

Get off the roads and conquer the Hill of Life on the Greenbelt! Pay attention to this route, especially as you descend the Hill of Life. What starts at the top with great views ends nearly half a mile downhill, with nearly 300 feet of elevation change. There are no major turns unless you want to run on the trail for a 5-minute recovery. Repeat as desired. Get to the Hill of Life on foot (several Greenbelt access points) or by car (take Scottish Woods Trial off 360). This workout will help strengthen the muscles in your feet and teach you about building your mental toughness.

Pease Park

This double-roller near Shoal Creek doesn’t have the elevation gain of the other three on this list, but it’s a great workout nonetheless.

  • start near the picnic tables at Pease Park, run west on Kingsbury Street (climbs aren’t gnarly, but there is a flat part before the second hill)
  • use this section to briefly recover before attacking the second hill
  • there’s more than a quarter-mile until the crest, turn around at the top, use the downhill to recover
  • rest at Pease Park for 60 seconds, repeat as desired

When you visit these Austin hills it’s important to bring fluids with you, especially during the Texas summers. Pease Park has water fountains, but if you prefer your own hydration plan accordingly. As for all workouts on the road, be visible/reflective, run against traffic, be predictable, and keep an eye out for cars. If you’re running as a group, don’t hog the road and run no more than side-by-side. Don’t forget to strengthen your core. These 5 core exercises will help you do just that, allowing you to be in more control of your body when you run up and come back down these Austin hills.

How to Get Comfortable with the Aero Position

Take advantage of the benefits of riding your bike in the aero position

Triathletes are always looking for different ways to get faster. That could include increased training, improved nutrition/hydration, or better equipment. If you’ve ever seen a cyclist in a more hunched-over position not using their original handlebar, they’re in the aero position. Their arms are placed on the aero bar and they keep their body more parallel to the ground than a traditional cyclist. Riding in the aero position during training or your triathlon allows for increased power output while conserving energy. 

Ask your tri friends for aero position advice.

This doesn’t happen overnight. Like all training, you have to work at it. Getting more comfortable with the aero position over time will allow you to take advantage of its benefits. Below are a few tips that’ll help you adjust to this new position. Pro tip: continue to work on your everyday bike skills for continued growth.

Ask your tri friends

Before you dive into anything that involves change, ask your triathlon friends and club/group. Firsthand information will be instrumental in discovering what works best for you. Tips, advice, gear, and recommendations can get you going in the right direction. Using the aero position is a big switch to your current riding. All the information you can obtain is helpful.

But don’t stop at just asking questions. Watch what others do when in the aero position. See what products they use. Ask how much they had to adjust different components on their bike. Lastly, ask someone if you can give their bike a test ride to see if you even like the aero position. You can complete this ride on one of these cyclist-friendly courses in Austin or on a trainer.

Make incremental changes

The Veloway is a cyclist-friendly place to ride in Austin.

To achieve an aero position that is best for you, you need to make changes to your riding posture. Do so with incremental changes. If you want to adjust your saddle height, make adjustments 1-2mm at a time until you find what’s comfortable for you. 

Ride in the new position for a week or two, see if it’s comfortable, and make changes as needed. Eventually, you’ll become accustomed to the new posture. Making incremental changes helps prevent injuries and allows you to find the new saddle height that’s right for you.

Check fit of elbow cups

Elbow cups, scoops, armrests, whatever the name, this is where you place your arms when in the aero position. Comfort is important since your elbows and forearms will be on the aero bars for the majority of the time. If you find your current set is lackluster, get something better. Also, you can put extra padding on the elbow cups for better support. As with the saddle height incremental changes, make armrest adjustments until you find the position that works for you.

Practice the new aero position

Just like anything related to triathlon training, you have to practice! Once you find the aero position that best fits you, practice in it as often as you can to become increasingly comfortable. Even if you’re still making adjustments keep practicing so you can diagnose the needed changes. Practice with these 1-hour bike workouts until you get more comfortable.

The aero position can help increase speed and conserve energy. Credit – Scott Flathouse

Incremental change includes time spent in aero. Spend some time there, then return to your regular handlebar. Once you become more comfortable, increase the duration of holding the aero position. Then ride in this position on turns, when you need to pass, or with a large group. With continued practice, you’ll take advantage of the benefits of the aero position in no time.

Work on your core/upper body strength, and flexibility

Your core and upper body strength are essential to the aero position. Building strength helps prevent fatigue, allowing you to push harder and longer. Improving the flexibility of your lower back helps you get in a better and more comfortable position. Add these 5 core exercises to build your strength. You can do them anywhere!

Fine-tuning your aero position for maximum comfort will help you get optimal results. With continued practice, you’ll find the right position and increase your speed. Just like any other aspect of your training plan, this will not happen instantly. You’ll have to constantly work at this is order to find what works best for you.

How Your Bike Cadence Can Influence Your Run

Focus more on your bike cadence when you learn how it can influence your run

Running is an aerobic exercise that can help burn calories, build strength, and improve your cardiovascular health. But to become a well-rounded runner you should understand how other strength-building exercises can influence your run. This is especially true for triathletes as the run is the final leg of triathlon. Cycling, the second leg of triathlon, can influence your run and actually make you a better runner. Focus on your bike cadence, the number of pedal revolutions per minute, during training. It’ll positively influence your run by increasing your speed, boosting your endurance, and building your muscle strength. 

You’ll shorten your stride and become a better runner when you improve your bike cadence.

4 ways your bike cadence can make you a better runner

Boost your endurance and stamina

Endurance and stamina are must-haves when training for triathlon, especially if you compete in longer-distance triathlons. Your body and mind must be prepared for what you’re going to ask of it on race day. Add long weekend rides to your training to work on your endurance without the wear and tear of long-distance running. Once you become comfortable with long-distance rides, add brick workouts to the equation. To start, follow a 10:1 brick workout where you ride a 10-mile loop and then run 1 mile when you get back. This tests and builds your stamina while preparing your legs for what they’ll experience on race day.

Reduce your chances of injury

Riding hilly routes might slow your cadence, but they’ll increase your strength.

Biking is a low-impact activity that doesn’t put as much strain on your body as running does. That’s why many runners who aren’t triathletes cross-train with cycling. When cycling, your body is exercising and strengthening muscles you use while swimming and running differently. Injury chances can decrease when you reduce overusing your muscles. Even changing your bike cadence while riding works muscles differently. These 1-hour bike workouts are an excellent addition to your training plan. They’ll allow you to mix up your bike cadence.

Quicker cadence improves your speed

Most triathletes with a running background have a longer stride and slower cadence. A faster cadence on the bike can help you shorten your stride and increase your turnover rate. This could improve your speed and efficiency when running. If you’re tracking this information in real-time, you should ride a route with little to zero traffic. These 3 cyclist-friendly spots in Austin are perfect.

Build quad and glute strength

You can really focus on your bike cadence during a long weekend ride.

Biking and running develop strength in your hamstrings, quads, and glutes. Biking, in particular, will help you increase the strength in those muscles differently than running which will translate to your power output. As you get stronger on the bike, your power output on the bike and the run will increase. Riding a hilly route might slow your cadence due to the climbs, but you’ll use those muscles differently and become stronger. Before you increase the frequency and distance of your rides, make sure you’re well-versed in cycling’s rules of the road.

That’s right, riding your bike can also make you a better and more efficient runner. By improving your bike cadence you can improve your speed, strength, and stamina. Whether it’s a brick workout, hilly route, or long weekend ride, set goals for your cadence. This will give you something to strive for during the ride that’ll influence your run. Don’t forget to adjust your bike cadence goals for different rides and as you get stronger.