Posts

Train Your Brain: Build Mental Toughness

Build mental toughness and explore what you’re capable of accomplishing

It’s easy to get wrapped up in the latest gear and training technology. Triathletes get caught up in the latest nutrition, the newest GPS watch, or the most recent bike to hit the market. But can those get you over the proverbial hump? Maybe not. Most agree that a big part of success in any sport is due to mental factors. You can have the fanciest items, but they can’t make you push yourself when it’s needed most.

When you build mental toughness you create strategies for when an obstacle is encountered or an uncomfortable feeling arises. Those strategies become tools that help you become comfortable with the uncomfortable. Still uncomfortable during an open water swim? Add these 5 tips to get over your fear of open water to your strategy.

How you can build mental toughness
Assume that your thoughts, feelings, and performance are intertwined. With that, triathletes can begin the process of overcoming anything rather than the feeling of being overcome. Mental training is an important part of an athlete’s overall development. Many do not identify this part of training and often find themselves struggling during their training or a race. One of the basic principles of success and how to build mental toughness is to simplify the process of thinking. Be as prepared for your first triathlon as possible when you know what to expect with this breakdown.

As many will confirm, you can accomplish anything you put your mind to. With so many thoughts going through the brain, it can be difficult to reduce distractions and negatives. One of the reasons why athletes ignore the mental aspect of training is that they are not familiar with the basics of sports psychology and mental training. In keeping with the “less is better” philosophy, mental training is better understood using the construction of the following three words: Think –> Feel–> Perform.

Think
Check-in with yourself before your next swim, bike, or run workout.

Before your next workout, take a moment to identify your thoughts. Are you optimistic about your planned bike ride? Are you thinking about how good you will feel during and after the swim? Maintaining positive thoughts before and during an activity is the first step to controlling your performance. Uncomfortable and negative thoughts might start to creep in. Bring yourself back to your “why” and tell yourself positive “I am” statements. Make these “I am” statements become a habit. Then add that to these 8 additional habits of successful triathletes.

  • I am strong.
  • I am willing to push through this to complete my goal of riding 30 miles.
  • I can swim longer.
  • I am running 10 miles to better myself.  

Feel

Determine your emotional state as you warm up. Identify your thoughts. Are you excited to swim, bike, or run? Do you feel a personal challenge with the distance? Do you feel confident in your abilities? Are you anxious, nervous, or stressed about the mileage? Maintaining positive emotions before and during the workout is the second step in gaining control over your performance. Pro tip: feel more confident when you increase your bike mileage by incorporating these 6 tips.
Consistency is key during training.

Visualize other times in your life or training where you have achieved a goal you set for yourself. Harness this positive feeling and project it towards your current goal. Check your playlist if you are listening to music. Make sure your running playlist consists of music that’ll pump you up and energize you. If more relaxed music or a podcast helps, listen to that to calm your nerves. 

Perform

Practice daily. Be consistent. This does not mean you have to work out every day, but you can put yourself in situations where you have to practice mental toughness. Increase the weights during your workout or add more reps. Add more miles to your ride. Swim for 15 more minutes than last time. If you need to make tweaks to your training to see improvement, follow this advice and adjust accordingly.

Introduce yourself to situations that may happen on race day during your training. Get out of bed and start that workout in the cold weather. Next time it is raining, instead of skipping go out and run in the rain. Of course, that is only if it is safe to do so. Didn’t sleep well? Attempt your planned run. You can see how the lack of sleep affects your ability to keep positive thoughts and emotions. 

Overcome the struggle

Having positive thoughts and feelings right from the start will give you a chance to succeed. This may not result in PR, but you are in a much better position to have a pleasant experience with the right mindset. Your thoughts can affect your emotions, and your emotions can affect your performance. Once you get into the race, a strong swim will lead to more positive thoughts, and more confident emotions. Conversely, negative thoughts usually lead to negative feelings.

If you find yourself struggling, understand your thought process during that specific workout. Chances are negative, self-defeating thoughts are what’s making you question your abilities. Turn your thoughts into something positive, optimistic, and confidence-building. When you go out on the streets, it will help you feel good about yourself and crush your next swim, bike, or run.

5 Must Try Yoga Poses for Triathletes

Adding yoga to your life offers many benefits such as increasing mobility and range of motion, preventing injuries, and relieving pain. Hopefully, you already have some kind of stretching routine included in your training. If you don’t, the offseason is the perfect time to try some new things! We’ve compiled a list of the 5 most beneficial yoga poses for triathletes to combat the wear and tear we put our bodies through during training.

1. Downward Facing Dog

Purpose: This is a common pose but is especially beneficial for a triathlete with any built-up tension in your calves and feet from running. Also great for cyclists with lower back from riding. Hold this pose to help build strength in your shoulders, arms, and chest.

How To: Start on your knees with your hands out in front of you, push your bottom up until you feel a stretch in your calves and the bottom of your feet. Straighten your legs if you can, but the main thing to remember in this pose is to keep your back as flat as possible.

Downward Dog

2. Crescent Lunge

Purpose: This pose utilizes all the muscles in your body but focuses on getting a stretch in the back of your legs, groin, and hip flexors while building strength in the front of your legs. Practicing this pose will open your range of motion in your legs and hips.

How To: Start in a standing position, and go into a lunge until your front leg is bent at a 90-degree angle. Keep your core tight to remain balanced as you lift your arms above your head. During this motion, you will feel a stretch in your triceps and chest.  Take deep breaths as you hold this position, switch to your other leg, and repeat.Crescent Lunge

3. Pigeon Fold

Purpose: The Pigeon Fold is a great yoga pose for opening up your hips and getting a deep stretch in your hip flexors and glutes. Good for athletes who spend more time cycling to loosen and realign their hips after putting in hours on the bike.

How To: Start in a Downward Facing Dog, bend your right knee and sweep your leg down and place it on the mat beneath you. Lower yourself to a comfortable seated position with your left leg behind you as you feel the stretch in your quad and hamstring. Hold your chest high to focus the stretch in your legs. Pigeon Fold

4. Cross-Legged Twist

Purpose: This pose focuses on stretching your lats, shoulders, and neck. This will help reduce any pain you may have from constantly rotating your body side to side during your freestyle swim stroke.  Holding this pose will lengthen and help mobility along your spine which is great for increasing your range of motion during your swim training.

How To: Begin on the floor with both legs out in front of you. Bring your knees to your chest and place the bottom of your feet on the ground. Slide your left foot on the ground under your right leg to rest your foot beside your right hip. Bring your right arm across your body and place it against the inside of your left knee. Push slightly to twist your body until you feel a stretch in your lats and shoulder. Cross Legged Twist


5. Bridge Pose

Purpose: Offers relief from pain caused by the position you are in when training on your bike. Good stretch for your quads, chest, and abs while also strengthening your glutes and hamstrings. You will feel this pose strengthens your back muscles to reduce or prevent pain you may have from running and cycling.

How To: Lie flat on your back with your knees bent with feet on the floor shoulder-width apart. Place hands on either side of your body to help keep yourself balanced. Press your feet and arms firmly into the floor and push your hips up off the ground.Bridge Pose


These yoga poses work muscles that are often neglected in the repetitive movements you do while preparing for a triathlon. Get the most out of your training when you add in these 5 yoga poses that are best for triathletes before or after your next workout!

Resistance Bands: How to Use Them Effectively

Add resistance bands to your training and learn to use them effectively

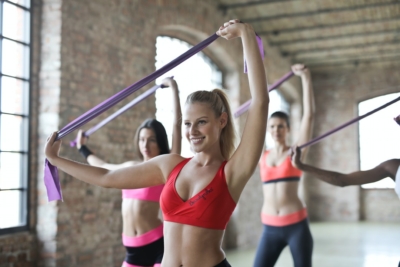
Resistance bands are known as workout bands or exercise bands. They’re used during training to build strength and increase flexibility. They can be beneficial whether you’re training for a triathlon or want another form of cross-training. They come in various lengths and different thicknesses. The two most common shapes you’ll encounter are flat and tubular-shaped resistance bands. The difference in shape and size helps people build strength in different areas of the body. Learn about the different types of bands. There are also a few exercises to get you started. They’re so easy you could complete them during your lunch break like these exercises.

Types of resistance bands

Therapy bands

Therapy bands are beneficial and have many uses.

Resistance bands were first used in physical therapy and rehabilitation. They still are, even though they’re now used in various ways during a workout. With a flat surface and no handles, therapy bands can be gentle on the body unless they bunch up and pinch the skin. They can be cut and tied together to create different lengths or used as one long piece.

Compact resistance bands

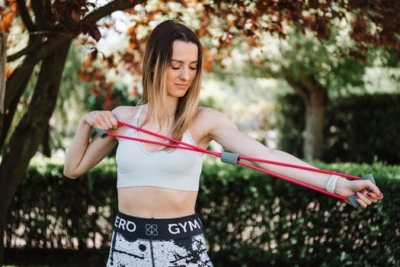
These tubular bands have two plastic handles and are typically longer than other bands. The additional length makes these bands ideal for upper- and lower-body workouts. The ability to strengthen most of the body makes these bands ideal for reaping the many benefits of cross-training.

Ring resistance bands

A small, tube-shaped ring with two soft handles on either side. It’s best used when working with the lower body. 

Figure 8 bands 

Figure 8 bands are good for strengthening the upper body.

These resistance bands come with two plastic handles that intertwine around each, giving the appearance of a figure 8. They’re shorter than other bands, making them a great tool for upper body strengthening. 

Fit loop bands 

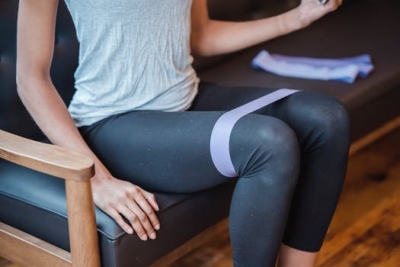
These are also known as mini bands. Similar to therapy bands, they are a flat, continuous loop. However, they come as one piece and are not tied together. Use these during training to help you target specific muscles groups like the hips and glutes and improve your run performance.

Lateral resistance bands

Unlike the other bands with handles, lateral bands have velcro cuffs on either end. The cuffs can wrap around the ankle or the wrist, depending on the exercise. Best used with lower body workouts, strengthening the hips and thighs.

3 exercises to add to your training

Lateral band walk

You can place the band above your knees for many lower body exercises.

Depending on the strength of the band, you can place it around your ankles and above your knees. Start with your feet shoulder-length apart. Extend your right leg out, place it on the ground, follow with your left leg. Repeat 10 steps to your right, then come back to the left. Best when using therapy bands (if tied together), fit loop bands, or lateral resistance bands.

Bicep curls

Hold the end of a band in either hand and put the other end underneath each foot. Lower your arms until they’re straight, then bend your elbows and raise your fists up. Repeat this for 10 reps. Best when using therapy or compact resistance bands.

Flutter kicks

This is a great core exercise. Lay down on your back on the ground or on a bench. Place your hands by your side or under your butt. Put a band around your ankles. Raise your feet a few inches off the ground, alternate kicking each foot 6-8 inches into the air. Repeat this for 10 reps with each leg. Best when using therapy bands (if tied together), fit loop bands, or lateral resistance bands. 

There’s no doubt you strengthen your body by swimming, cycling, and running. But working seldom-used muscle groups with resistance bands is just as important. It’ll allow other muscle groups the chance to recover as well. If you want to build a healthy physique with tone muscles, then resistance training could be exactly what you’re looking for.

Run these Austin Hills to Become a Stronger Runner

Build strength and stamina when you run these Austin hills

Very few people enjoy hill workouts. But you can’t deny the benefits of including hill workouts with your routine. Whether you’re training or maintaining, adding at least one hill-based workout has many benefits. Yes, your pace will be slower, but that’s okay. You’ll build stamina, strengthen your lower body, and increase your lung capacity. Add one workout a week on these different Austin hills to begin seeing a difference. If needed, make it every other week to begin. And yes it’s okay to run/walk these Austin hills when you first start. Pro tip: you’re asking your body to work harder, take care of it with these tips to beat the heat.

“Hills are speedwork in disguise.” – Frank Shorter (gold medalist, marathon, 1972 Summer Olympics; silver medalist, marathon, 1976 Summer Olympics)

Wilke

Climb Wilke and arrive at Rabb Road.

There are few people in Austin who haven’t heard of Wilke, a well-known classic in the Barton Hills neighborhood. The entire road itself is about .3 miles, but you can push that to nearly half a mile (and >100 feet elevation change) with this workout:

  • begin at Barton Hills and Wilke Drive
  • Run (against traffic) to the top of the Wilke, you’ll end at Rabb Road
  • turn around and head back down (make sure to control yourself!)
  • take a left on Barton Parkway; make a U-turn at the footbridge
  • return to your starting point, rest for 60 seconds, repeat as desired

Ladera Norte

To visit Ladera Norte head to northwest Austin, past Far West Boulevard. Many different routes can be created from this hill, but this workout is a ~1.3-mile lollipop route that has about 325 feet elevation change. Park at Ladera Norte and Valburn Drive. 

  • run south on Ladera Norte and control your stride
  • take a right on Backtrail Drive., it’ll end at Ladera Norte
  • take a left on Ladera Norte and begin your ascent; Pro tip: keep your head low, lean forward, pump your arms, and keep your feet moving
  • rest for 2:30 minutes at the top, repeat as desired

Hill of Life

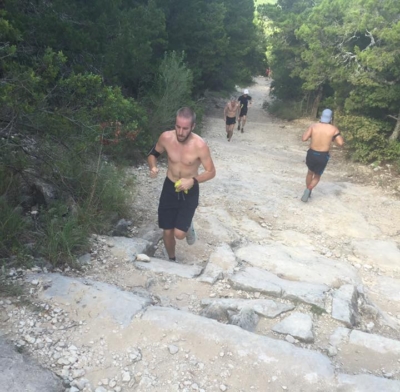
Runners running up and down Hill of Life.

Get off the roads and conquer the Hill of Life on the Greenbelt! Pay attention to this route, especially as you descend the Hill of Life. What starts at the top with great views ends nearly half a mile downhill, with nearly 300 feet of elevation change. There are no major turns unless you want to run on the trail for a 5-minute recovery. Repeat as desired. Get to the Hill of Life on foot (several Greenbelt access points) or by car (take Scottish Woods Trial off 360). This workout will help strengthen the muscles in your feet and teach you about building your mental toughness.

Pease Park

This double-roller near Shoal Creek doesn’t have the elevation gain of the other three on this list, but it’s a great workout nonetheless.

  • start near the picnic tables at Pease Park, run west on Kingsbury Street (climbs aren’t gnarly, but there is a flat part before the second hill)
  • use this section to briefly recover before attacking the second hill
  • there’s more than a quarter-mile until the crest, turn around at the top, use the downhill to recover
  • rest at Pease Park for 60 seconds, repeat as desired

When you visit these Austin hills it’s important to bring fluids with you, especially during the Texas summers. Pease Park has water fountains, but if you prefer your own hydration plan accordingly. As for all workouts on the road, be visible/reflective, run against traffic, be predictable, and keep an eye out for cars. If you’re running as a group, don’t hog the road and run no more than side-by-side. Don’t forget to strengthen your core. These 5 core exercises will help you do just that, allowing you to be in more control of your body when you run up and come back down these Austin hills.

How to Get Comfortable with the Aero Position

Take advantage of the benefits of riding your bike in the aero position

Triathletes are always looking for different ways to get faster. That could include increased training, improved nutrition/hydration, or better equipment. If you’ve ever seen a cyclist in a more hunched-over position not using their original handlebar, they’re in the aero position. Their arms are placed on the aero bar and they keep their body more parallel to the ground than a traditional cyclist. Riding in the aero position during training or your triathlon allows for increased power output while conserving energy. 

Ask your tri friends for aero position advice.

This doesn’t happen overnight. Like all training, you have to work at it. Getting more comfortable with the aero position over time will allow you to take advantage of its benefits. Below are a few tips that’ll help you adjust to this new position. Pro tip: continue to work on your everyday bike skills for continued growth.

Ask your tri friends

Before you dive into anything that involves change, ask your triathlon friends and club/group. Firsthand information will be instrumental in discovering what works best for you. Tips, advice, gear, and recommendations can get you going in the right direction. Using the aero position is a big switch to your current riding. All the information you can obtain is helpful.

But don’t stop at just asking questions. Watch what others do when in the aero position. See what products they use. Ask how much they had to adjust different components on their bike. Lastly, ask someone if you can give their bike a test ride to see if you even like the aero position. You can complete this ride on one of these cyclist-friendly courses in Austin or on a trainer.

Make incremental changes

The Veloway is a cyclist-friendly place to ride in Austin.

To achieve an aero position that is best for you, you need to make changes to your riding posture. Do so with incremental changes. If you want to adjust your saddle height, make adjustments 1-2mm at a time until you find what’s comfortable for you. 

Ride in the new position for a week or two, see if it’s comfortable, and make changes as needed. Eventually, you’ll become accustomed to the new posture. Making incremental changes helps prevent injuries and allows you to find the new saddle height that’s right for you.

Check fit of elbow cups

Elbow cups, scoops, armrests, whatever the name, this is where you place your arms when in the aero position. Comfort is important since your elbows and forearms will be on the aero bars for the majority of the time. If you find your current set is lackluster, get something better. Also, you can put extra padding on the elbow cups for better support. As with the saddle height incremental changes, make armrest adjustments until you find the position that works for you.

Practice the new aero position

Just like anything related to triathlon training, you have to practice! Once you find the aero position that best fits you, practice in it as often as you can to become increasingly comfortable. Even if you’re still making adjustments keep practicing so you can diagnose the needed changes. Practice with these 1-hour bike workouts until you get more comfortable.

The aero position can help increase speed and conserve energy. Credit – Scott Flathouse

Incremental change includes time spent in aero. Spend some time there, then return to your regular handlebar. Once you become more comfortable, increase the duration of holding the aero position. Then ride in this position on turns, when you need to pass, or with a large group. With continued practice, you’ll take advantage of the benefits of the aero position in no time.

Work on your core/upper body strength, and flexibility

Your core and upper body strength are essential to the aero position. Building strength helps prevent fatigue, allowing you to push harder and longer. Improving the flexibility of your lower back helps you get in a better and more comfortable position. Add these 5 core exercises to build your strength. You can do them anywhere!

Fine-tuning your aero position for maximum comfort will help you get optimal results. With continued practice, you’ll find the right position and increase your speed. Just like any other aspect of your training plan, this will not happen instantly. You’ll have to constantly work at this is order to find what works best for you.

How Your Bike Cadence Can Influence Your Run

Focus more on your bike cadence when you learn how it can influence your run

Running is an aerobic exercise that can help burn calories, build strength, and improve your cardiovascular health. But to become a well-rounded runner you should understand how other strength-building exercises can influence your run. This is especially true for triathletes as the run is the final leg of triathlon. Cycling, the second leg of triathlon, can influence your run and actually make you a better runner. Focus on your bike cadence, the number of pedal revolutions per minute, during training. It’ll positively influence your run by increasing your speed, boosting your endurance, and building your muscle strength. 

You’ll shorten your stride and become a better runner when you improve your bike cadence.

4 ways your bike cadence can make you a better runner

Boost your endurance and stamina

Endurance and stamina are must-haves when training for triathlon, especially if you compete in longer-distance triathlons. Your body and mind must be prepared for what you’re going to ask of it on race day. Add long weekend rides to your training to work on your endurance without the wear and tear of long-distance running. Once you become comfortable with long-distance rides, add brick workouts to the equation. To start, follow a 10:1 brick workout where you ride a 10-mile loop and then run 1 mile when you get back. This tests and builds your stamina while preparing your legs for what they’ll experience on race day.

Reduce your chances of injury

Riding hilly routes might slow your cadence, but they’ll increase your strength.

Biking is a low-impact activity that doesn’t put as much strain on your body as running does. That’s why many runners who aren’t triathletes cross-train with cycling. When cycling, your body is exercising and strengthening muscles you use while swimming and running differently. Injury chances can decrease when you reduce overusing your muscles. Even changing your bike cadence while riding works muscles differently. These 1-hour bike workouts are an excellent addition to your training plan. They’ll allow you to mix up your bike cadence.

Quicker cadence improves your speed

Most triathletes with a running background have a longer stride and slower cadence. A faster cadence on the bike can help you shorten your stride and increase your turnover rate. This could improve your speed and efficiency when running. If you’re tracking this information in real-time, you should ride a route with little to zero traffic. These 3 cyclist-friendly spots in Austin are perfect.

Build quad and glute strength

You can really focus on your bike cadence during a long weekend ride.

Biking and running develop strength in your hamstrings, quads, and glutes. Biking, in particular, will help you increase the strength in those muscles differently than running which will translate to your power output. As you get stronger on the bike, your power output on the bike and the run will increase. Riding a hilly route might slow your cadence due to the climbs, but you’ll use those muscles differently and become stronger. Before you increase the frequency and distance of your rides, make sure you’re well-versed in cycling’s rules of the road.

That’s right, riding your bike can also make you a better and more efficient runner. By improving your bike cadence you can improve your speed, strength, and stamina. Whether it’s a brick workout, hilly route, or long weekend ride, set goals for your cadence. This will give you something to strive for during the ride that’ll influence your run. Don’t forget to adjust your bike cadence goals for different rides and as you get stronger.

Nearly 1300 Triathletes Return to Racing at CapTex Triathlon

Austin skyline provided the backdrop for CapTex Tri’s return to racing

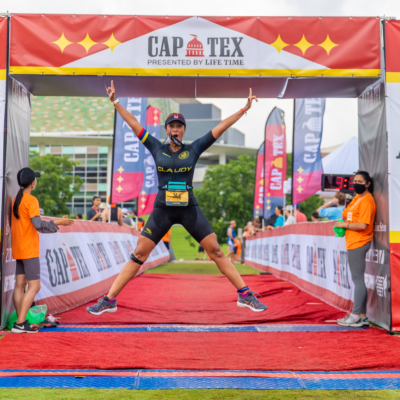
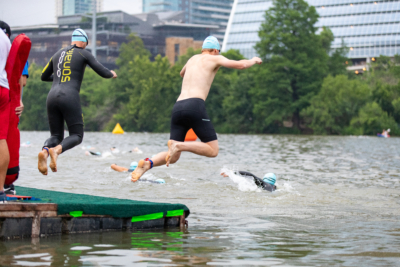
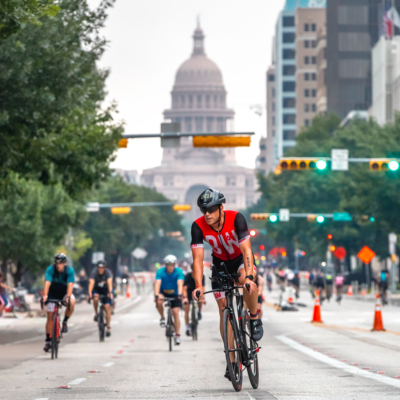
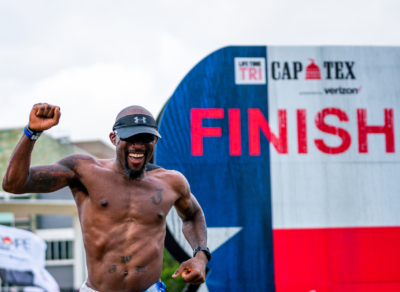
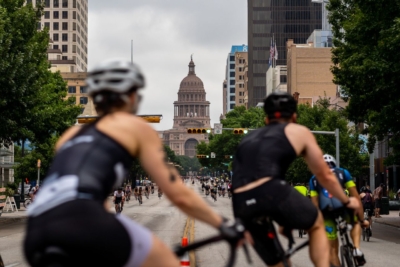
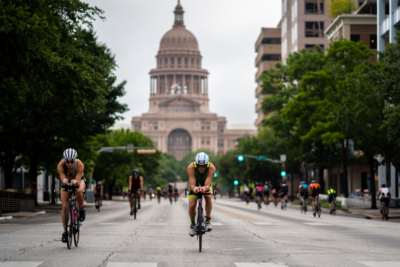
The 29th annual CapTex Triathlon presented by Life Time welcomed nearly 1300 triathletes from 26 states to Austin, Texas, for their return to racing during Memorial Day weekend. Race weekend included a one-day expo, endless views of downtown Austin, and triathletes crossing their first physical finish line in more than a year. Austin’s only downtown triathlon features a swim course in Lady Bird Lake, bike course through downtown Austin, and run course at Auditorium Shores. 

Credit – Scott Flathouse

“CapTex Tri produced an unforgettable race day, we had great weather, and the on-course support was amazing,” said Emily Shryock, paratriathlete who finished the Sprint distance in 1:57:19. “This was an excellent way to return to racing after not having events for more than a year!” 

Something for everyone

CapTex Tri’s return to racing featured a one-day packet pick up and expo on Sunday, May 30th. Race day was Monday, May 31st, and included three distances and different divisions for triathletes of all abilities. Distances included the Sprint (750m swim, 12.3-mile bike, 5K run), Olympic (1500m swim, 24.3-mile bike, 10K run), and the newly-introduced Rookie (300m swim, 12.3-mile bike, 2-mile run). Athletes received a finisher medal, customized shirt, tote bag, and sunglasses. Additionally, they got a reusable custom water bottle, personalized race bib, and Zone3 swim cap. They refueled with post-race fruit, snacks, and drinks. 

Credit – Scott Flathouse

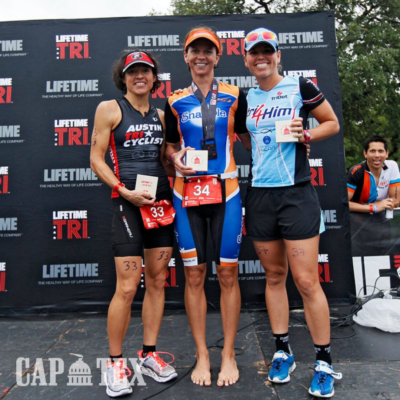
The Olympic distance’s Open Division provided great competition between professional triathletes and elites who began with a mass swim start. Chris Pietraszkiewicz (1:52:35), of San Antonio, Texas, barely edged out Mark Saroni (1:52:40), of San Antonio, for the Olympic distance title. Adrian Cameron (2:00:39) finished third. Haley Koop (2:13:25) and Mina Pizzini (2:20:07) followed Snyder-Elcock, finishing second and third respectively. They rounded out the Olympic distance female top 3.

“It was great to be back racing in my hometown of Austin with so many other triathletes and an energetic crowd,” said Sierra Snyder-Elcock, 2021 CapTex Triathlon Olympic distance female champion (2:07:38). “It’s been so long since I’ve crossed a real finish line and I wanted to make sure that I finished strong!”

CapTex Tri’s return to racing a success

Credit – Scott Flathouse

Ben Rawson (50:59) was the Sprint distance male champion and Clare Anne Dasso (1:06:04) was the Sprint distance female champion. Male and female champions of the Rookie distance were Joe Alvarez (47:35) and Lesley Murray (1:02:45). 2021 participants can see their results on the CapTex Tri website and continue to share their memorable experiences on Facebook, Twitter, and Instagram. Triathletes can expect their FinisherPix race day photos to be ready in 24-48 hours after the race.

“The Sprint was so much fun and my adrenaline was pumping this morning,” said Charlotte Burleson of Waco, Texas, who placed first in the Sprint distance female 45-49 age group (1:22:23). “The entire event was done so well and we’re glad to be back out racing with everyone else. If you haven’t been to CapTex Tri you have to add it to your list!”

30th annual CapTex Tri

Credit – Scott Flathouse

CapTex Tri, owned and produced by High Five Events, is celebrating its 30th anniversary in 2022 with Special Pricing. These deals are good for 30 days, through Wednesday, June 30th. Don’t miss your chance to swim, bike, and run Austin’s only downtown triathlon. 

CapTex Triathlon would like to thank sponsors and partners Life Time, Zone3, Ascension Seton, Camp Gladiator, Fleet Feet Austin, Austin Tri Club, Athlinks, FinisherPix, Super Coffee, the City of Austin, Austin Police Department, CapMetro, Austin Public Health, and Travis County EMS.

2021 CapTex Triathlon Ready to Showcase Downtown Austin

Austin’s only downtown triathlon set to welcome nearly 1500 triathletes

High Five Events, one of the largest privately owned event production companies in the United States, is ready to welcome triathletes to the 2021 CapTex Triathlon presented by Life Time during Memorial Day weekend. Nearly 1500 triathletes from 26 states have registered for Austin’s only downtown triathlon. 

The 29th annual CapTex Tri features a swim course in Lady Bird Lake, bike course through downtown Austin, and run course at Auditorium Shores. 2021 CapTex Triathlon will take place on Monday, May 31st.

CapTex is the quintessential Austin triathlon and I cannot wait to swim, bike, and run through the heart of Austin, passing multiple iconic landmarks and quirky local spots,” said Haley Koop, elite triathlete and 2018 Kerrville Triathlon Quarter Distance female champion. “CapTex is the perfect way to get a unique look at the city and a true feel for The Live Music Capital of the World!

2021 CapTex Triathlon has something for everyone

2021 CapTex Triathlon offers different divisions and distances for triathletes of all abilities. Age groupers are separated into five-year increments and begin with others in their age group. They are eligible for age-group awards. Open Division allows professional triathletes and elites to begin regardless of age, with a mass swim start. Open Division participants are not eligible for age-group awards. CapTex Tri also features Athena and Clydesdale categories. There are also aquabike and relay options for race day. The relay team can consist of two or three members and the aquabike completes the swim and the bike only.
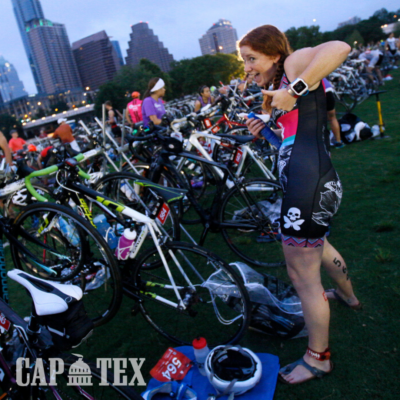
Female triathlete gives a thumbs up after setting up her triathlon area at the 2018 CapTex Triathlon.

Event distances include:

  • Rookie triathlon – 300m swim, 12.3-mile bike, 2-mile run
  • Sprint triathlon – 750m swim, 12.3-mile bike, 5K run
  • Sprint aquabike – 750m swim, 12.3-mile bike
  • Olympic triathlon – 1500m swim, 24.3-mile bike, 10K run
  • Olympic aquabike – 1500m swim, 24.3-mile bike

“Everyone is excited for the return of CapTex Tri and to swim, bike, and run through downtown Austin,” said Jack Murray, co-owner of High Five Events. “These triathletes are ready to put their training to work and cross the finish line with the Austin skyline as their backdrop.”

Participants will receive custom 2021 participant shirts, finisher medals, water bottles, and swim caps. Everyone can relive competing in Austin’s only downtown triathlon thanks to professional timing and photography. Registration is still available and the final price increase occurs on Thursday, May 27th at 11:59 p.m. CST.

High Five Events Agrees to Multi-Year Partnership with Zone3 USA

Partnership names Zone3 USA the Official Triathlon and Swim Gear

High Five Events, one of the largest privately owned event production companies in the United States, announces a two-year agreement with Zone3 USA. The partnership makes Zone3 USA the Official Triathlon and Swim Gear of CapTex Triathlon presented by Life Time and Kerrville Triathlon Festival.

“We can’t wait to be back to racing and spending time with the endurance sports community,” said Ryan Dolan, President of Zone3 USA. “High Five Events has produced high-quality, community-based events for a long time and we’re excited to partner with them for CapTex Tri and Kerrville Triathlon.”
Zone3’s involvement

Zone3 USA, one of the most loved and chosen specialist sport brands around the world, is headquartered in Boulder, Colorado. The partnership means all participants will receive Zone3’s silicone swim caps that are long-lasting and eco-friendly. They will also host product demos at both expos and provide triathlon insight for blogs and social media.

“Zone3 is one of the most recognized brands in the world and this partnership will continue to elevate the profiles of CapTex and Kerrville Tri,” said Jack Murray, co-owner of High Five Events. “What really impressed us in our initial conversations with Zone3 was the depth and quality of their product line and their commitment to building a relationship with our endurance community.”

CapTex Tri will take place on Memorial Day, Monday, May 31st, in downtown Austin. Kerrville Triathlon will celebrate its 10th anniversary on September 25-26th, in Kerrville, Texas.

How to Set Up Your Transition Area on Race Day

Enjoy a smooth race morning when you properly set up your transition area

Properly setting up your transition area can help reduce the amount of time it takes for you to finish. Preparing ahead of time to transition from swimming to cycling to running can help you keep your composure and focus on what’s next. Follow the seven tips below to set up your transition area in a way that’ll benefit you on race day! Pro tip: this advice is even more important for first-timers who want to know what to expect at their first triathlon.

Make transition area compact and comfortable

Female triathlete gives a thumbs up after setting up her triathlon area at the 2018 CapTex Triathlon.

Be respectful of other triathletes and make your transition area compact and comfortable.

Be courteous to your triathlon neighbors! You don’t need to be crammed next to one another, but you also don’t get a 10-foot runway all to yourself. Make sure there’s a comfortable amount of space around you. Chat with the folks around you, make sure they have the space they need too. If you find out you both have different time goals and speeds, you might not even be in transition at the same time. Pro tip: remember where your transition area is by identifying your row or specific landmarks around it. If you have time, walk from all the different entrances and exits to your transition area to become more familiar.

Carry extra goggles

Nobody wants this to happen, but sometimes the rubber straps break when you least expect it. Being goggle-less is not a good start to race morning. Always keep an extra pair of goggles with your triathlon gear. Even if yours don’t break, it’s still a good idea to have an extra pair in case you can help someone you know who didn’t bring an extra pair.

Clip cycling shoes into your pedals

This tip is more for veterans, but there’s no reason you can’t do this! A great way to save time during the triathlon transition is to keep your cycling shoes clipped into your pedals. This maneuver takes a lot of practice. You must be comfortable slipping your feet in and bending over while riding to strap your shoes. If you do this, make sure the shoes are loose enough for your feet to slide in easily but not too loose that the straps come out.

Put bike in preferred gear

Ease into cycling when your bike is in the gear you want before racking it.

You’re in transition after the swim, switching out your gear. The last thing you want is to hop on your bike, leave your transition area, and start pedaling in the highest gear. Make sure your bike is in the gear that’ll allow for a smooth start to your ride. Adjust accordingly, depending on whether you’re starting uphill or downhill. Pro tip: make sure your saddle height is where it’s supposed to be before race morning.

Loosen your running shoes

Rack your bike and get ready for the last leg: the run. Make your running shoes are loose enough that you can easily slide in your feet. Unless you have amazing balance, it might be best to sit down and put them on. Especially if you have to tie your laces. But you can save even more time with elastic laces! Keep the resistance just right so the shoe is snug for running, but not so tight that you can’t get your foot in.

Practice your transition area before race day

This helps you nail down what works for you and what won’t work for you. Practice putting on shoes with elastic laces. Try leaving your shoes clipped into your pedals before you ride. Perfect the order in which you complete everything comfortably. The best time to do this is in the middle of a brick workout. These workouts most closely resemble race day and give you a good idea of how transition will unfold.

Simulate race morning

Complete a test run to ensure your transition area is perfectly set up.

Once your transition area is set up race morning, do a test run. You don’t have to physically put on and take off everything, but it helps to run through each transition. Make sure your shoes are loose. Check your bike’s gear. Place your nutrition and hydration where you can easily grab it. If you wear a hat and sunglasses on the run, put your shades in your hat so you don’t forget them. These are ways to reduce pre-race jitters. Here are six more tactics that can help with any butterflies!

This simple checklist will help you effectively set up your transition area on race day. It’ll allow for a more enjoyable race experience and possibly a faster time. Practice beforehand to make sure you’re comfortable with everything.