Get ready to get inspired by these motivational backgrounds!
Do you find yourself thinking “I’ll just work out tomorrow” or putting off fixing the flat on your bike? When exhaustion sets in, maintaining that motivation to keep up with your fitness routine can be tough. Now is the time for action and we have just the thing for you.
There’s something about an inspirational quote/phrase/saying that will really get you back on track when you are unmotivated. Whether you’re battling with stress or lack of motivation, an inspiring wallpaper or background is a great way to give you the extra boost you need to complete a workout.
Here are some of our favorite inspirational sayings that never fail to keep us taking another step forward whenever our body is fighting us. Be inspired and get motivated to keep being the awesome triathlete you are.
These motivational wallpapers will be there to help you stay active and help motivate you to keep training and believing in yourself!
Right click to save the image and set it as your phone background or lock screen.
Get motivated, anywhere, anytime all at your fingertips with our motivational backgrounds.
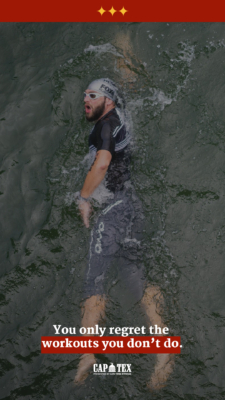
You only regret the workouts you don’t do.
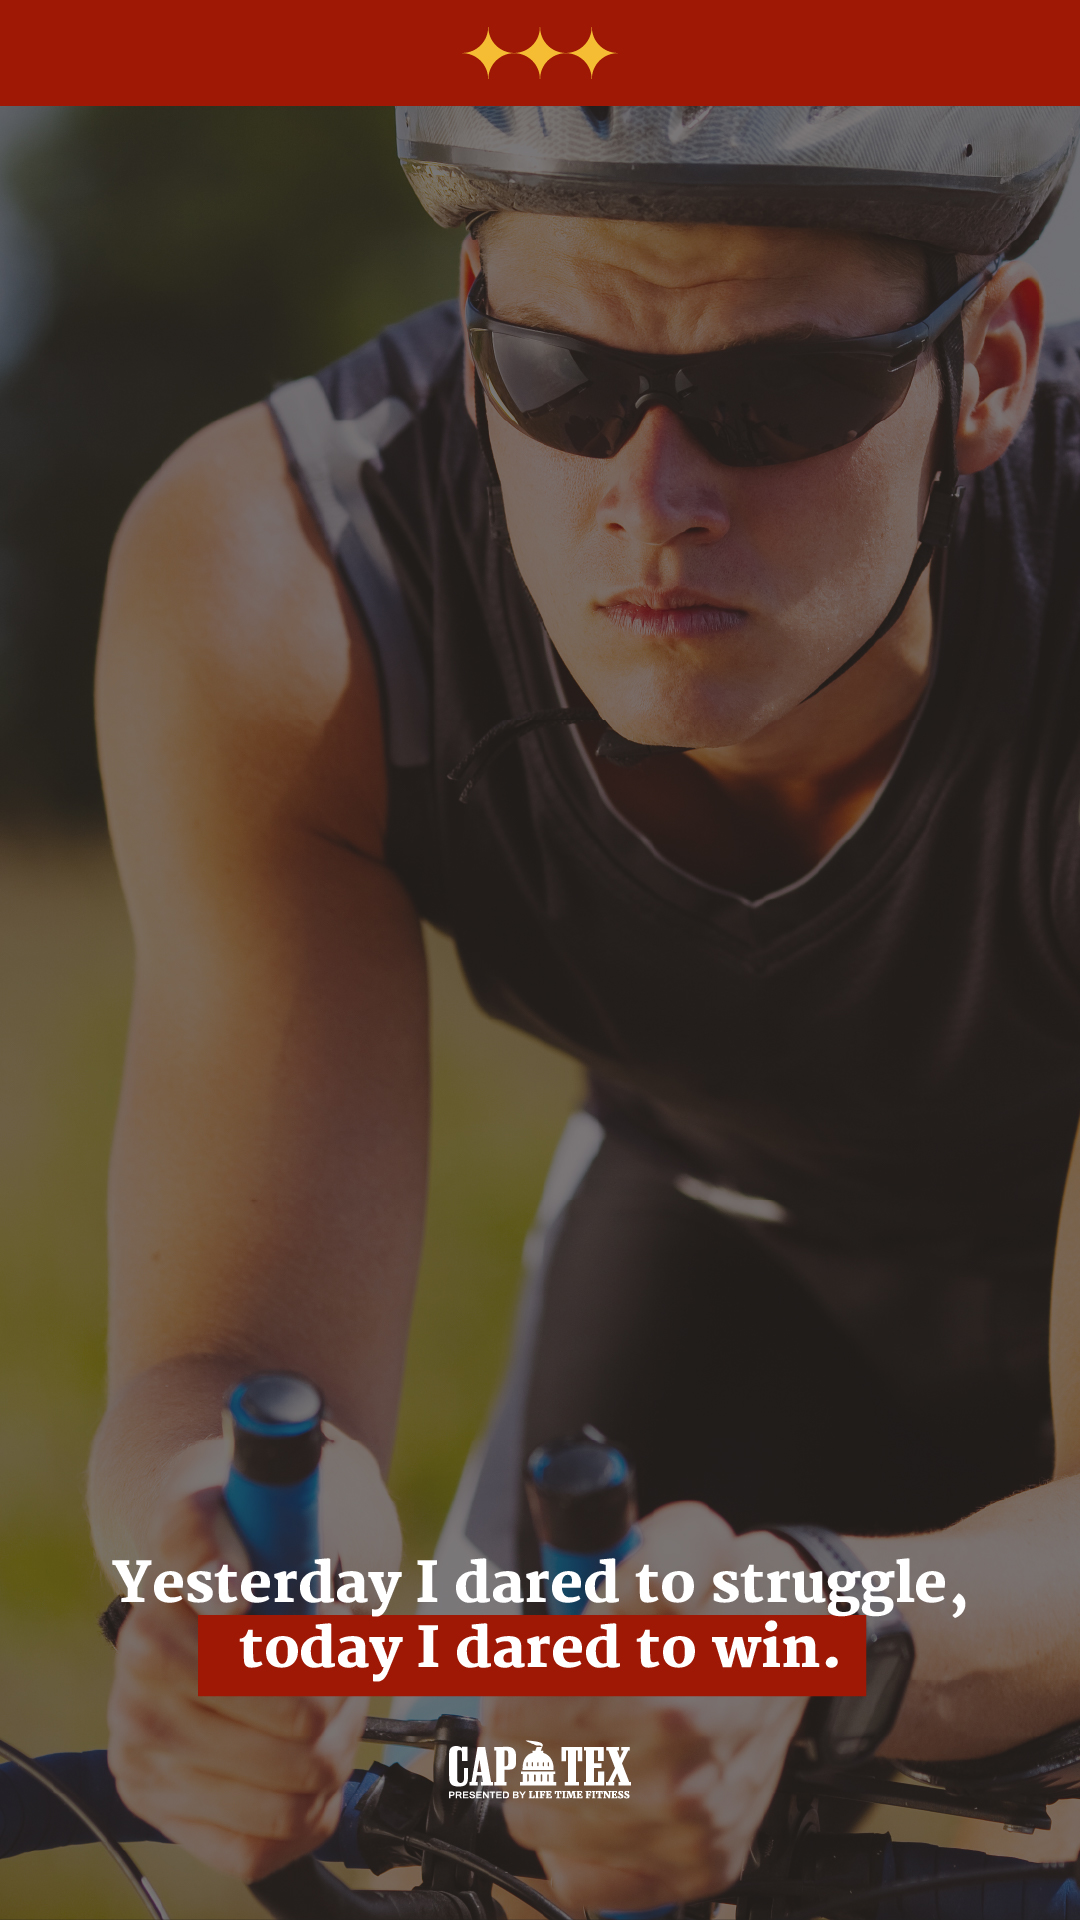
Yesterday I dared to struggle, today I dared to win.
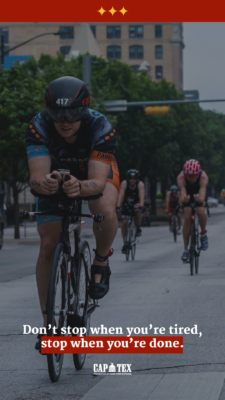
Don’t stop when you’re tired, stop when you’re done.
A journey of a thousand miles begins with one step
It pains me to continue, but it hurts much worse to stop.
All it takes is all you got.
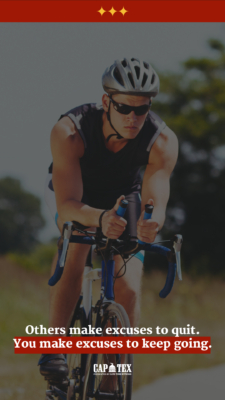
Others make excuses to quit. You make excuses to keep going.
Swim fast. Cycle strong. Run to win.
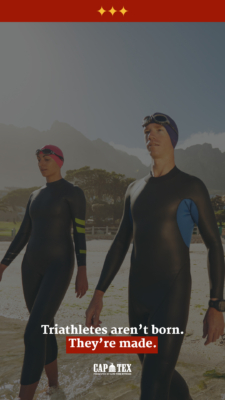
Triathletes aren’t born. They’re made.
Swim. Bike. Run.
Share your Motivation
We are feeling motivated just writing this blog! Now before you run out the door to log some miles be sure to give yourself time to warm up. Starting off too quick can lead to injury and nobody wants that!
Do you have a favorite motivational quote? Share them with us and your fellow athletes in the community on our Facebook page or tag us on Instagram!
https://captextri.com/wp-content/uploads/2020/09/797504_CopyofCapTex2020MotivationalBackgroundsBlog1_082720.png400495CapTex Trihttps://captextri.com/wp-content/uploads/2022/05/AS_CAPTEX_LOGO_MOCK-UP_FULL_COLOR-400x197.pngCapTex Tri2020-09-10 12:40:572020-09-10 12:40:57Free Motivational Phone Backgrounds for Triathletes
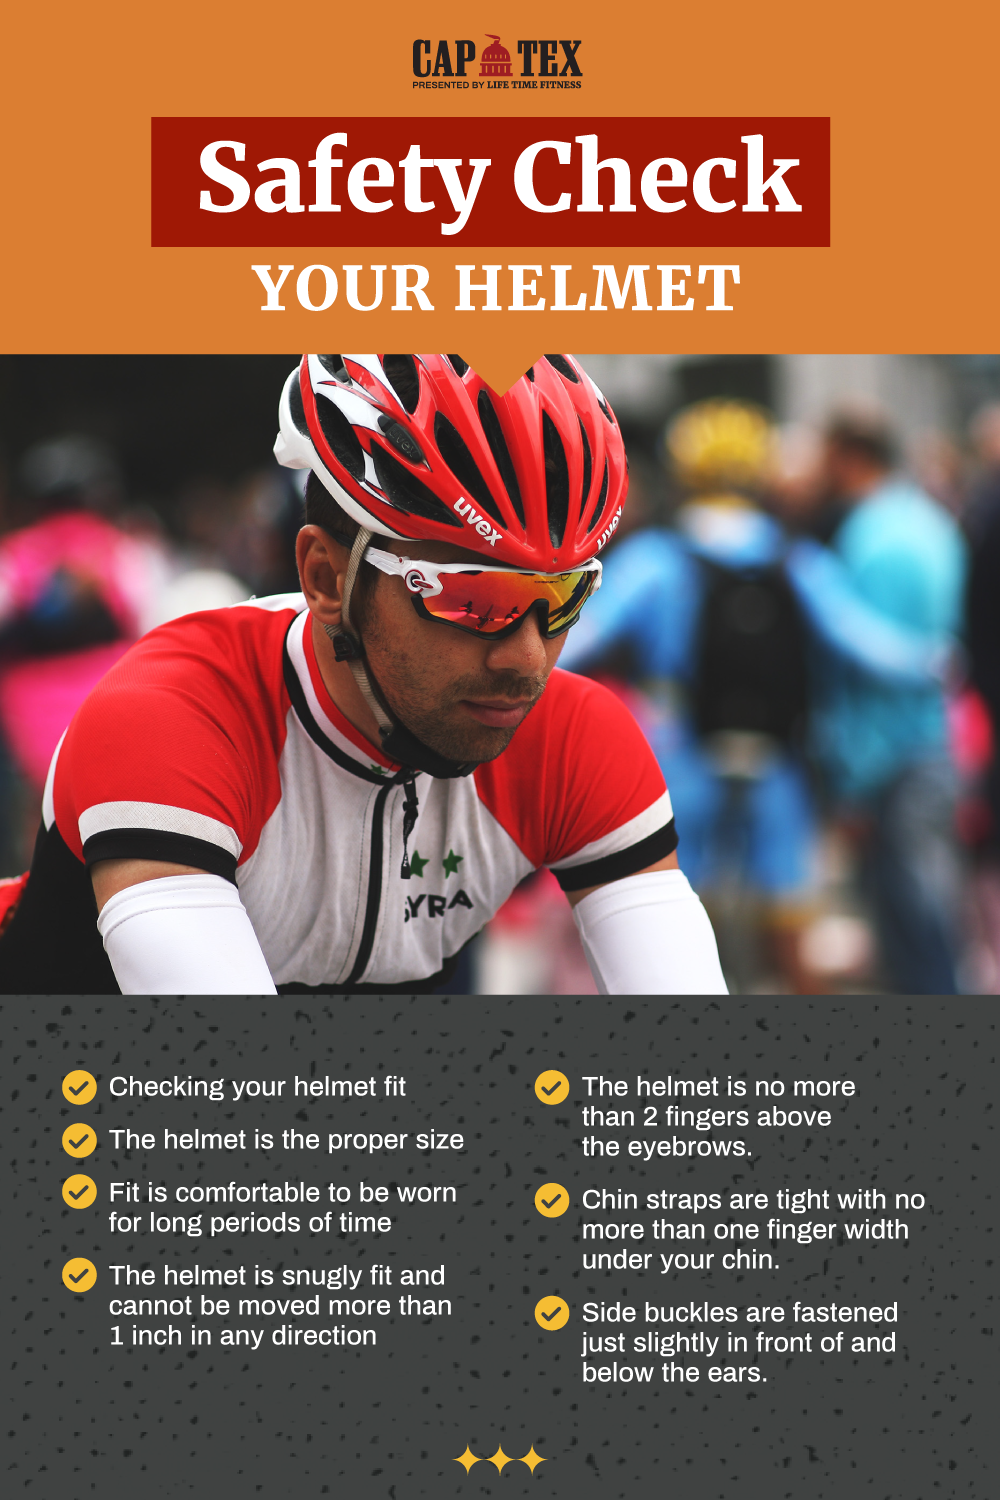
Get the right fit and know that your helmet is fully protecting you
An unexpected fall from a bike can happen at any time with the potential to result in brain injury. The good news is that a properly-fitted helmet will reduce this risk.
Helmets come in a variety of sizes depending on the manufacturer. Even though they are sized they will come with a fine-tuning dial so that you can adjust the helmet to fit your head specifically. Take the time to check your helmet before every ride. Your life is worth it and could depend on how your helmet is set up. Use these tips on how to make sure you have the right fit for your bike helmet.
Size
The first thing you should adjust when choosing a helmet is the fit pads or adjuster ring. The helmet needs to be snug around your head to effectively protect you. It should not be too tight where you feel pressure and not too loose that there is any wiggle room. It should not be able to move from side to side or slip back off your forehead. If needed, add more fit pads to get a secure fit. If your helmet has an adjuster ring, modify the circumference until the helmet is fitted properly for your head.
Positioning
The next thing to determine is how high the helmet should sit on your head to protect your head on all sides, in case of a fall. Two finger-widths should be visible on your forehead. You can also decide if your helmet fits properly by looking up. You should be able to see the rim or front edge of the helmet when you do so without interfering with your vision.
Pro tip: you should always wear protective lenses with your helmet, so make sure there is enough room to wear them both comfortably.
Straps
To keep the helmet in place, the next step is ensuring the chin straps are long enough to reach under your chin and can be tightened securely. This part is especially important because you do not want to be dealing with an ill-fitting helmet during your next tri.
The “Y” shaped strap needs to fit under your ears comfortably and buckle under your chin without being too tight. Your helmet should not be able to move more than an inch in any direction. After you buckle the chin strap, it should be secured in the correct position. You should not be able to fit more than one finger under the chin.
These straps can sometimes loosen with time so it is important to check your helmets fit before each ride.
Comfort
While comfort is not a safety feature in itself, having a helmet that you find comfortable will mean that you wear it more often. While every helmet is the same safety rating, you will find more expensive helmets have more vents. If you have long rides planned during hot weather, having these extra vents to cool you off might make you more comfortable.
Bicycle helmets only work if you wear them correctly. Helmets should always be replaced if they are in a crash. Yes, even if it is a “small one”, if your helmet makes any contact it could be compromised and should be replaced.
If you’re riding alone or going on a group ride, use these tips when shopping around for your next helmet to make sure you are as safe as possible on your future rides.
Checking your helmet fit for safety:
The helmet is the proper size
Fit is comfortable to be worn for long periods of time
The helmet is snugly fit and cannot be moved more than 1 inch in any direction
The helmet is no more than 2 fingers above the eyebrows.
Chin straps are tight with no more than one finger width under your chin.
Side buckles are fastened just slightly in front of and below the ears.
https://captextri.com/wp-content/uploads/2020/08/805917_CapTex-2020-Proper-Helmet-Fits-Blog_495x400_082020.png400495emilyhttps://captextri.com/wp-content/uploads/2022/05/AS_CAPTEX_LOGO_MOCK-UP_FULL_COLOR-400x197.pngemily2020-08-25 13:17:242020-08-28 12:46:29Easy Steps to Check Your Helmets Fit
10 Fun Facts You Never Knew About the Sport of Triathlon!
Triathlon is a complex sport that consists of swimming, biking, and running. While there is a lot of technical aspects to know about triathlon, there’s a lot of fun stuff too! We love everything there is about triathlon. From selecting the race and choosing the right distance, to the preparation and training. Trying to take all that in can be overwhelming, so let’s start with some of the fun stuff. Expand your knowledge of triathlon and keep reading to see 10 fun facts about triathlon you maybe didn’t know!
Check Out These Fun Facts
It is not uncommon for triathletes to burn up to 10,000 calories during a long-distance race.
In triathlon every second counts, for that reason, many athletes pee while they are on the bike, or even on the run.
The first triathlon event was held on September 25, 1974.
Simon Lessings holds the Olympic distance triathlon world record with a time of 1 hour, 39 minutes, 50 seconds. That’s fast.
Triathlon was designed to be an alternative to hard track training.
The reason why the order of the disciplines is swim, bike, run is for safety concerns.
The Olympic distance tri was originally called the international distance.
The oldest triathlete on record is Arthur Gilbert, who was still competing at the age of 93.
Drafting, riding in close behind the rider before you to reduce wind resistance, is not allowed during the cycling part of a triathlon. If you get caught you face a penalty including disqualification.
Triathlon made its Olympic debut at the 2000 Sydney Games.
The world of triathlon is certainly an interesting one and has evolved greatly overtime with new people joining the fun each year. If you’re new to the sport and thinking about doing a triathlon yourself, check out these essential race day tips to help as you train and prepare for your first triathlon. Now that you know some of the fun triathlon facts, be sure to share it with your fellow triathletes on Facebook or Twitter.
https://captextri.com/wp-content/uploads/2020/08/feature_CapTex-2020-10-fun-facts-you-never-knew-about-triathlons_495x400_1_072420.png400495CapTex Trihttps://captextri.com/wp-content/uploads/2022/05/AS_CAPTEX_LOGO_MOCK-UP_FULL_COLOR-400x197.pngCapTex Tri2020-08-11 12:44:152020-08-11 12:44:1510 Fun Facts You Need to Know About Triathlon
Going The Distance: What to Keep In Mind When Going From Sprint to Olympic
So you have completed a Sprint Triathlon and now you’re looking for the next challenge. You can always do more sprint triathlons and work on increasing your speed or you can work on your endurance and increase your distance. Maybe going up to the next distance is your goal. For those looking to go long, here are some simple training reminders and workout tips to help you conquer the Olympic distance tri at CapTex Tri.
6 Tips for Olympic Distance Triathlons
1. Not Always Easy
First, it is important to remember that part of the appeal of racing an Olympic distance is that it is not exactly easy. Simply doubling your workouts isn’t going to cut it. In training, have a goal of completing 60-80% of the segment distance before the event.
2. Find Your Pace
With a sprint, you could go all out but you will probably not able to keep this same pace in the Olympic distance tri. Train at a pace that you are comfortable with so that you do not burn out on race day. Start thinking of speed versus endurance.
3. Calories Matter
Third, Calories Calories Calories. These longer distances are going to require fueling. Test several products before committing, just because something works for your friend or someone at the gym, it doesn’t mean that it is right for you.
4. Preparation is Key
Fourth, take “Nothing New on Race Day” to the next level. Make sure you have tried everything at least 3 times before you arrive race morning. We are talking socks, shoes, hats, sunscreen, sunglasses, nutrition, which water bottle, ev-er-y-thing.
5. When in Doubt, Swim
Fifth, if you have time for an extra workout – choose the pool. Swimming is great aerobics and can lead to gains on the bike and the run. Efficiency in the swim can leave you with more energy instead of being taxed right out of the water. More important than hours logged, make sure that you are making each workout count.
6. Find A Balance
Sixth, keep balance. Make sure to find time for friends and family. Many of them may not understand but make sure and thank them for being there to support you in any way. Make sure and inform them when, where, and how long you are going out for a long run or bike. A safety post on Facebook is a good idea as well and a fun way to let everyone know how your training is going.
Additional Tips
Every other week make one of your run workouts follows immediately after your bike workout.
Switch it up. Don’t always do the same style work out on the same day of the week.
Have Fun and Smile!
Go The Distance!
These 6 easy steps are your guide to getting to the start line with a high level of confidence so that you are ready to be successful for your first Olympic distance triathlon! Also, remember that no matter the distance increase it is important to keep your ultimate end goal in mind and then set up milestones that you can meet along the way.
https://captextri.com/wp-content/uploads/2020/07/feature_CapTex-2020-6-Steps-from-Sprint-to-Olympic_495x400_1_071520.png400495CapTex Trihttps://captextri.com/wp-content/uploads/2022/05/AS_CAPTEX_LOGO_MOCK-UP_FULL_COLOR-400x197.pngCapTex Tri2020-07-17 11:55:442020-07-17 11:55:446 Things to Keep In Mind for Olympic Distance Triathlons
If you’re looking to improve your overall endurance when it comes to running, you’ve come to the right place. In this blog, we’ll discuss a few ways to improve your run performance for your upcoming triathlon.
Adjust Your Current Running Plan
Start by evaluating your current running abilities to establish your starting point and work from there. Then, you can determine how you will need to make adjustments to your run training. No matter how seasoned you are as a triathlete, preparation for the run leg is very similar. The most notable difference in advanced triathletes and new triathletes is the distance and duration of the runs. If you’re new to running or just got into running, try a high-intensity run to test your endurance capacity. Try to keep your pace consistent when doing so. Keep track of how long you were able to run at that pace without becoming fatigued. This is your starting point.
Improve Your Endurance
For beginners, maintaining the right pace for extended periods can be tough. We see this when athletes start too fast and fade at the end during a workout. An excellent way to learn how to maintain a new, faster pace is to do track-type workouts on a treadmill. Treadmill sessions are good for this because you’ll become used to holding your pace while dealing with fatigue. Short intervals on a treadmill while adjusting the incline can lead to an increase in your pace and speed without having to exert a ton of energy. This will especially help if your triathlon run has a hilly run course. During this time of focusing on your run, increase the number of run workouts you do in a week. Pro tip: be sure you’re warming up and cooling down for each session for the maximum payoff!
Get Used to Running on Tired Legs
Improve your run by incorporating brick workouts into your training and get out for a longer, more challenging run than usual after hard swimming or cycling sessions. Completing swimming or cycling workouts back to back with a run workout will help to familiarize your body with the movement patterns and expectations you’ll need for the day of your race. Because the run is the last leg of the tri, it’s important that you get used to running on tired legs.
Takeaway
Once you have mastered the running basics and established a starting point, you’ll start seeing improvements. Integrating these tips will likely increase your resistance to fatigue and improve your ability to run for longer periods of time at a steady pace. These tips are useful to triathletes because completing better quality speed training will lead to faster run time, and overall finishing time. With thought and planning, now is the perfect time to improve your triathlon run performance like never before.
https://captextri.com/wp-content/uploads/2020/07/feature_CapTex-2020-Training-Tweaks-to-Improve-Your-Run_495x400_1_071420.png400495CapTex Trihttps://captextri.com/wp-content/uploads/2022/05/AS_CAPTEX_LOGO_MOCK-UP_FULL_COLOR-400x197.pngCapTex Tri2020-07-16 08:35:412020-07-16 08:35:41Training Tweaks to Improve Your Run Performance
Triathlon Bikes vs. Road Bikes: What’s the Difference?
When it comes to triathlon, a bike is, well, a necessity. How are you supposed to know which bike is best suited for you if you’re new to triathlon or limited on options? In this blog, we’re going to talk about two types of bikes: road bikes and triathlon bikes. Keep reading to understand some key differences between triathlon bikes and road bikes so you can decide which fits your style best for your triathlon journey.
How They’re Different
The most notable difference is the design, or geometry of the frame of each bike. Triathlon bikes have a steeper angle of the seat. Seats on a road bike are positioned at, on average, 78 degrees while the angle on a triathlon bike is closer to 72 degrees. The steeper angle allows the user to travel at a faster rate because you can bend your body down lower which reduces wind resistance. Another huge difference is that a triathlon bike includes aerobars instead of regular handlebars and many models have specially shaped frame tubing and special wheels. These design features are intended to minimize drag and increase speed which is important in triathlon racing.
Triathlon Bikes
Tri bikes allow you to get into a more aerodynamic position by lowering your upper body and bringing your arms in-line with your torso. This is a result of the tilt of the seat in combination with aero bars that cause the cycler to lay lower on the bike with elbows rested. The goal here is to be in the optimal position for a smoother, faster ride. Unlike other handlebar positions, aero bars serve as both handgrips as well as armrests, allowing you to significantly reduce the pressure on your wrists and hands throughout a race or riding for an extended amount of time.
Key Traits of a Tri Bike
has aerobars
more aggressive frame geometry
can be more expensive
better for speed
more aerodynamic
Road Bikes
Road bikes are great when aerodynamics are not the top priority. These bikes are typically easy to maneuver during longer rides. Road bike frames are slim and also come with thin tires for riding on the road. The handles on road bikes offer different hand positions. Because of this, most people find road bikes to be more comfortable because you can alter your riding position as needed. For beginner triathletes, we recommended trying a road bike before a triathlon bike.
Key Traits of a Road Bike
more versatile
less expensive
lightweight
can add clip-on aero bars
easy to customize
Now it’s Time to Make a Decision! Which Bike Will You Choose?
Now that you know the key differences between the types of bikes, take a moment to weigh your options before deciding which bike is better suited for your riding needs. Keep in mind: comfort is key, but you don’t want to compromise speed for comfort or vice versa. It’s all about finding a bike with a balance that works best for your body and your cycling needs. Whichever bike you choose, either will do for the day of your big race. Now, all there’s left to do is choose your bike, grab your shades, and start logging those miles!
Which type of bike do you prefer? Let us know on Facebook or Twitter and tell us what you decide to name your new set of wheels!
https://captextri.com/wp-content/uploads/2020/06/feature_CapTex-2020-Triathlon-vs-Road-Bike-What-is-the-Difference_495x400_1_062320.png400495CapTex Trihttps://captextri.com/wp-content/uploads/2022/05/AS_CAPTEX_LOGO_MOCK-UP_FULL_COLOR-400x197.pngCapTex Tri2020-07-08 10:43:442020-07-08 10:43:44How to Know the Difference Between Triathlon and Road Bikes
Benefits to CapTex Tri being USAT-Sanctioned and having a USAT-Certified Race Director
When researching triathlon events, you’ve probably come across the terms USAT-sanctioned and USAT-Certified Race Director. So what exactly do these terms mean and why should you care about the benefits of a USAT Certified race?
USAT-Sanctioned
USAT is an acronym for USA Triathlon, which is the governing body of the sport of triathlon in the United States. Additionally, since triathlon is a sport featured in the Olympic games, USA Triathlon is part of Team USA. Therefore, they must adhere to the rules and guidelines of the US Olympic and Paralympic Committees. When you see the phrase “This is event is sanctioned by USAT” or “This event is USAT-sanctioned” it means that the event organizer has completed a thorough questionnaire regarding how they plan to conduct the event. They have also received approval from the USA Triathlon Events staff. As a potential participant in a triathlon, the term USAT-sanctioned should give you confidence. You are registering for an event that meets minimum standards for safety and fairness.
Participant benefits of a USAT-sanctioned event:
As a participant in a USAT Sanctioned event, you must have a current membership with USA Triathlon. Annual memberships and one-day memberships (purchased per event) are available. Most adult triathlons in the United States are sanctioned by USA Triathlon. This helps the individual event. It also helps keep the national governing body strong so that it can support race directors, growth of the sport initiatives, and Olympic and Paralympic athletes.
USAT-Certified Race Director
Additionally, USA Triathlon has created a Race Director Certification program that goes above the standard sanctioning process. Race Directors who choose to become certified go through approximately 16 hours of coursework and complete an exam. They are required to recertify every two years and complete a background check through NCSI and take SafeSport training. The recertification and coursework ensures that the race director remains current in their knowledge and engaged in the triathlon community. There are two levels of Race Director Certifications. Level II is the most difficult to obtain and retain. Only the most qualified race directors reach this level. Dan Carroll of High Five Events was among the first race directors to achieve Level II certification. He has maintained that certification since the program was created in 2007.
Choose USAT Certified for Your Upcoming Tri
So the next time that you register for a triathlon like CapTex Tri, look to see if the event has the benefits of being USA-sanctioned and if it is produced by a Certified Race Director. That way you’ll know you’re safe in good hands and you’re in for an awesome experience!
https://captextri.com/wp-content/uploads/2020/06/feature_CapTex-2020-USAT-Certified-What-that-Means-Blog_1_495x400_052220.png400495CapTex Trihttps://captextri.com/wp-content/uploads/2022/05/AS_CAPTEX_LOGO_MOCK-UP_FULL_COLOR-400x197.pngCapTex Tri2020-06-23 02:00:532020-06-22 11:44:54USAT-Certified: Why It Matters and How It Benefits You
Everything You Need To Know About Completing a Virtual Triathlon
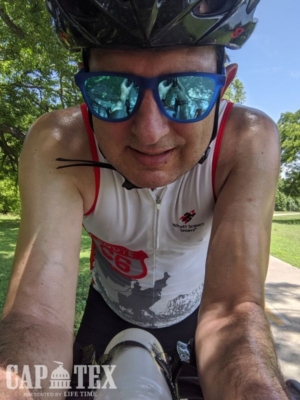
CapTex Tri went virtual this year, and while we know that’s not ideal, that sure didn’t stop these two from accomplishing their tri goals! The best part about a virtual triathlon: you complete it at your pace, on your time. These die-hard triathletes were determined to complete the Virtual CapTex Triathlon or Duathlon anyways, and did just that! While their approach was different, Joey did the whole thing in one day and John did it pieced together, it’s fine to do a virtual triathlon/duathlon either way. Keep reading to see how much they enjoyed their Virtual CapTex Tri experience, and hopefully you’ll be inspired to join in on Virtual races when you can!
Joey Trimyer’s Virtual CapTex Tri Journey
I wasn’t planning on doing the CapTex virtual race because my hip has been bothering me for a while. On Thursday, I saw my doctor he ordered x-rays and prescribed a round of steroids for the inflammation. I hadn’t had the x-rays yet and the steroids hadn’t had time to take effect, but when I got an email promising homemade pickles if I took the challenge and wrote a report I was in.
Sunday afternoon I loaded my gear and drove over to Govalle Park. I like doing multisport workouts here because there are several flat running routes to choose from and you are right at the head of the Walnut Creek trail.
Joey’s Game Plan
My plan was to do the sprint du: 2 mile run, 13.3 mile bike and a 3.1 mile run.
The first run was uneventful. It was super humid and I did not enjoy running in air you could eat with a fork, but then I had waited until the afternoon so I got what I deserved. There was a decent amount of walking and my hip definitely started complaining, but I got it done and got my bike ready to ride.
12.3 miles on the bike went by fairly easily. I just rode along and didn’t worry about pace. The Walnut Creek Trail is a nice out and back and I got to turn around right before the big hill which is always a good thing. One drawback to delaying until the afternoon is that you tend to encounter more cyclists and hikers clogging the path, but overall, the congestion was minimal.
The final 5k involved more jogging and walking than I would have liked, but again I got it done. Virtual events hadn’t ever really appealed to me, but given the circumstances, it was nice to have a little motivation to get out and be active.
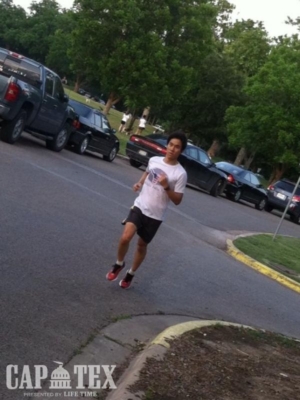
John Chung’s Virtual CapTex Tri
I decided to change things up a bit for CapTex Tri virtual, instead of scheduling a dedicated workout for each of the disciplines of the virtual tri and go as hard as I can, I would incorporate them into my normal weekly workouts. The time would be slower but it would be interesting to see by how much of a difference.
John’s Strategy
First Run
I chose the sprint duathlon option, a distance that would easily be incorporated into my weekly workout schedule. For the first 2 mile run, I timed it during my Tuesday morning run. The workout was a Fartlek workout. After the warmup, we went straight into the interval. We start with the effort level around half marathon, gradually increasing it as the interval becomes shorter. Time for the 2 miles was 16:25.
Bike Ride
The bike portion was timed during a ride out to see my co-worker son’s graduation parade. The ride was through town on neighborhood streets, with red lights and stop signs. I was amazed at how much time I spent waiting and not moving. My “moving” time for the 12.3 miles was a bit over 47 minutes, total time on the bike was more than 1 hour. I spent roughly 15mins or ⅓ of the time sitting at lights or stop signs not moving.
Final Run
For the final 3.1 mile run, the time was from my weekly longish run. The run was an out and back at 9ish total miles. Since I don’t own a GPS watch, I mapped out online the section of the run to figure out the start and stop of the 3.1 miles. Time was measured for both the out and the back, and it was within minutes of each other. I was pleased with the effort considering the out was downhill and the back was uphill. The 3.1-mile time was a bit over 24 minutes.
It was fun to mix in some higher effort intervals into my routine workout to mix it up a bit and keep it interesting.
Go Virtual, Join the Fun!
As you can see, these guys made the most of their time during their virtual tri. After all, it’s a fun way to switch up your fitness routine. Also, a fun challenge if you’re for a new way to get out and be active. Since a virtual tri is completed on your own time, at your own pace, the level of intensity is all up to you. If you participated in the Virtual CapTex Tri this year, tell us about it! We’re on Instagram, Facebook, and Twitter or tag us at #CapTexTriVirtual. We would love to hear about your experience!
https://captextri.com/wp-content/uploads/2020/06/feature-Virtual-Tri-Experience-Blog_495x400_1_060920.png400495CapTex Trihttps://captextri.com/wp-content/uploads/2022/05/AS_CAPTEX_LOGO_MOCK-UP_FULL_COLOR-400x197.pngCapTex Tri2020-06-16 02:00:212023-06-05 11:47:57What It’s Like to Complete a Virtual Triathlon
We know that each workout should start with a warm-up and end with a cool-down, but more often than not, athletes tend to skip one or both. Especially when pressed for time. Not incorporating a warm-up and cool-down into your training can be detrimental to your overall performance when it comes time for race day. While also puts you at the disadvantage of a much higher risk of injury. Just like giving your car time to warm up before cruising at 65 mph, your body needs this time to get in a higher gear for more intense workouts or fitness activities. Keep reading to know the importance of warming up and cooling down during your CapTex Tri training.
Why You Should Warm-Up
A warm-up before a training session or race is essential for preparing your body and mind for a workout session. The main point of a warm-up is to increase your body core temperature and muscles. Warming up will not only help you to perform better, but it will also protect your body from injury. A good warm-up gets your blood flowing and gives you a chance to get energized for the rest of your session. It also helps increase the range of motion to your joints and muscles, which should allow your muscles to feel less stressed and stiff when you start. A dynamic warmup should aim to increase blood flow to the areas which will be working and to wake up the nervous system throughout the body.
A guideline to a general warm-up routine would include:
Jogging, biking, etc. for about 5 minutes to just get your blood flowing and get those muscles and joints moving. You want to work at a comfortable pace that’s easy to moderate. For the bike, a good warm-up should consist of five to 10 minutes of easy spinning, and then slowly increasing to the gear you wish to complete your session in. This really helps “open up” your body before getting into the more strenuous part of your workout.
Why You Should Cool-Down
Don’t come to an abrupt stop when completing your exercise, especially if it has been high intensity. Instead, you should cool-down by exercising at a lower intensity than the main session to bring your body temp and heart rate back down to pre-exercise levels. The cool-down should last around five to 10 minutes no matter what discipline you are training for that day. Cooling down helps to gradually decrease your heart rate and get rid of the metabolic waste from your muscles.
Mentally, cooling down also allows you some space to reflect on your performance and gives you some time to set you up for the rest of the day. Don’t underestimate the importance of this! Pro tip: Add some stretches to your cool down while your muscles are warmed up for one of the best ways to improve your overall flexibility and mobility while also reducing post-workout pain.
Bottom Line
Adding a warm-up and cool down into your fitness routine is a simple, yet proven way to maximize your benefits when working out. The warm-up gives your body a chance to prepare for your session while the cool-down then helps you focus on slowing your breathing and return to your normal heart rate. Rather than seeing it as an optional part of your workout, think of warming up and cooling down as part of your session to get the most out of all the hard work you’ve put in!
https://captextri.com/wp-content/uploads/2020/06/feaute.-Warming-up-and-Cooling-Down.CapTex_2_495x400_060120.png400495CapTex Trihttps://captextri.com/wp-content/uploads/2022/05/AS_CAPTEX_LOGO_MOCK-UP_FULL_COLOR-400x197.pngCapTex Tri2020-06-02 09:23:222020-06-02 09:23:22Importance of Warming Up and Cooling Down
Summer is setting in, take precautions when adjusting to training in the heat.
Even with the occasional summer thunderstorms, temperatures in Central Texas consistently hit the mid-90s. High temperatures won’t keep you from training, so you need to make some adjustments. Training in the heat does have some benefits, but being smart and altering your schedule/plan will help uphold your training regimen, and continue without any bumps. Incorporate these 5 tips for training in the heat to be prepared for the Virtual CapTex Tri, or your next race.
Ease Into It
Give yourself some time to get used to the temperature adjustment. Although some athletes have less trouble adapting to training in warmer temps, that may not be the case for you. If you know you struggle with adapting to training in the heat, it’s important to take baby steps. At first, shorten your runs or rides as you adapt to handle the heat. Then, work your way up to the distance you are training for.
Listen to Your Body
You know your body better than anyone. Paying attention to the way you feel while out on a run or ride is the first thing to do in establishing a baseline for keeping you cool as the temperatures soar during your training. Early signs and symptoms of heat illness include fatigue, discomfort, lightheadedness, disorientation, and nausea. This will be your indicator of how you need to adjust the following in order to keep up with your tri training during these hot upcoming summer months.
Hydrate, Hydrate, Hydrate!
Hydrating on the CapTex Tri course!
This is the most obvious and most over-looked tip for training in the heat. You know to hydrate in the summer months, but you don’t always do it. Perhaps you get caught up and forget during your day-to-day schedule. Even if you are hydrating, it may not be enough. It’s recommended that we drink 64 ounces of water a day. In the summer months that should increase, especially when training in the heat. Your body is losing fluids and you need to make it a priority to replace them. Don’t just drink water either, incorporate an electrolyte-enhanced drink. Alternate between water and electrolytes. If you’re training in the heat you should aim for no less than 100 ounces of water/electrolytes every day. So start early, and drink up!
Train in the mornings/evenings
It’s no secret that the hottest part of the day is noon – 5:00 p.m. If you can avoid training during that timeframe – do it! Your training should occur earlier in the mornings or later in the evenings during the summer months. Training early in the morning before work is your best bet. That’s the coolest part of the day. For those of you who love your sleep, try to move your workouts to an evening time like 7:00 – 8:00 p.m. It’ll be warm, just not as hot as midday. Bonus – without the sun angled directly over you like it would be in the middle of the day, there will be more shade on your run or ride.
Dress to Sweat
Wear light, breathable clothing to combat the heat!
You’re going to sweat, so aim to wear light-colored, breathable clothing when training. Darker colored clothing attracts and absorbs more of the sun’s heat. Cotton shirts and shorts absorb and carry sweat, and can weigh you down. Wear light-colored, breathable clothing when training in the heat. The lighter colors will reflect the sunlight and not absorb as much heat. The same goes for breathable clothing. The fabric is less absorbant so you’ll wick away sweat and prevent your clothes from weighing you down. This allows your body to stay cool and work more efficiently.
Run/bike on the Trails
Hit the trails! The pavement’s temperature can soar as high as 140 degrees when you’re running or cycling. This heat can last well into the evening. Visit some of the many local trails for your next run or ride. The shade from the trees helps keep the temperatures down. There’s often little-to-no vehicle traffic. The ground is softer than the hot concrete. Often times there’s a creek or river nearby that you can jump in if needed. Check out some favorite shaded spots to train from Jack’s Generic Tri. Bonus – the trails will make you a better runner/cyclist!
As you can see, there are many ways to beat the summer heat and stay in shape. Use these tips to stay cool this summer and continue to tackle your triathlon goals.
https://captextri.com/wp-content/uploads/2020/05/feature-2_CapTex-2020-Beat-the-Heat-Blog_2_495x400_051220.png400495CapTex Trihttps://captextri.com/wp-content/uploads/2022/05/AS_CAPTEX_LOGO_MOCK-UP_FULL_COLOR-400x197.pngCapTex Tri2020-05-26 09:56:422020-05-26 09:56:42Beat the Heat: Tips for Training this Summer


 To keep the helmet in place, the next step is ensuring the chin straps are long enough to reach under your chin and can be tightened securely. This part is especially important because you do not want to be dealing with an ill-fitting helmet during your next tri.
  Additional Tips

 Adding a warm-up and cool down into your fitness routine is a simple, yet proven way to maximize your benefits when working out. The warm-up gives your body a chance to prepare for your session while the cool-down then helps you focus on slowing your breathing and return to your normal heart rate. Rather than seeing it as an optional part of your workout, think of warming up and cooling down as part of your session to get the most out of all the hard work you’ve put in!