Posts

3 Tips for Running During the Holidays

Stay on top of your running during the holidays with our advice

The holiday season is fast approaching. You might wonder if you can keep your running schedule going without any disruptions. Spending time with your family and friends, eating your favorite Christmas meals, late nights, and drinking can make running during the holidays quite the challenge.

If you don’t go for a run regularly, you can feel out of shape. So how can you keep running during the holidays? Follow the advice below! Prepare accordingly, stay on track with your running schedule, and have a wonderful time this holiday season. Pro tip: preparation is crucial and one of the main habits of successful triathletes.

Set a goal

One of the best ways to keep yourself running during the holidays is to set a goal. For instance, a goal can include a specific number of miles or a fixed amount of time every week. Another option would be to start a running streak by setting a schedule. Feel like your running is in a rut? These training tweaks could improve your performance.

You can register for an event, like the Ascension Seton Austin Marathon. Having a goal race on your calendar will push you to run regularly. Keep in mind that it doesn’t have to be a big event to get you running during the holidays. Even registering for the Run Austin Virtual Series’ Armadillo 5K or Makin’ Music 4-Miler can do the trick. All you need is to create goals that will motivate you to go for a run regularly.

Go with the flow

During the holiday season, you are bound to have family, work, and travel commitments. They affect how much time you can spend training and keeping your body healthy and fit. When it comes to running, the first thing you should do is take a look at your schedule. If you have any commitments, avoid canceling your run. Instead, make adjustments to your running schedule. If you feel like going for a run outside of your “planned time,” do it. You never know what might happen to prevent you from running. Pro tip: remember to leave some time for the important warm-up and cool-down.

Have fun

The most important thing when it comes to winter training is to have fun. Although the holiday season is a time to enjoy and relax, it may not always be the case. Sometimes, you have to crunch extra hours at work to spend time with your family and friends. For a lot of people, the holiday season comes with a lot of stress. The best way to deal with anxiety-inducing situations is to take a break from them. You need to relax to recharge your mind and be ready to deal with anything that comes your way.

When you are suffering from a mental block, going for a run can help you significantly. By taking your mind off the situation, you can come back and visit it with a fresh and new perspective.

At the same time, you should also make sure you get adequate amounts of sleep. This helps your body recover and should be a major part of your winter training schedule. After all, you don’t want to burn your candle at both ends, as this will make it harder to go for a run regularly.

Don’t stress out if you miss a run or two. As long as you do as much as you can every day, you’re doing a wonderful job!

Adjusting Your Saddle Height Can Make All the Difference

Learn why adjusting your saddle height matters and how it can be done

Many people don’t realize that adjusting your saddle height by a few millimeters can make a huge difference in how they feel on their bike. If you feel like you are not making gains or if you have pain after riding, you may want to try adjusting your saddle height. Properly adjusting your saddle height could help you improve these 5 bike handling skills.

Saddle height explained

Saddle height is the distance between the heart of the pedal axle and the top of the saddle. It is set by adjusting the seat post to an ideal height that balances comfort and power on the bike. Remember, adjusting your saddle height is important like making sure your helmet always fits!

Reasons to change

Saddle height is arguably the single most important adjustment on your bicycle. Incorrect saddle height can contribute to saddle discomfort and anterior and posterior knee pain. The poor leverage can also limit your power production. 

Adjusting your saddle height

There are many methods and formulas to find your “proper” saddle height. One of the best approaches is to establish it based on the rider’s individual ride characteristics and flexibility. If you are looking for recommendations, visit Josh at Jack & Adam’s Fredericksburg or with the crew over at Mellow Johnny’s. A bike fit specialist can explain your individual characteristics. They can also highlight what equipment may be contributing to any performance or biomechanical limitations. If you can’t make it to a bike fit there is still a solution. 

At home fix

Before your next ride, experiment at home with the “heel to pedal method.” This will get you in the ballpark range before you can see a professional. First, mark the current height. Then, put your bike on the trainer. Pedal around to make sure you are in the position you normally ride in. Place your heel on the pedal and pedal backward to reach the six o’clock position. Your knee should be completely straight. If your heel has trouble making contact with the pedal, the seat is too high. If your knee is bent it is too low. Make very small adjustments, in millimeters, until your leg is straight with the heel on the pedal.

Adapting to your new saddle height

When you’re done adjusting your saddle height, wrap a strip of electrical tape around the base of the post where it meets the seat clamp. Take measurements and keep them for future reference. Make the first few rides with your new saddle height short and sweet. It can take a few rides before your body fully adapts. It is good to get your bike fit looked at at least every few years or if you get new equipment such as new shoes or pedals. Pro tip: when you’re ready for longer rides, check out these 3 cyclist-friendly routes in Austin.

3 Cyclist-Friendly Routes in Austin to Ride

Get more comfortable on your bike when you ride these cyclist-friendly routes in Austin

Avoid traffic and become more comfortable on your bike on these cyclist-friendly routes. These 3 Austin spots are located throughout town, making them accessible to many cyclists. They’re ideal for enjoying a scenic route and mastering your bike handling skills. New to cycling or just purchased your first bike? Nice! The more routes you ride, the more familiar you will become with your new bike. If switching gears is new to you, using them can be tricky on your first few rides. Your bike presents a new feel. Leaning into the curves, becoming comfortable with the handling, and eating and drinking on the bike are all things you should practice. Pro tip: always check that your helmet fits before every ride.

Veloway

This 3-mile looped, one-way roadway is an ideal cyclist-friendly route. The Veloway is located in southwest Austin off LaCrosse Avenue and is closed to traffic. Parking is ample. Most noteworthy, this route is strictly for cyclists and rollerbladers, no runners or walkers (watch out for the wildlife!). The roadway is bisected with a continuous white line (slower cyclists keep to the right). Everyone moves in the same clockwise manner. You can relax a little knowing you don’t have to keep an eye out for non-wheeled individuals or riders coming in your direction. There are gorgeous views, a few tight turns, and some nice straightaways. Make sure you get into the right gear for a nice climb around Mile 2! Porta-potties are available.

Southern Walnut Creek Trail

The Southern Walnut Creek Trail begins at Govalle Neighborhood Park off Bolm Road in east Austin. It features nearly 7.5 miles of 10-foot wide concrete paths and splendid views. Like the Veloway, there is plenty of parking. Be advised, runners and walkers are allowed on the trail and traffic flows both ways. Ensure the other lane is clear and yell out “on your left” if you plan to pass others. There are a few road crossings along the trail to be aware of as well. Add 11 miles and some nice climbs to your bike ride when you preview the Rookie Tri and Jack’s Generic Tri bike courses! The trail rides alongside Daffan Lane and eventually hits Decker Lane.

Brushy Creek Regional Trail

Representing north Austin, the Brushy Creek Regional Trail reaches Round Rock to the east and Cedar Park to the west. Check out Stone Canyon Pool if you park to the east. Park to the west at Twin Lakes Family YMCA. Be aware of runners and walkers on this 6.75-mile multi-use trail that connects neighborhoods and existing parks. Traffic flows in both directions and there are multiple restrooms along the trail. Make sure the other lane is clear and yell out “on your left” if you plan to pass others. BCRT images from cedarparktexas.gov.

6 Items Every Beginner Triathlete Must Have

Every beginner triathlete needs these 6 items before they can train

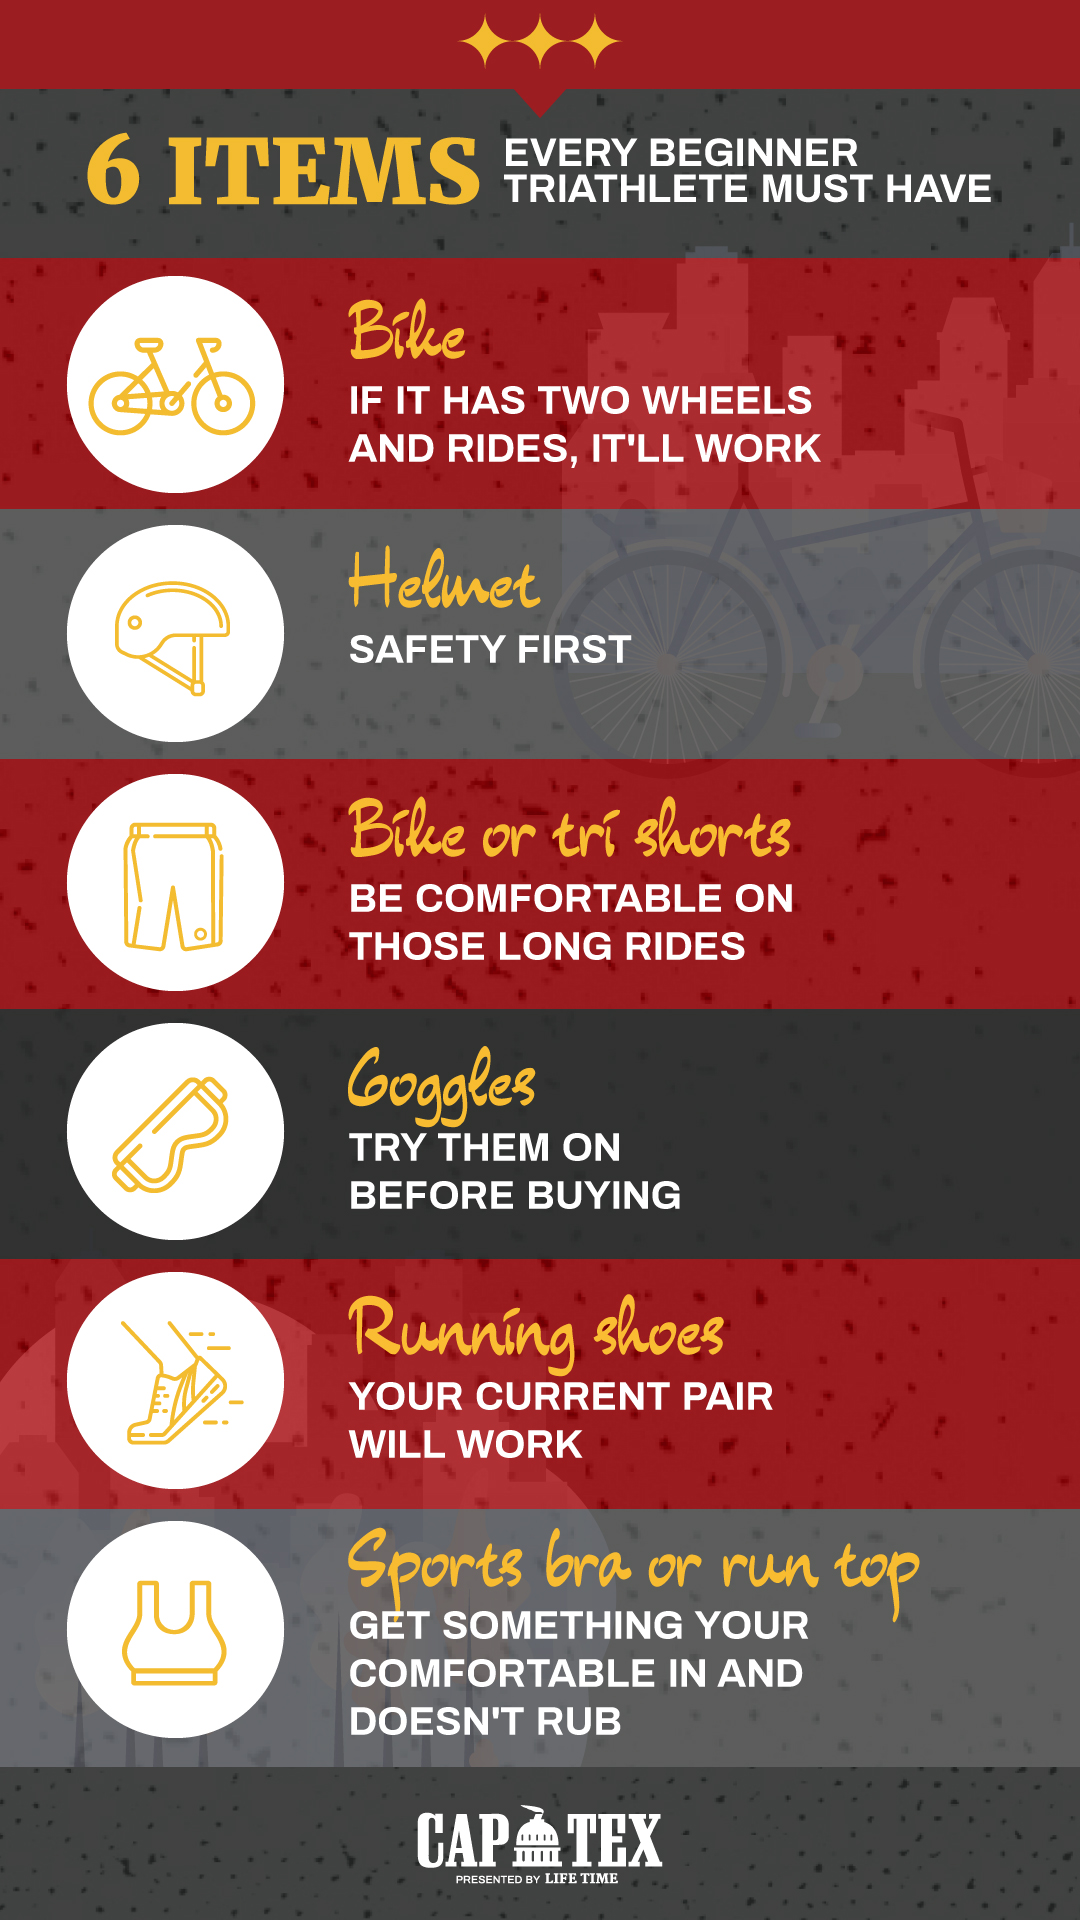
You’ve decided to start training for your first triathlon, congrats! Now what? Before you get started you’ll need some specific gear for all phases of training. This 6-item checklist is a great start for every beginner triathlete! It’s got you covered from the swim to the bike to the run. You might even have some of these items already. If that’s the case, we’ve added a few more recommendations at the end. Below are the 6 items every beginner triathlete must-have. Pro tip: pair the items with these 8 habits to successfully train and crush it on race day! 

Bike

Infographic listing the 6 items every beginner triathlete must have. List includes bike, helmet, tri shorts, goggles, running shoes, and sports bra. Read more at https://captextri.com/6-items-beginner-triathlete/Any bike. It can be anything from your uncle’s old bike that has been in the garage or the mountain bike you take out riding with your kids. Be sure that the bike is in good repair by taking it to a local shop. If the bike is really old or in disrepair, you may spend just as much on fixing it as you will buying a beginner bike. Pro tip: a road bike with gears will make your training a lot more comfortable. You will be able to go further with less effort and have more “in the tank” when you head out for the run. Remember to practice these 5 bike handling skills.

Helmet

Helmets should be replaced every 5-8 years and definitely after any crash — no matter how small. Helmets provide the same safety level at any price tag so you don’t need anything expensive. The higher-end helmets are equipped with more ventilation and aerodynamics. Some helmets are specifically sized so make sure and check when you purchase. A loose-fitting helmet is not safe. Pro tip: follow these easy steps to ensure your helmet properly fits.

Bike or tri shorts

Really you can wear what you want, just remember that transition is open and there is nowhere to change in private. If you want to be comfortable while training and racing get a nice pair of athletic shorts. These can really be anything but cotton as cotton will not wick away sweat and can lead to chaffing. Ouch! A basic tri short with a little bit of padding will make your bike-riding experience much more enjoyable. The best part is that these shorts will last long after your triathlon debut. They are perfect for cross-training, cycle classes, and even going for runs.

Goggles

There is no perfect goggle since everyone’s face is shaped a little differently. Visit a local swim shop and try on a few models to find what works for you. Leaky goggles will derail your swim and can make swimming a lot more difficult. Especially if you are having to stop and constantly adjust for goggles. Don’t skimp and just buy the cheapest ones at the store. Once you have tested them out a few times, we suggest buying a second pair in a different tint so that you have something for all conditions. Here’s some more advice to follow when searching for your goggles.

Running shoes

If they are comfortable, they are good to go. Even if they are just the shoes you got because you liked the way they looked. Have some shoes that aren’t comfortable? Well, you can still run in those — you will just be, well uncomfortable at the end of your run.

Sports bra

Ladies, even if you decide to use your swimsuit for your first triathlon you are going to want to wear a good sports bra underneath. You will want something you are comfortable running in. If you have some areas that rub, like under the armpits, you can put some Vaseline or Body Glide on in the morning to help with chaffing.

Beginner triathlete extras

Recommended

  • Flat kit – you’ll want this if you get a flat
  • Hat/visor – protect yourself from the sun
  • Water bottle for the bike – stay hydrated
  • Bright towel – find your spot easier in transition
  • Sunscreen – don’t get burnt 
  • Race belt – carry your nutrition and your bib

Optional

  • Socks – keep your feet comfortable
  • Bike shoes with clip-in pedals – make sure you practice first
  • Sports watch – track your time
  • Sunglasses – protect from debris on your ride
  • Transition bag – carry all your stuff
  • Wetsuit – can be expensive, but could help in the water

5 Bike Handling Skills Every Triathlete Should Know

Why triathletes should focus on bike handling skills

Competency with your bike handling skills gives you a decisive advantage over your competition. You gain the experience, knowledge, and practical ability to bike better and more efficiently. Success at a triathlon depends on how well you can gauge your environment. You’ll be surrounded by people, have to traverse across various kinds of terrain, and your journey will be long. That is why you should be completely comfortable with riding your bike for long hours. Here are five key bike handling skills that will help you become a more successful triathlete.

Pro tip: follow these steps before every ride to ensure your helmet fits.

The skills every triathlete should nail

  • Starting and Stopping

These are the most basic bike skills that you must master. Without having solid control over your bike, you could end up in an accident. If your bike uses clip-on pedals, then you should become familiar with them. Practice clipping and unclipping your pedals while riding until you perfect it.

  • Braking and Corners

Speed isn’t always your best friend when it comes to triathlon. This really applies to corners. Instead of pressing down on the brake once you reach the corner, try slowly braking as you near it. This way, you get time to think about the turn you’ll make and pre-emptively react to any dangers ahead.

  • Bike Handling and Shifting gears

Your timing with gear handling should be impeccable. You can achieve this by spending as much time riding on the roads as you can. The natural environment will teach you how to gauge the timing of your shifting. Once you develop this skill, you’ll begin to shift your gears more naturally as you get to your location.

  • Know your Cadence

The cadence in a bike is the number of times you can pedal per minute. Cadence is also known as pedaling rate. Triathletes should be able to maintain a consistent pedaling rate between 90-100 revolutions per minute. By practicing every day, you should be able to get to this level.

  • Drinking while biking

If you’re going to compete in a triathlon, your nutritional intake should be right. You don’t want to get dehydrated during the event nor do you want to feel anything less than your best. That is why you should practice grabbing your water bottle while your biking. You can do this by biking slowly at first, as you reach to your water bottle holder to grab the bottle, drink from it, and place it back. Over time, you will gain the confidence to do this with ease. Pro tip: you will spill and your bike will get dirty. Take the time to clean it with these simple steps!

These basic bike handling skills will take you from a cyclist to a real competitor. You need more than a better bike to succeed at triathlon. Developing your skills is what will help you achieve success. If you’re in the market for a new bike, make sure you know the differences between triathlon and road bikes.

Habits of a Successful Triathlete

Become a successful triathlete when you practice these 8 habits

To be a triathlete you need to have the basics of swimming, biking, and running down. But to become a successful triathlete (whatever that means to you/ whatever your goals may be) there are some other lifestyle changes you can make to really be successful. There are a few habits you can adopt to help you get there that already line up with your goals. Keep reading to discover the habits successful triathletes have in common.

Do your research/PREPARE

Find the right race for you. If you’re new to the sport, don’t go for a longer distance tri. Start slow and build your way up to your desired event distance. Will you need a wetsuit? Is your race even wetsuit legal? What are the benefits of a race being USAT certified? There’s a lot to learn, like knowing the difference between triathlon and road bikes. Proper preparation can reduce unexpected surprises that may come your way during training or on race day. 

Pace yourself

Don’t go full force when you’re first training or just getting back into training after offseason. Find a training plan and follow that as your guide. Be willing to make training tweaks if needed.

Know how to fuel

Nutrition during training and during the race has a huge impact on the way you can expect to perform come race day. Make sure you’re following the right nutrition plan for your body and the event distance you signed up for. 

Give Your Gear the TLC it needs

Take care of the gear that takes care of you. Follow instructions for proper care and give your bike frequent tune-ups to maximize performance. Clean gear is happy gear!

Know what you can control

You’ve done everything you can to make sure this race goes perfectly. You did a gear check, you packed the perfect race day bag and you’re ready to go! Then a storm hits. Don’t let this get you down or let you feel defeated before the race even starts. You know you’ve spent the time training and just remember to focus on what you can control for a good race. All the other athletes there are experiencing the exact same thing. Pre-race jitters are real and they can throw even the best athletes off track. If you know your jitters on race morning are going to be bad, work on a couple of exercises or something to help you distract yourself from the nerves on race morning. We see this all the time and its a really great way to center yourself before starting the swim!  

REST!

Take some time off when you need it! Listen to what your body is telling you so you don’t overdo it and risk an injury. 

Enjoy healthy food

Switching up your diet for healthier options is a really simple yet effective way to help you during your training. Of course, you don’t have to stop eating what you really love, but adjusting to a cleaner, healthier lifestyle is great for maintaining energy during workouts as well as leaving you feeling good too. 

Successful triathletes stay in the moment

Take it one day at a time. Everyone has good days and bad days and training for a triathlon is no exception. Remember why you started this journey or what inspired you to and focus on that when you’re having a tough day. Be kind to yourself and find ways to keep yourself motivated to reach the goal of crossing that finish line!

Easy Steps to Check Your Helmets Fit

Get the right fit and know that your helmet is fully protecting you

An unexpected fall from a bike can happen at any time with the potential to result in brain injury. The good news is that a properly-fitted helmet will reduce this risk. 

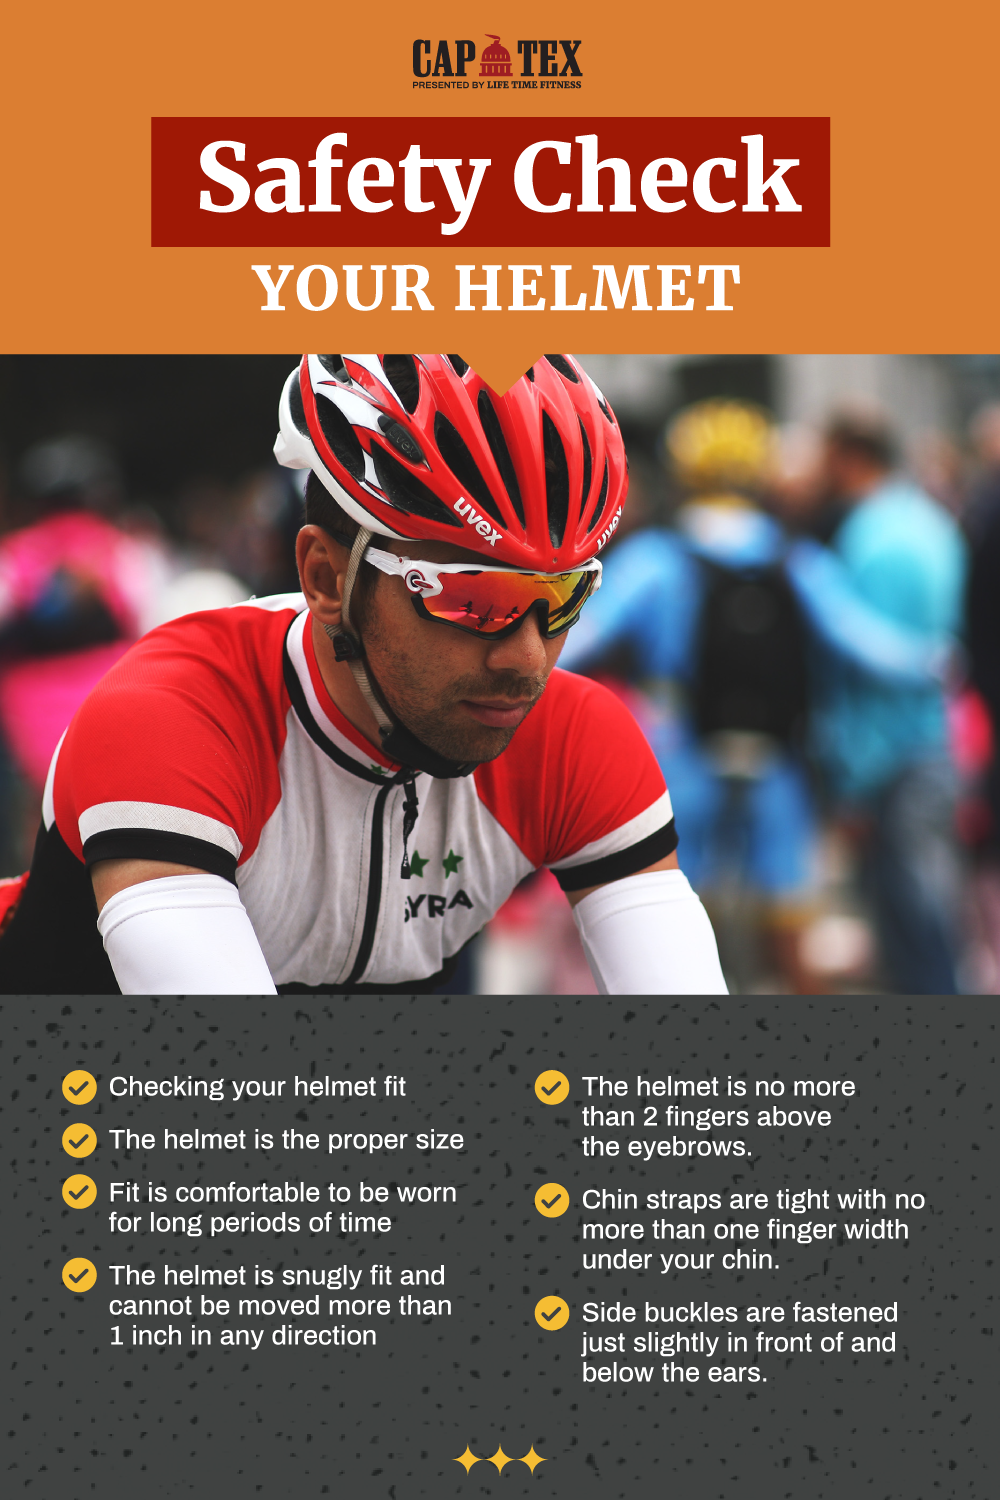
Helmets come in a variety of sizes depending on the manufacturer. Even though they are sized they will come with a fine-tuning dial so that you can adjust the helmet to fit your head specifically. Take the time to check your helmet before every ride. Your life is worth it and could depend on how your helmet is set up. Use these tips on how to make sure you have the right fit for your bike helmet. 

Size

The first thing you should adjust when choosing a helmet is the fit pads or adjuster ring. The helmet needs to be snug around your head to effectively protect you. It should not be too tight where you feel pressure and not too loose that there is any wiggle room. It should not be able to move from side to side or slip back off your forehead. If needed, add more fit pads to get a secure fit. If your helmet has an adjuster ring, modify the circumference until the helmet is fitted properly for your head. 

Positioning

The next thing to determine is how high the helmet should sit on your head to protect your head on all sides, in case of a fall. Two finger-widths should be visible on your forehead. You can also decide if your helmet fits properly by looking up. You should be able to see the rim or front edge of the helmet when you do so without interfering with your vision.

Pro tip: you should always wear protective lenses with your helmet, so make sure there is enough room to wear them both comfortably.

Straps

Cyclist wearing a helmet properly with instructions to check proper helmet fit for saftyTo keep the helmet in place, the next step is ensuring the chin straps are long enough to reach under your chin and can be tightened securely. This part is especially important because you do not want to be dealing with an ill-fitting helmet during your next tri. 
The “Y” shaped strap needs to fit under your ears comfortably and buckle under your chin without being too tight. Your helmet should not be able to move more than an inch in any direction. After you buckle the chin strap, it should be secured in the correct position.  You should not be able to fit more than one finger under the chin.

These straps can sometimes loosen with time so it is important to check your helmets fit before each ride. 

Comfort

While comfort is not a safety feature in itself, having a helmet that you find comfortable will mean that you wear it more often. While every helmet is the same safety rating, you will find more expensive helmets have more vents. If you have long rides planned during hot weather, having these extra vents to cool you off might make you more comfortable. 

Bicycle helmets only work if you wear them correctly. Helmets should always be replaced if they are in a crash. Yes, even if it is a “small one”, if your helmet makes any contact it could be compromised and should be replaced.

If you’re riding alone or going on a group ride, use these tips when shopping around for your next helmet to make sure you are as safe as possible on your future rides.

Checking your helmet fit for safety:

  1. The helmet is the proper size
  2. Fit is comfortable to be worn for long periods of time
  3. The helmet is snugly fit and cannot be moved more than 1 inch in any direction
  4. The helmet is no more than 2 fingers above the eyebrows. 
  5. Chin straps are tight with no more than one finger width under your chin.
  6. Side buckles are fastened just slightly in front of and below the ears. 

6 Things to Keep In Mind for Olympic Distance Triathlons

Going The Distance: What to Keep In Mind When Going From Sprint to Olympic

So you have completed a Sprint Triathlon and now you’re looking for the next challenge. You can always do more sprint triathlons and work on increasing your speed or you can work on your endurance and increase your distance. Maybe going up to the next distance is your goal. For those looking to go long, here are some simple training reminders and workout tips to help you conquer the Olympic distance tri at CapTex Tri.

6 Tips for Olympic Distance Triathlons

1. Not Always Easy

First, it is important to remember that part of the appeal of racing an Olympic distance is that it is not exactly easy.  Simply doubling your workouts isn’t going to cut it. In training, have a goal of completing 60-80% of the segment distance before the event. 

2. Find Your Pace

With a sprint, you could go all out but you will probably not able to keep this same pace in the Olympic distance tri. Train at a pace that you are comfortable with so that you do not burn out on race day. Start thinking of speed versus endurance.

3. Calories Matter

Third, Calories Calories Calories. These longer distances are going to require fueling. Test several products before committing, just because something works for your friend or someone at the gym, it doesn’t mean that it is right for you.

4. Preparation is Key

Fourth, take “Nothing New on Race Day” to the next level. Make sure you have tried everything at least 3 times before you arrive race morning. We are talking socks, shoes, hats, sunscreen, sunglasses, nutrition, which water bottle, ev-er-y-thing. 

5. When in Doubt, Swim

Fifth, if you have time for an extra workout – choose the pool. Swimming is great aerobics and can lead to gains on the bike and the run. Efficiency in the swim can leave you with more energy instead of being taxed right out of the water. More important than hours logged, make sure that you are making each workout count.

6. Find A Balance

Sixth, keep balance. Make sure to find time for friends and family. Many of them may not understand but make sure and thank them for being there to support you in any way. Make sure and inform them when, where, and how long you are going out for a long run or bike. A safety post on Facebook is a good idea as well and a fun way to let everyone know how your training is going. 

6 tips for going from sprint to olympic distance triathlonAdditional Tips

  • Every other week make one of your run workouts follows immediately after your bike workout. 
  • Switch it up. Don’t always do the same style work out on the same day of the week.
  • Have Fun and Smile!


Go The Distance!

These 6 easy steps are your guide to getting to the start line with a high level of confidence so that you are ready to be successful for your first Olympic distance triathlon! Also, remember that no matter the distance increase it is important to keep your ultimate end goal in mind and then set up milestones that you can meet along the way.

Training Tweaks to Improve Your Run Performance

Improve your run performance for your next tri

If you’re looking to improve your overall endurance when it comes to running, you’ve come to the right place. In this blog, we’ll discuss a few ways to improve your run performance for your upcoming triathlon. 

Adjust Your Current Running Plan

Start by evaluating your current running abilities to establish your starting point and work from there. Then, you can determine how you will need to make adjustments to your run training. No matter how seasoned you are as a triathlete, preparation for the run leg is very similar. The most notable difference in advanced triathletes and new triathletes is the distance and duration of the runs. If you’re new to running or just got into running, try a high-intensity run to test your endurance capacity. Try to keep your pace consistent when doing so. Keep track of how long you were able to run at that pace without becoming fatigued. This is your starting point.

Improve Your Endurance

For beginners, maintaining the right pace for extended periods can be tough. We see this when athletes start too fast and fade at the end during a workout. An excellent way to learn how to maintain a new, faster pace is to do track-type workouts on a treadmill. Treadmill sessions are good for this because you’ll become used to holding your pace while dealing with fatigue. Short intervals on a treadmill while adjusting the incline can lead to an increase in your pace and speed without having to exert a ton of energy. This will especially help if your triathlon run has a hilly run course. During this time of focusing on your run, increase the number of run workouts you do in a week. Pro tip: be sure you’re warming up and cooling down for each session for the maximum payoff!

Get Used to Running on Tired LegsRunning on tired legs

Improve your run by incorporating brick workouts into your training and get out for a longer, more challenging run than usual after hard swimming or cycling sessions. Completing swimming or cycling workouts back to back with a run workout will help to familiarize your body with the movement patterns and expectations you’ll need for the day of your race. Because the run is the last leg of the tri, it’s important that you get used to running on tired legs.

Takeaway

Once you have mastered the running basics and established a starting point, you’ll start seeing improvements. Integrating these tips will likely increase your resistance to fatigue and improve your ability to run for longer periods of time at a steady pace. These tips are useful to triathletes because completing better quality speed training will lead to faster run time, and overall finishing time. With thought and planning, now is the perfect time to improve your triathlon run performance like never before.

How to Know the Difference Between Triathlon and Road Bikes

Triathlon Bikes vs. Road Bikes: What’s the Difference?

When it comes to triathlon, a bike is, well, a necessity. How are you supposed to know which bike is best suited for you if you’re new to triathlon or limited on options? In this blog, we’re going to talk about two types of bikes: road bikes and triathlon bikes. Keep reading to understand some key differences between triathlon bikes and road bikes so you can decide which fits your style best for your triathlon journey.

How They’re Different

The most notable difference is the design, or geometry of the frame of each bike. Triathlon bikes have a steeper angle of the seat. Seats on a road bike are positioned at, on average, 78 degrees while the angle on a triathlon bike is closer to 72 degrees. The steeper angle allows the user to travel at a faster rate because you can bend your body down lower which reduces wind resistance. Another huge difference is that a triathlon bike includes aerobars instead of regular handlebars and many models have specially shaped frame tubing and special wheels. These design features are intended to minimize drag and increase speed which is important in triathlon racing.

Triathlon Bikes

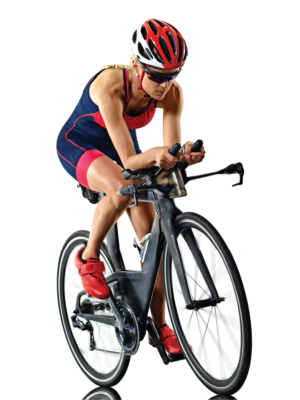
Tri bikes allow you to get into a more aerodynamic position by lowering your upper body and bringing your arms in-line with your torso. This is a result of the tilt of the seat in combination with aero bars that cause the cycler to lay lower on the bike with elbows rested. The goal here is to be in the optimal position for a smoother, faster ride.  Unlike other handlebar positions, aero bars serve as both handgrips as well as armrests, allowing you to significantly reduce the pressure on your wrists and hands throughout a race or riding for an extended amount of time.Key Traits of a Triathlon Bike

Key Traits of a Tri Bike

  • has aerobars
  • more aggressive frame geometry
  • can be more expensive
  • better for speed
  • more aerodynamic


Road Bikes

Road bikes are great when aerodynamics are not the top priority. These bikes are typically easy to maneuver during longer rides. Road bike frames are slim and also come with thin tires for riding on the road. The handles on road bikes offer different hand positions. Because of this, most people find road bikes to be more comfortable because you can alter your riding position as needed. For beginner triathletes, we recommended trying a road bike before a triathlon bike.

Key Traits of a Road Bike

Key Traits of a Road Bike

  • more versatile
  • less expensive
  • lightweight
  • can add clip-on aero bars
  • easy to customize


Now it’s Time to Make a Decision! Which Bike Will You Choose?

Now that you know the key differences between the types of bikes, take a moment to weigh your options before deciding which bike is better suited for your riding needs. Keep in mind: comfort is key, but you don’t want to compromise speed for comfort or vice versa. It’s all about finding a bike with a balance that works best for your body and your cycling needs. Whichever bike you choose, either will do for the day of your big race. Now, all there’s left to do is choose your bike, grab your shades, and start logging those miles!

Which type of bike do you prefer? Let us know on Facebook or Twitter and tell us what you decide to name your new set of wheels!