Posts

What to Eat and When During a Triathlon

This post was originally published on https://zone3.us/blogs/blog/what-to-eat-and-when-to-eat-during-a-triathlon

By Glen Gore, former pro triathlete and current coach.


If ever there was a hot topic of debate, it comes in the form of triathlon nutrition and more importantly, nutrition intake on race days.

What exactly do you need to eat and drink, and when?

To start this editorial piece, we need to agree that there is no magic formula that will work the same for everyone. Each of us differs in our body mechanics and the way we work with nutritional absorption that it’s almost impossible to pinpoint one clear plan that will work for everyone.

Having said that, you can still use sound advice and at least start on the right track. For us, nutrition is another important discipline in the sport of triathlon. The fastest and most finely tuned sports car in the world will go nowhere fast if there is no fuel in the tank. Similarly no matter how hard you have trained and prepared if you are going to race on zero nutrition, your body (engine) is going to slowly come to a complete stop and falter.

Rule no 1 – don’t neglect your nutritional intake on race days. It’s quite easy to “forget” to drink and eat when you are giving 100% during an all-out race effort. Just know that sooner or later, you will start to run out of energy stores and that is when racing becomes anything but fun.
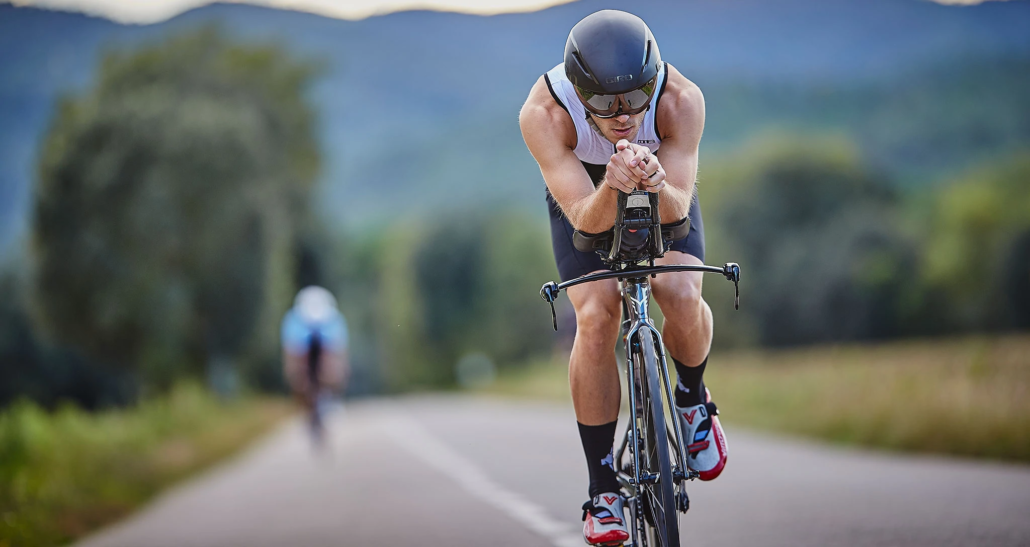
Fuelling is different depending on the distance

A Sprint Distance triathlon race is completely different from an Olympic, Half, or full Ironman distance event. These distances require different amounts of training loads to be fully prepared to take on the challenge. The same rule applies to how you fuel the body during an event that takes less than 60 mins compared to an event that may take up to 17hrs.

Sprint

A sprint race normally lasts anywhere between 52 minutes for the PRO’s up to say 1.5-2hrs for the backmarkers. Most of the time – depending on weather conditions, you can get away with next to nothing in the form of intake over the sprint distance. Some hydration via a small sports bottle and perhaps 1-2 gels for the bike and run should sufficiently see you through the event.

I have often found that my best results over the sprint distance come when I go in “light” – not much food in the tank – that empty feeling but with just enough energy stores from the previous night’s meal or early morning small breakfast to see me through the event.

Hydration is always important – you never want to start any event “thirsty” so make sure the fluid levels are topped up in the form of small sips. A huge intake of fluids just before the start is not a suggested best practice for an optimum result over short distances. 

These should be taken as pure guidelines and not as hard-fast rules – these suggestions come from trial and error on the battlefield.

Olympic

When you compete in an event that spans longer than 2hrs, then you need to start looking at a more efficient fueling system.

The Olympic distance event can take anywhere from 2hrs to 3hrs plus – eating and drinking now becomes more important. If you are not fuelling adequately over the 40km cycle, you will feel the burn when you enter the hunt on the 10km run.

Some athletes require less nutritional intake than others while others may require more fluid intake. The best place to learn what your body requires is by trial and error. The more you race over this distance, the more you will learn as to what you require and when. 

Half-Distance

When the event time spans over 4hrs in duration right up to 8h30, then you will need a tried and tested method, worked on in training, to see you adequately fuelled in a race that covers a whopping 113km.

The many trained brick sessions will give you a firm indication of what will work for you on race day and what will not. It does become quite expensive when your training sessions have to mimic race days but as the saying goes, practice makes perfect. The more you practice eating and drinking over the longer distances in training, the easier the transition will be from training days to half-distance racing days.

Full IM Distance

So many athletes have “bonked” or “hit the wall” over the full IM distance simply because they ran out of fuel. The body was prepared, the mental side was in place but the “engine” for some reason was neglected.

Firstly consider that a normal day at work would require someone to eat breakfast, lunch, and dinner. Now add in 3.8km of swimming, 180km of biking, and a 42.2km marathon to top it all off, covered in a time that may span at least 17hrs. Now it becomes apparent just how much food and drink is required to keep you moving along at an optimum level.
Best Fuelling Tactics during Training

  • Find a product that works and more importantly is cost-effective. Just because it’s expensive does not mean it’s better.
  • Trial and Error – the brick session will help you develop a suitable war plan for race days. If it works in training, more than likely it will work during the race.
  • Make sure you re-fuel within 15-30 minutes after a strenuous workout. As athletes, we often neglect the post-training refueling strategy. Remember you are not only eating for today but you are eating for tomorrow’s training session as well.

Best Fuelling Tactics during Racing

  • Eat small bits and drink small sips all the time – especially during the longer races – the reason being to keep the tank on full at all times and not deplete it before you think about replenishing. 
  • Cut up your energy bars into small bite-size pieces – this is much easier to eat and digest while on the move.
  • Get in some solid food sources quickly once you are done with the swim. The longer the duration of the event, the more advisable to start the cycle with something a little more substantial than just a gel.
  • Don’t overload your bike with too much nutrition and hydration. This makes that very expensive bike extremely heavy. The bigger races have more than an ample supply of nutrition along the way – make use of it even if you need to stop briefly and take some on-board.
  • Don’t start the run in a hurry. T2 over long distances is a time where you need to relax a little and consume some solid nutrition before you head out onto the run. Whatever time you lose in transition you will more than makeup, especially when the run distance is over a full standard marathon.

Common Fuelling Mistakes

  • Eating only when hungry – this means it’s already too late. It will take you a long time to get back those lost energy stores, time which you won’t have during the race days.
  • Drinking only when thirsty. Once again, this is too late – if you are feeling thirsty you are already on the way to partial dehydration. Keep on sipping water and juice so you never get to feel that thirst.
  • Trying new stuff on race day. Stick to what you know and what you have trained on.
  • Don’t alter the nutritional plan. What you practiced in training, do the same on race day. Don’t change the formula, there is a good chance it won’t work.
  • Drinking too much. This can be a problem worse than drinking too little so take the race weather conditions on the day into account and drink what is normal for you.

Nutrition is important, a successful race plan always has a well thought out nutritional plan that goes along with it, and remember, it takes trial and error to perfect – good luck!

Click here to shop ZONE3.

Celebs You Didn’t Know Were Triathletes

Ever wondered which of your favorite celebs share the love of triathlon with you??

The world of triathlon knows no bounds. With an estimate of 4 million people participating every year, the sport is constantly growing and adding new athletes to the mix. We see every type of person enter triathlons, but have you ever thought if any of your favorite stars are triathletes too? See if your favorite star made the list with these celebs that TRI!

1. Shawn Colvin

Shawn Colvin, Triathlete

Image: Getty Images

Shawn Colvin is a Grammy award-winning artist that was bitten by the tri-bug back in 2001. “It’s true, once you do one of them you want to do more!” She regularly participates in triathlons all over the country and was even at the 2019 Kerrville Triathlon Festival where she sang the national anthem to kick-off Saturday and Sunday of race weekend! Colvin holds a special place in our hearts because she’s one of our very own.


James Marsden

Image: Noel Vasquez

2. James Marsden

James Marden is a well-rounded actor, known for his roles in 27 Dresses, Enchanted, and X-Men, is also a regular participant of triathlons all over the States. He is constantly keeping up with his training and participates in various triathlons every year to maintain his muscular physique. Marsden says triathlons are a great way to stay in shape year-round so he is camera-ready at all times.  He even missed the 2017 Emmy awards because it conflicted with one of his triathlons!


3. Jennie Finch

Image: Matt Peyton

Jennie Finch is one of the best softball players the sport has ever seen. After retiring from her 11-year career earning her 2 Olympic medals, she hung up her cleats and traded them in for running shoes. She began by entering marathons before she participated in the 2013 New York City Triathlon as a way to get back in shape after her third child was born. She crossed the finish line of the Olympic-distance (we see what she did there) with an impressive time of 2:51:15!


Triathlete Gordon Ramsay

Image: Clara Molden

4. Gordon Ramsay

Hell’s Kitchen’s overlord, Gordon Ramsay, took his skills out of the kitchen to participate in the 2013 Hawaii Ironman. Since then, Ramsay has competed in several marathons, half-ironman, and other races throughout his journey. The competitive environment of the events is what keeps him coming back year after year. He trains throughout the year to keep up with his physical condition alongside his wife, Tana.


Jennifer Lopez Triathlete

Image: Jean Lacroix


5. Jennifer Lopez

Jennifer Lopez was inspired to begin her journey as a triathlete for a good cause. She participated in her first-ever triathlon at the Nautica Malibu Triathlon in 2008 to raise money for Children’s Hospital Los Angeles. New to the sport, she had to spend most of her time training for the swim portion. On race morning, her training certainly paid off with her finishing time being 2 hours, 23 minutes and 28 seconds!


Matthew McConaughey

Image: Gregg Deguire

6. Matthew McConaughey

Austin local Matthew McConaughey is no stranger to the sport, having completed several triathlons since his journey began. McConaughey started his journey in 2008 by completing an Olympic-distance tri. He showed off his athleticism by earning a time of 1:43:48. How would you like that for your first ever triathlon time?


7. Claire Holt

Claire Holt Triathlete

Image: Chris Polk

Best known for her role in the TV series The Vampire Diaries, Claire Holt was instantly hooked on triathlons. Like the other star triathletes, Claire Holt is a regular participant of the celebrity division at the Nautica Malibu Triathlon. Once she discovered her love for the sport, she found herself returning every year with the goal of improving her performance! She achieved her goal at the 2012 event by taking home first place with a time of one hour and 44 minutes.


Image: Noel Vasquez

8. Joel McHale

Joel McHale is the newest celeb to become a triathlete. He was especially impressed with his defeat of fellow triathlete and star, James Marsden, during the run portion of the race. He plans on returning to race triathlon again next year and plans on recruiting other celebs to join him!


9. Megyn Price

Megyn Price

Image: Chelsea Lauran

Rules of Engagement star, Megyn Price, started her triathlon career because she wanted to have a goal that would test her physical strength.  She finds it important for females to have goals that are based on something more than how you look. Her efforts paid off when she took home first place at a 2010 triathlon with a time of 2:10:23, just 3 years after her first tri! Way to go!


Brendan Hansen Triathlete

Image: Jamie Squire

10. Brendan Hansen

Brendan Hansen is best known for his professional swimming career. During all the chaos of winning 6 Olympic medals, breaking world records left and right, and starting a family, Hansen managed to find time to become a triathlete! Hansen competed alongside our Rookie Triathletes in 2010 and continues to participate in triathlons in and around Austin, Texas. When asked about his triathlon journey, Hansen told The Orange County Register, “Triathletes are great. They’ve got a screw loose, the way they train. But at the finish line, there is a beer tent. How great is that?” We couldn’t have said it better ourselves!


These folks may be superstars, but at the end of the day, their triathlon journey started just like everybody else. Maybe we can invite them to join us on the course this May with the CapTexTri!


Simple Steps to Eliminate Bike Shifting Issues

Derailleur Adjustment Tips

Experiencing issues shifting when hitting the road to log some miles on your bike? You most likely need to make some adjustments to your derailleur. Shifting problems are a common occurrence for cyclists and triathletes. So we’re going to give you some expert tips to fix your shifting problems yourself. Get ready to expand your bike mechanic skills and learn these quick, easy steps to adjust your derailleur and put a stop to your shifting issues! 

What’s a Derailleur?

A derailleur is a device on your bike that changes gears by moving the chain from one sprocket to another. There are several different styles and sizes when it comes to derailleurs. But when it comes to fixing shifting issues, the steps you should follow are often the same.

Derailleur Basics for Shifting Issues

Derailleur mechanics provide a simple way for you to dial in shifting in the middle of a ride. Although it’s easiest to make and check adjustments when the bicycle is supported in a repair stand, you can adjust your derailleur without any tools at all. 

If you suspect your derailleur may be damaged or bent, unfortunately, you won’t be able to fix this one yourself. You’ll need to take your bike to your favorite local bike shop to have a mechanic help you out. The following tips are for derailleurs that just need slight adjustments such as a tweak to the shifter, elimination of rubbing, or quieting that pesky squeaking sound. 

Identify the Problem

To adjust the derailleur, look at the point where the cable enters the rear derailleur. Here you’ll see a round, knob-like piece; that’s the cable adjustment barrel. This is used to tune the derailleur adjustment.

Standing behind the bike, turn the cable adjustment barrel either counterclockwise or clockwise in half-turn increments until the shifting hesitation is cured. The direction in which you turn your derailleur depends on what type of hesitation you’re experiencing.

The most common problem is slow-shifting into easier gears (toward the spokes) which is due to the stretching of the cable. But, it’s also possible that you’re experiencing difficulty with shifting into a higher gear, which means the cog isn’t allowing the chain to shift outward smoothly to the next gear.

So, which way do you turn it? Determine this to continue to your next steps to adjust your derailleur.

  • Experiencing slow shifting – turn the barrel adjuster counter-clockwise toward the spokes. This will tighten the space between the cogs or shifting increments.
  • Difficulty shifting into a higher gear – turn the barrel adjuster clockwise, away from the spokes to loosen the space between the cogs to allow for easier shifting.

Time to Adjust Your Derailleur

Commit this to memory to help you remember which way to turn the barrel adjuster the next time you experience shifting issues. 

  • If the derailleur is hesitating when shifting toward the spokes (the more common problem), turn the barrel toward the spokes (counter-clockwise). 
  • If it hesitates to shift away from the spokes, turn the adjuster away (clockwise) from the spokes. 
  • Turn it only a half turn, shift multiple times to check the adjustment, and repeat as needed to eliminate all hesitation. 

Pro tip: Be aware that there is a range of acceptable adjustments, so there may be more than one barrel adjuster position that results in good shifting performance.

No More Shifting Issues!

Now you have the right tips to adjust your derailleur back into place for a smooth ride with easy, noise-free shifting.  If you were experiencing trouble with your shifting, remember these tips to adjust your derailleur before your next ride. If you have a friend who is constantly dealing with shifting problems, help them out, and share this with them! Congrats! You have a mechanic you trust and know will keep you in good hands, YOU!

Now you’re ready to go and check out these fantastic cyclist-friendly routes in Austin.


Adjusting Your Saddle Height Can Make All the Difference

Learn why adjusting your saddle height matters and how it can be done

Many people don’t realize that adjusting your saddle height by a few millimeters can make a huge difference in how they feel on their bike. If you feel like you are not making gains or if you have pain after riding, you may want to try adjusting your saddle height. Properly adjusting your saddle height could help you improve these 5 bike handling skills.

Saddle height explained

Saddle height is the distance between the heart of the pedal axle and the top of the saddle. It is set by adjusting the seat post to an ideal height that balances comfort and power on the bike. Remember, adjusting your saddle height is important like making sure your helmet always fits!

Reasons to change

Saddle height is arguably the single most important adjustment on your bicycle. Incorrect saddle height can contribute to saddle discomfort and anterior and posterior knee pain. The poor leverage can also limit your power production. 

Adjusting your saddle height

There are many methods and formulas to find your “proper” saddle height. One of the best approaches is to establish it based on the rider’s individual ride characteristics and flexibility. If you are looking for recommendations, visit Josh at Jack & Adam’s Fredericksburg or with the crew over at Mellow Johnny’s. A bike fit specialist can explain your individual characteristics. They can also highlight what equipment may be contributing to any performance or biomechanical limitations. If you can’t make it to a bike fit there is still a solution. 

At home fix

Before your next ride, experiment at home with the “heel to pedal method.” This will get you in the ballpark range before you can see a professional. First, mark the current height. Then, put your bike on the trainer. Pedal around to make sure you are in the position you normally ride in. Place your heel on the pedal and pedal backward to reach the six o’clock position. Your knee should be completely straight. If your heel has trouble making contact with the pedal, the seat is too high. If your knee is bent it is too low. Make very small adjustments, in millimeters, until your leg is straight with the heel on the pedal.

Adapting to your new saddle height

When you’re done adjusting your saddle height, wrap a strip of electrical tape around the base of the post where it meets the seat clamp. Take measurements and keep them for future reference. Make the first few rides with your new saddle height short and sweet. It can take a few rides before your body fully adapts. It is good to get your bike fit looked at at least every few years or if you get new equipment such as new shoes or pedals. Pro tip: when you’re ready for longer rides, check out these 3 cyclist-friendly routes in Austin.

3 Cyclist-Friendly Routes in Austin to Ride

Get more comfortable on your bike when you ride these cyclist-friendly routes in Austin

Avoid traffic and become more comfortable on your bike on these cyclist-friendly routes. These 3 Austin spots are located throughout town, making them accessible to many cyclists. They’re ideal for enjoying a scenic route and mastering your bike handling skills. New to cycling or just purchased your first bike? Nice! The more routes you ride, the more familiar you will become with your new bike. If switching gears is new to you, using them can be tricky on your first few rides. Your bike presents a new feel. Leaning into the curves, becoming comfortable with the handling, and eating and drinking on the bike are all things you should practice. Pro tip: always check that your helmet fits before every ride.

Veloway

This 3-mile looped, one-way roadway is an ideal cyclist-friendly route. The Veloway is located in southwest Austin off LaCrosse Avenue and is closed to traffic. Parking is ample. Most noteworthy, this route is strictly for cyclists and rollerbladers, no runners or walkers (watch out for the wildlife!). The roadway is bisected with a continuous white line (slower cyclists keep to the right). Everyone moves in the same clockwise manner. You can relax a little knowing you don’t have to keep an eye out for non-wheeled individuals or riders coming in your direction. There are gorgeous views, a few tight turns, and some nice straightaways. Make sure you get into the right gear for a nice climb around Mile 2! Porta-potties are available.

Southern Walnut Creek Trail

The Southern Walnut Creek Trail begins at Govalle Neighborhood Park off Bolm Road in east Austin. It features nearly 7.5 miles of 10-foot wide concrete paths and splendid views. Like the Veloway, there is plenty of parking. Be advised, runners and walkers are allowed on the trail and traffic flows both ways. Ensure the other lane is clear and yell out “on your left” if you plan to pass others. There are a few road crossings along the trail to be aware of as well. Add 11 miles and some nice climbs to your bike ride when you preview the Rookie Tri and Jack’s Generic Tri bike courses! The trail rides alongside Daffan Lane and eventually hits Decker Lane.

Brushy Creek Regional Trail

Representing north Austin, the Brushy Creek Regional Trail reaches Round Rock to the east and Cedar Park to the west. Check out Stone Canyon Pool if you park to the east. Park to the west at Twin Lakes Family YMCA. Be aware of runners and walkers on this 6.75-mile multi-use trail that connects neighborhoods and existing parks. Traffic flows in both directions and there are multiple restrooms along the trail. Make sure the other lane is clear and yell out “on your left” if you plan to pass others. BCRT images from cedarparktexas.gov.

5 Bike Handling Skills Every Triathlete Should Know

Why triathletes should focus on bike handling skills

Competency with your bike handling skills gives you a decisive advantage over your competition. You gain the experience, knowledge, and practical ability to bike better and more efficiently. Success at a triathlon depends on how well you can gauge your environment. You’ll be surrounded by people, have to traverse across various kinds of terrain, and your journey will be long. That is why you should be completely comfortable with riding your bike for long hours. Here are five key bike handling skills that will help you become a more successful triathlete.

Pro tip: follow these steps before every ride to ensure your helmet fits.

The skills every triathlete should nail

  • Starting and Stopping

These are the most basic bike skills that you must master. Without having solid control over your bike, you could end up in an accident. If your bike uses clip-on pedals, then you should become familiar with them. Practice clipping and unclipping your pedals while riding until you perfect it.

  • Braking and Corners

Speed isn’t always your best friend when it comes to triathlon. This really applies to corners. Instead of pressing down on the brake once you reach the corner, try slowly braking as you near it. This way, you get time to think about the turn you’ll make and pre-emptively react to any dangers ahead.

  • Bike Handling and Shifting gears

Your timing with gear handling should be impeccable. You can achieve this by spending as much time riding on the roads as you can. The natural environment will teach you how to gauge the timing of your shifting. Once you develop this skill, you’ll begin to shift your gears more naturally as you get to your location.

  • Know your Cadence

The cadence in a bike is the number of times you can pedal per minute. Cadence is also known as pedaling rate. Triathletes should be able to maintain a consistent pedaling rate between 90-100 revolutions per minute. By practicing every day, you should be able to get to this level.

  • Drinking while biking

If you’re going to compete in a triathlon, your nutritional intake should be right. You don’t want to get dehydrated during the event nor do you want to feel anything less than your best. That is why you should practice grabbing your water bottle while your biking. You can do this by biking slowly at first, as you reach to your water bottle holder to grab the bottle, drink from it, and place it back. Over time, you will gain the confidence to do this with ease. Pro tip: you will spill and your bike will get dirty. Take the time to clean it with these simple steps!

These basic bike handling skills will take you from a cyclist to a real competitor. You need more than a better bike to succeed at triathlon. Developing your skills is what will help you achieve success. If you’re in the market for a new bike, make sure you know the differences between triathlon and road bikes.

Free Motivational Phone Backgrounds for Triathletes

Get ready to get inspired by these motivational backgrounds!

Do you find yourself thinking “I’ll just work out tomorrow” or putting off fixing the flat on your bike? When exhaustion sets in, maintaining that motivation to keep up with your fitness routine can be tough. Now is the time for action and we have just the thing for you.

There’s something about an inspirational quote/phrase/saying that will really get you back on track when you are unmotivated.  Whether you’re battling with stress or lack of motivation, an inspiring wallpaper or background is a great way to give you the extra boost you need to complete a workout. 

Here are some of our favorite inspirational sayings that never fail to keep us taking another step forward whenever our body is fighting us. Be inspired and get motivated to keep being the awesome triathlete you are.

These motivational wallpapers will be there to help you stay active and help motivate you to keep training and believing in yourself!

Right click to save the image and set it as your phone background or lock screen.

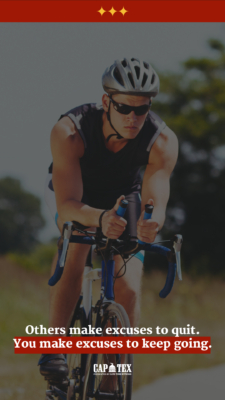
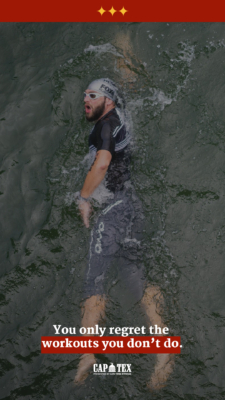
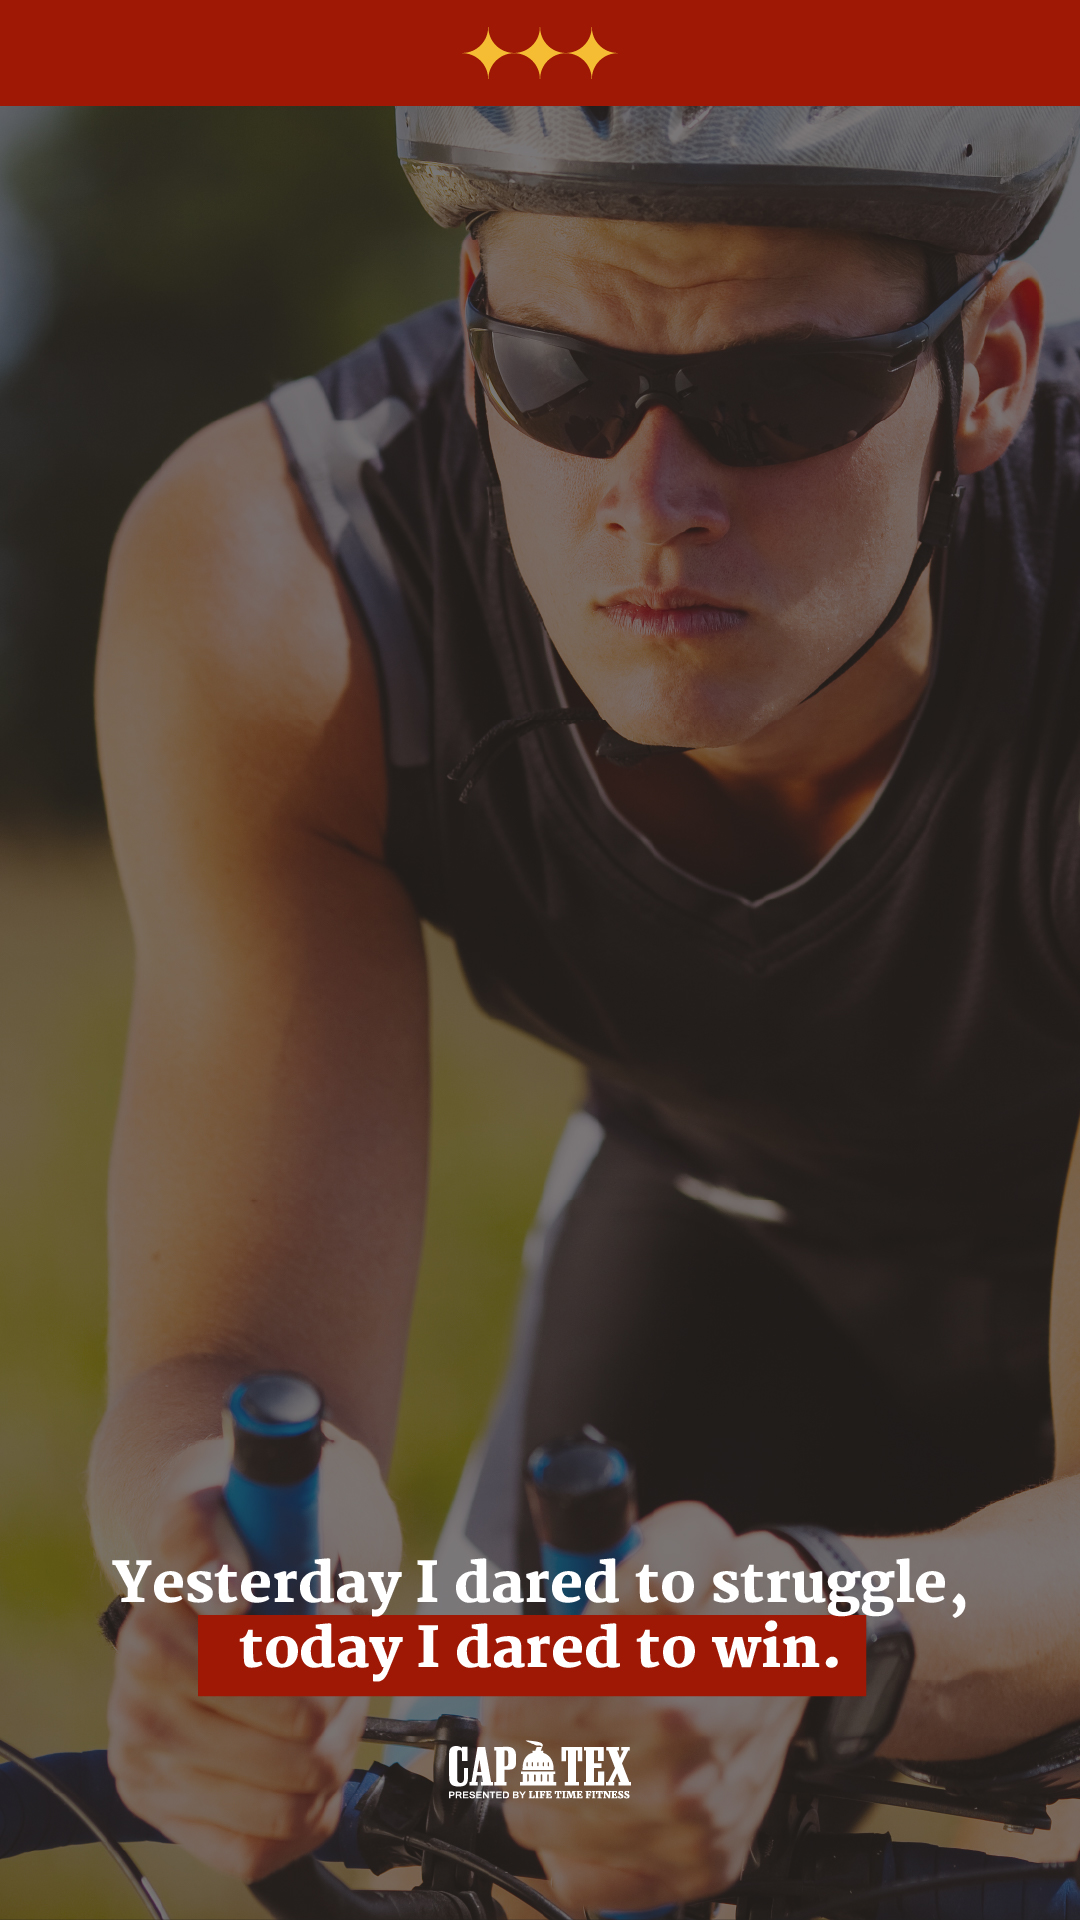
Motivational Triathlon Wallpaper Background for iphones CapTex Tri Austin, Texas Motivational Triathlon Wallpaper Background for iphones CapTex Tri Austin, Texas Motivational Triathlon Wallpaper Background for iphones CapTex Tri Austin, Texas Motivation Quote Triathlon Instagram Stories CapTex Tri Motivational Backgrounds CapTex Tri Motivational Background with cyclist CapTex Tri Motivational Background with cyclist CapTex Tri Motivational Background with cyclist CapTex Tri Motivational Background with swimmer Yesterday I dared to struggle, today I dared to win.

Get motivated, anywhere, anytime all at your fingertips with our motivational backgrounds.

  1. You only regret the workouts you don’t do.
  2. Yesterday I dared to struggle, today I dared to win.
  3. Don’t stop when you’re tired, stop when you’re done. 
  4. A journey of a thousand miles begins with one step
  5. It pains me to continue, but it hurts much worse to stop.
  6. All it takes is all you got.
  7. Others make excuses to quit. You make excuses to keep going. 
  8. Swim fast. Cycle strong. Run to win. 
  9. Triathletes aren’t born. They’re made.
  10. Swim. Bike. Run.

Share your Motivation

We are feeling motivated just writing this blog! Now before you run out the door to log some miles be sure to give yourself time to warm up. Starting off too quick can lead to injury and nobody wants that!

Do you have a favorite motivational quote? Share them with us and your fellow athletes in the community on our Facebook page or tag us on Instagram!

How to Know the Difference Between Triathlon and Road Bikes

Triathlon Bikes vs. Road Bikes: What’s the Difference?

When it comes to triathlon, a bike is, well, a necessity. How are you supposed to know which bike is best suited for you if you’re new to triathlon or limited on options? In this blog, we’re going to talk about two types of bikes: road bikes and triathlon bikes. Keep reading to understand some key differences between triathlon bikes and road bikes so you can decide which fits your style best for your triathlon journey.

How They’re Different

The most notable difference is the design, or geometry of the frame of each bike. Triathlon bikes have a steeper angle of the seat. Seats on a road bike are positioned at, on average, 78 degrees while the angle on a triathlon bike is closer to 72 degrees. The steeper angle allows the user to travel at a faster rate because you can bend your body down lower which reduces wind resistance. Another huge difference is that a triathlon bike includes aerobars instead of regular handlebars and many models have specially shaped frame tubing and special wheels. These design features are intended to minimize drag and increase speed which is important in triathlon racing.

Triathlon Bikes

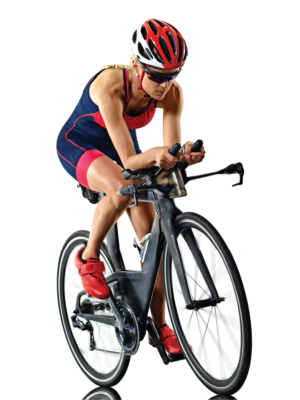
Tri bikes allow you to get into a more aerodynamic position by lowering your upper body and bringing your arms in-line with your torso. This is a result of the tilt of the seat in combination with aero bars that cause the cycler to lay lower on the bike with elbows rested. The goal here is to be in the optimal position for a smoother, faster ride.  Unlike other handlebar positions, aero bars serve as both handgrips as well as armrests, allowing you to significantly reduce the pressure on your wrists and hands throughout a race or riding for an extended amount of time.Key Traits of a Triathlon Bike

Key Traits of a Tri Bike

  • has aerobars
  • more aggressive frame geometry
  • can be more expensive
  • better for speed
  • more aerodynamic


Road Bikes

Road bikes are great when aerodynamics are not the top priority. These bikes are typically easy to maneuver during longer rides. Road bike frames are slim and also come with thin tires for riding on the road. The handles on road bikes offer different hand positions. Because of this, most people find road bikes to be more comfortable because you can alter your riding position as needed. For beginner triathletes, we recommended trying a road bike before a triathlon bike.

Key Traits of a Road Bike

Key Traits of a Road Bike

  • more versatile
  • less expensive
  • lightweight
  • can add clip-on aero bars
  • easy to customize


Now it’s Time to Make a Decision! Which Bike Will You Choose?

Now that you know the key differences between the types of bikes, take a moment to weigh your options before deciding which bike is better suited for your riding needs. Keep in mind: comfort is key, but you don’t want to compromise speed for comfort or vice versa. It’s all about finding a bike with a balance that works best for your body and your cycling needs. Whichever bike you choose, either will do for the day of your big race. Now, all there’s left to do is choose your bike, grab your shades, and start logging those miles!

Which type of bike do you prefer? Let us know on Facebook or Twitter and tell us what you decide to name your new set of wheels!

What It’s Like to Complete a Virtual Triathlon

Everything You Need To Know About Completing a Virtual Triathlon

CapTex Tri went virtual this year, and while we know that’s not ideal, that sure didn’t stop these two from accomplishing their tri goals! The best part about a virtual triathlon: you complete it at your pace, on your time. These die-hard triathletes were determined to complete the Virtual CapTex Triathlon or Duathlon anyways, and did just that! While their approach was different, Joey did the whole thing in one day and John did it pieced together, it’s fine to do a virtual triathlon/duathlon either way. Keep reading to see how much they enjoyed their Virtual CapTex Tri experience, and hopefully you’ll be inspired to join in on Virtual races when you can!

Joey Trimyer’s Virtual CapTex Tri Journey

I wasn’t planning on doing the CapTex virtual race because my hip has been bothering me for a while. On Thursday, I saw my doctor he ordered x-rays and prescribed a round of steroids for the inflammation. I hadn’t had the x-rays yet and the steroids hadn’t had time to take effect, but when I got an email promising homemade pickles if I took the challenge and wrote a report I was in.

Sunday afternoon I loaded my gear and drove over to Govalle Park. I like doing multisport workouts here because there are several flat running routes to choose from and you are right at the head of the Walnut Creek trail.

Completing the Virtual CapTex Tri
Joey’s Game Plan

My plan was to do the sprint du: 2 mile run, 13.3 mile bike and a 3.1 mile run.

The first run was uneventful. It was super humid and I did not enjoy running in air you could eat with a fork, but then I had waited until the afternoon so I got what I deserved. There was a decent amount of walking and my hip definitely started complaining, but I got it done and got my bike ready to ride.

12.3 miles on the bike went by fairly easily. I just rode along and didn’t worry about pace. The Walnut Creek Trail is a nice out and back and I got to turn around right before the big hill which is always a good thing. One drawback to delaying until the afternoon is that you tend to encounter more cyclists and hikers clogging the path, but overall, the congestion was minimal.

The final 5k involved more jogging and walking than I would have liked, but again I got it done. Virtual events hadn’t ever really appealed to me, but given the circumstances, it was nice to have a little motivation to get out and be active.

John Chung’s Virtual CapTex Tri

I decided to change things up a bit for CapTex Tri virtual, instead of scheduling a dedicated workout for each of the disciplines of the virtual tri and go as hard as I can, I would incorporate them into my normal weekly workouts. The time would be slower but it would be interesting to see by how much of a difference.

John’s Strategy

First Run

I chose the sprint duathlon option, a distance that would easily be incorporated into my weekly workout schedule. For the first 2 mile run, I timed it during my Tuesday morning run. The workout was a Fartlek workout. After the warmup, we went straight into the interval. We start with the effort level around half marathon, gradually increasing it as the interval becomes shorter. Time for the 2 miles was 16:25. Completing the run during his virtual triathlon

Bike Ride

The bike portion was timed during a ride out to see my co-worker son’s graduation parade. The ride was through town on neighborhood streets, with red lights and stop signs. I was amazed at how much time I spent waiting and not moving. My “moving” time for the 12.3 miles was a bit over 47 minutes, total time on the bike was more than 1 hour. I spent roughly 15mins or ⅓ of the time sitting at lights or stop signs not moving.

Final Run

For the final 3.1 mile run, the time was from my weekly longish run. The run was an out and back at 9ish total miles. Since I don’t own a GPS watch, I mapped out online the section of the run to figure out the start and stop of the 3.1 miles. Time was measured for both the out and the back, and it was within minutes of each other. I was pleased with the effort considering the out was downhill and the back was uphill. The 3.1-mile time was a bit over 24 minutes.

It was fun to mix in some higher effort intervals into my routine workout to mix it up a bit and keep it interesting.

Go Virtual, Join the Fun!

As you can see, these guys made the most of their time during their virtual tri. After all, it’s a fun way to switch up your fitness routine. Also, a fun challenge if you’re for a new way to get out and be active. Since a virtual tri is completed on your own time, at your own pace, the level of intensity is all up to you.  If you participated in the Virtual CapTex Tri this year, tell us about it! We’re on Instagram, Facebook, and Twitter or tag us at #CapTexTriVirtual. We would love to hear about your experience!

Importance of Warming Up and Cooling Down

Warm-Up and Cool Down: The Basics

We know that each workout should start with a warm-up and end with a cool-down, but more often than not, athletes tend to skip one or both. Especially when pressed for time. Not incorporating a warm-up and cool-down into your training can be detrimental to your overall performance when it comes time for race day. While also puts you at the disadvantage of a much higher risk of injury. Just like giving your car time to warm up before cruising at 65 mph, your body needs this time to get in a higher gear for more intense workouts or fitness activities. Keep reading to know the importance of warming up and cooling down during your CapTex Tri training.

Why You Should Warm-Up

A warm-up before a training session or race is essential for preparing your body and mind for a workout session. The main point of a warm-up is to increase your body core temperature and muscles. Warming up will not only help you to perform better, but it will also protect your body from injury. A good warm-up gets your blood flowing and gives you a chance to get energized for the rest of your session. It also helps increase the range of motion to your joints and muscles, which should allow your muscles to feel less stressed and stiff when you start. A dynamic warmup should aim to increase blood flow to the areas which will be working and to wake up the nervous system throughout the body.

A guideline to a general warm-up routine would include:

Jogging, biking, etc. for about 5 minutes to just get your blood flowing and get those muscles and joints moving. You want to work at a comfortable pace that’s easy to moderate. For the bike, a good warm-up should consist of five to 10 minutes of easy spinning, and then slowly increasing to the gear you wish to complete your session in. This really helps “open up” your body before getting into the more strenuous part of your workout.

Why You Should Cool-Down

Don’t come to an abrupt stop when completing your exercise, especially if it has been high intensity. Instead, you should cool-down by exercising at a lower intensity than the main session to bring your body temp and heart rate back down to pre-exercise levels. The cool-down should last around five to 10 minutes no matter what discipline you are training for that day. Cooling down helps to gradually decrease your heart rate and get rid of the metabolic waste from your muscles.
Mentally, cooling down also allows you some space to reflect on your performance and gives you some time to set you up for the rest of the day. Don’t underestimate the importance of this! Pro tip: Add some stretches to your cool down while your muscles are warmed up for one of the best ways to improve your overall flexibility and mobility while also reducing post-workout pain.

Bottom Line

Group Warming Up and Cooling DownAdding a warm-up and cool down into your fitness routine is a simple, yet proven way to maximize your benefits when working out. The warm-up gives your body a chance to prepare for your session while the cool-down then helps you focus on slowing your breathing and return to your normal heart rate. Rather than seeing it as an optional part of your workout, think of warming up and cooling down as part of your session to get the most out of all the hard work you’ve put in!