Posts

How Can I Speed Up My Triathlon Transitions?

A triathlon is a competition with three sports, which means there are two points in the race where you must transition from one sport to the next. It can take a lot of practice to get good at transitioning between the sports, but there are things you can do to make it faster!

We made a list of some simple strategies can that can help you speed up your triathlon transitions.


Visualize a Plan & Practice on it

Triathletes should be ready with a plan and train themselves accordingly beforehand. You should practice rigorously and leave no room for error. Learning to execute the plan perfectly will enable you to have quick transitions.

Getting the Wetsuit Off Faster

Applying a lubricant to your body before putting on the wetsuit will enable you to slide out of it easily during the first transition. Locating the zip cord quickly and kicking off the suit as soon as possible saves a lot of time.

Only the Essentials

Take things that are absolutely essential. Skipping unnecessary items reduces the number of tasks to be done and saves time.

Be Quick With the Helmet

Your helmet should be kept unfastened prior to the race. Make proper adjustments so that it fits your head and can be removed comfortably. Train yourself to secure the helmet on your head as quickly as possible.

Use This Bike Shoe Trick

Fastening your shoes to the pedals of your bike expedites the process of transition. Thin rubber bands can be used for this purpose. Keep the shoes fully loosened so that you can sit on the bike and put them on swiftly. 

Running With the Bike

In the transition zone between swimming and cycling, you are not allowed to ride your bike. Practice running safely and smoothly while holding your bike. By clearing this distance quickly you can deduct some seconds from your overall timing.

Putting on the Running Shoes

You can sprinkle some talcum powder on your running shoes to facilitate a smooth entry of your feet into the shoes. Swap your ordinary shoelaces with speed laces or lace locks.

Maintain Balance

Some of these strategies like wearing shoes while sitting on the bike may seem a little difficult to achieve. But proper training can help you achieve the perfect balance. Along with quick execution, steadiness is also important. Do not move too fast, maintain proper balance.

Study the Racetrack Properly

Have the map of the racetrack in your mind. Repeatedly play the whole scenario in your imagination and prepare yourself to take the right step at the right time.


Training your body and mind for faster triathlon transitions gives you an edge over others, which is why triathletes should incorporate transition practice and the suggestions above into their tri training sessions. 

Preparing for Open Water: Breathing Drills

You signed up for a triathlon and chances are you are probably doing 99% of your training in a swimming pool.  Breathing can be a challenge for many swimmers, which can be exaggerated in open water where conditions may differ.  Challenges with open water include turbulence, missing a breath due to waves, running into other swimmers, or starting off the swim too fast before realizing you haven’t taken a breath yet.  

You can easily combat a lot of fear of open water swimming through simple drills while training in a swimming pool. Doing breath work will help prepare you for the uncertainties of open water. There is also the added benefit of oxygen capacity which can also help you on the bike and the run.

Our amazing ambassador and swim coach, Trisha Stavinoha, has put together 3 simple workouts that will improve your breathing and have you feeling calm and race-ready. 

The“3-5-7”

I like to use this workout to help swimmers relax their breathing, improve their oxygen capacity and prepare them for missing a breath or two.  

3-5-7 refers to how many strokes you take between breaths while swimming. This pattern requires you to use bi-lateral breathing.

Bilateral breaking means that you are breathing on both sides of your body. If you breathe only on one side, you can develop overuse injuries and have a lopsided stroke, as well as be more likely to veer to one side. This plus a current can really throw you off course requiring you to sight more which will cause your legs to drop and slow you down.  

Bilateral breathing is step one in preparing you for breathing in open water.  If you don’t currently breathe bilaterally, now is the time to start. Breathing every 2 strokes is too much and every 4 is not enough over a longer distance.

Here is your lesson…breathe on both sides starting with every three strokes. You will feel awkward the first couple of swims, but the following workouts will help.  You can do these workouts as a warm-up or cool down to longer swim sets.

You can print the following workouts and laminate them so you have them by the pool during your swims.

Workout 1

This workout will get you comfortable taking longer times between breaths.

Swim 25 meters breathing every 3 strokes. For the next 25 meters breathe every 5 strokes. Then the next every 7 stokes. Then ladder back down 7, 5, 3 the same way. 

Version 2: Do the same stroke count but over 50 meters instead of 25.

150-300 meters total (6 x 25 or 6 x 50).

Workout 2

This workout will help you learn to relax after missing a breath or catching your breath if you started off too fast.

Swim 4 x 75-meter set repeats (300 meters total).

For the first set, You will breathe every 3 strokes for the first 25 meters, then 5 for the second 25 meters, then back down to 3 for the final 25 meters. So we will call this 3, 5, 3 stroke workout. For the following sets, you will do the same but change your breathing pattern accordingly. 

The second is every 5, 3, 5 strokes.

The third sight is every 3, 7, 3 strokes

The final set is every 7, 5, 3 strokes. 

Workout 3

Continuously breathe every 3, 5, 7, 3, 5, 7, etc strokes for 200 meters non-stop. 

If you are not ready for the 7-stroke interval of the workout, not to worry, but keep trying!  Make sure you are breathing in through your mouth, out through your nose.  When I do the 7-stroke interval I take a deep breath in, spit out any water, hold my breath for 5 strokes then let the air out of my nose for the last two strokes before I breathe in again.  

With some practice and dedication, you’ll have these breathing drills mastered in no time, and be ready for the open water at your next triathlon. 


Trisha Stavinoha, MS, RD, CSSD, CSCS

Masters Swim Coach

Surge Strength Dryland Coach 

Understanding Lactate Threshold

LACTATE THRESHOLD EXPLAINED

The burning, aching sensation that accompanies intense efforts is all too familiar to athletes. This feeling can also occur when bikers begin to increase their mileage and biking pace. Most athletes have probably heard the terms lactic acid or lactate threshold thrown around by coaches. What do these terms actually mean? Lactate was originally believed to only be produced when the body lacks oxygen. It’s now known you produce lactate even at rest. Far from the cause of fatigue, lactate is shuttled around the body to areas where it is needed as a fuel source such as the heart, muscles, brain, and liver.

During high-intensity training, muscle contractions result in a build-up of metabolites and depletion of glycogen (the fuel inside muscles). This is when lactate is associated with fatigue. At rest and during low-intensity activity, lactate doesn’t build up in the muscles. It is shuttled to areas where it is needed faster than it is produced. Lactate threshold is the point at which the rate of production of lactate is greater than the rate of removal from the muscles. Athletes can only sustain exercise above this threshold for a limited amount of time before exhaustion. Pro tip: this is great information for boosting your mental toughness.

WHY YOU SHOULD KNOW ABOUT THIS

While lactate does not directly cause fatigue, it is still the best metric available for detecting when the body shifts away from mostly aerobic metabolism to rely more heavily on anaerobic metabolism. Anaerobic metabolism can only be sustained for a short period of time before fatigue occurs. Studies show that lactate threshold, or the point at which this transition occurs, is the best predictor of overall endurance performance abilities. If two athletes have the same VO2max, but one athlete can maintain a higher fraction of that VO2max without build up of metabolites (i.e. lactate, hydrogen ions), the athlete with the higher lactate threshold will always win. It’s an objective performance metric that gives invaluable information about your endurance abilities.

Dr. Allen recommends athletes measure their lactate threshold at the beginning of the training season to get a baseline. This can be used to establish training zones unique to their individual physiology, optimize performance, and avoid overtraining. Additionally, he recommends athletes come in for testing once every 3-4 months. This allows the team to monitor training progress and reestablish training zones. As the racing season approaches, the lactate threshold pace can be used to determine exact pacing strategies, no matter the distance. For example, marathoners usually set their race pace right around their lactate threshold. Measuring your lactate threshold gives you the ability to establish your race pace while knowing it’s truly what you’re capable of.

HOW THE MEASUREMENT IS PERFORMED

Lactate threshold can be performed in a clinical setting or in the field depending on the athlete’s preference. Ascension Seton Sports Performance adheres to the most stringent COVID-19 policies. They are also happy to offer the service outdoors if athletes would prefer that. The test involves either running on a treadmill or outdoor track or cycling on a stationary ergometer. As you exercise at increasing intensities their team measures the changes in various physiological parameters. This includes changes in lactate as measured from a drop of blood from the finger or changes in expired gases collected from a mask over your mouth.

ABOUT DR. JAKOB ALLEN

Dr. Allen received his Doctoral training from the nationally ranked University of Texas at Austin. He was an 8x All-American collegiate swimmer at Stanford, American Record holder, NCAA and Pac-10 Champion, and 2x Olympic Trials qualifier. Dr. Allen is now an avid cyclist and triathlete, frequently placing in the top-5 overall amateurs in Central Texas triathlons. He is driven to bring about the greatest potential of all athletes whether you are a weekend warrior or an Olympian.

Dr. Allen currently serves as the Sports Scientist for the Austin Bold FC team in addition to his work in the clinic. He believes that exercise remains one of the best ways to improve every physiological system in the body throughout the lifespan. Whether it’s helping prevent changes in mental acuity or improving muscle function, the benefits of exercise continue to be supported by scientific studies. Dr. Allen specializes in designing exercise training programs for improving muscle and cardiovascular health for aging wellness and masters athlete performance.

Habits of a Successful Triathlete

Become a successful triathlete when you practice these 8 habits

To be a triathlete you need to have the basics of swimming, biking, and running down. But to become a successful triathlete (whatever that means to you/ whatever your goals may be) there are some other lifestyle changes you can make to really be successful. There are a few habits you can adopt to help you get there that already line up with your goals. Keep reading to discover the habits successful triathletes have in common.

Do your research/PREPARE

Find the right race for you. If you’re new to the sport, don’t go for a longer distance tri. Start slow and build your way up to your desired event distance. Will you need a wetsuit? Is your race even wetsuit legal? What are the benefits of a race being USAT certified? There’s a lot to learn, like knowing the difference between triathlon and road bikes. Proper preparation can reduce unexpected surprises that may come your way during training or on race day. 

Pace yourself

Don’t go full force when you’re first training or just getting back into training after offseason. Find a training plan and follow that as your guide. Be willing to make training tweaks if needed.

Know how to fuel

Nutrition during training and during the race has a huge impact on the way you can expect to perform come race day. Make sure you’re following the right nutrition plan for your body and the event distance you signed up for. 

Give Your Gear the TLC it needs

Take care of the gear that takes care of you. Follow instructions for proper care and give your bike frequent tune-ups to maximize performance. Clean gear is happy gear!

Know what you can control

You’ve done everything you can to make sure this race goes perfectly. You did a gear check, you packed the perfect race day bag and you’re ready to go! Then a storm hits. Don’t let this get you down or let you feel defeated before the race even starts. You know you’ve spent the time training and just remember to focus on what you can control for a good race. All the other athletes there are experiencing the exact same thing. Pre-race jitters are real and they can throw even the best athletes off track. If you know your jitters on race morning are going to be bad, work on a couple of exercises or something to help you distract yourself from the nerves on race morning. We see this all the time and its a really great way to center yourself before starting the swim!  

REST!

Take some time off when you need it! Listen to what your body is telling you so you don’t overdo it and risk an injury. 

Enjoy healthy food

Switching up your diet for healthier options is a really simple yet effective way to help you during your training. Of course, you don’t have to stop eating what you really love, but adjusting to a cleaner, healthier lifestyle is great for maintaining energy during workouts as well as leaving you feeling good too. 

Successful triathletes stay in the moment

Take it one day at a time. Everyone has good days and bad days and training for a triathlon is no exception. Remember why you started this journey or what inspired you to and focus on that when you’re having a tough day. Be kind to yourself and find ways to keep yourself motivated to reach the goal of crossing that finish line!

Easy Steps to Check Your Helmets Fit

Get the right fit and know that your helmet is fully protecting you

An unexpected fall from a bike can happen at any time with the potential to result in brain injury. The good news is that a properly-fitted helmet will reduce this risk. 

Helmets come in a variety of sizes depending on the manufacturer. Even though they are sized they will come with a fine-tuning dial so that you can adjust the helmet to fit your head specifically. Take the time to check your helmet before every ride. Your life is worth it and could depend on how your helmet is set up. Use these tips on how to make sure you have the right fit for your bike helmet. 

Size

The first thing you should adjust when choosing a helmet is the fit pads or adjuster ring. The helmet needs to be snug around your head to effectively protect you. It should not be too tight where you feel pressure and not too loose that there is any wiggle room. It should not be able to move from side to side or slip back off your forehead. If needed, add more fit pads to get a secure fit. If your helmet has an adjuster ring, modify the circumference until the helmet is fitted properly for your head. 

Positioning

The next thing to determine is how high the helmet should sit on your head to protect your head on all sides, in case of a fall. Two finger-widths should be visible on your forehead. You can also decide if your helmet fits properly by looking up. You should be able to see the rim or front edge of the helmet when you do so without interfering with your vision.

Pro tip: you should always wear protective lenses with your helmet, so make sure there is enough room to wear them both comfortably.

Straps

Cyclist wearing a helmet properly with instructions to check proper helmet fit for safty
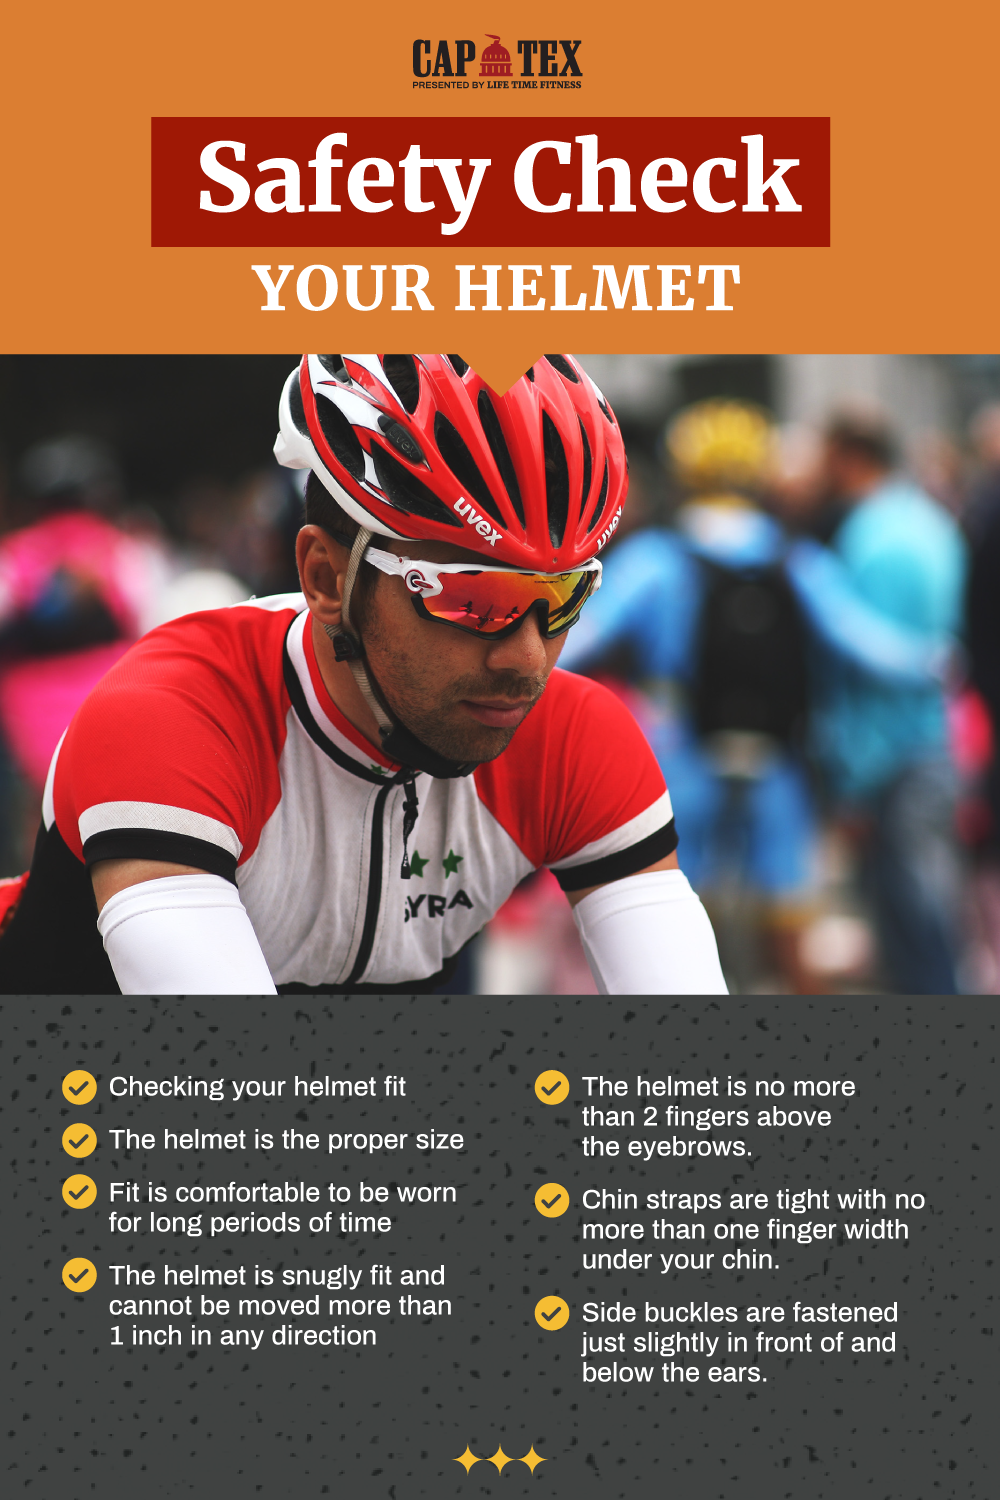
To keep the helmet in place, the next step is ensuring the chin straps are long enough to reach under your chin and can be tightened securely. This part is especially important because you do not want to be dealing with an ill-fitting helmet during your next tri. 

The “Y” shaped strap needs to fit under your ears comfortably and buckle under your chin without being too tight. Your helmet should not be able to move more than an inch in any direction. After you buckle the chin strap, it should be secured in the correct position.  You should not be able to fit more than one finger under the chin.

These straps can sometimes loosen with time so it is important to check your helmets fit before each ride. 

Comfort

While comfort is not a safety feature in itself, having a helmet that you find comfortable will mean that you wear it more often. While every helmet is the same safety rating, you will find more expensive helmets have more vents. If you have long rides planned during hot weather, having these extra vents to cool you off might make you more comfortable. 

Bicycle helmets only work if you wear them correctly. Helmets should always be replaced if they are in a crash. Yes, even if it is a “small one”, if your helmet makes any contact it could be compromised and should be replaced.

If you’re riding alone or going on a group ride, use these tips when shopping around for your next helmet to make sure you are as safe as possible on your future rides.

Checking your helmet fit for safety:

  1. The helmet is the proper size
  2. Fit is comfortable to be worn for long periods of time
  3. The helmet is snugly fit and cannot be moved more than 1 inch in any direction
  4. The helmet is no more than 2 fingers above the eyebrows. 
  5. Chin straps are tight with no more than one finger width under your chin.
  6. Side buckles are fastened just slightly in front of and below the ears. 

Training Tweaks to Improve Your Run Performance

Improve your run performance for your next tri

If you’re looking to improve your overall endurance when it comes to running, you’ve come to the right place. In this blog, we’ll discuss a few ways to improve your run performance for your upcoming triathlon. 

Adjust Your Current Running Plan

Start by evaluating your current running abilities to establish your starting point and work from there. Then, you can determine how you will need to make adjustments to your run training. No matter how seasoned you are as a triathlete, preparation for the run leg is very similar. The most notable difference in advanced triathletes and new triathletes is the distance and duration of the runs. If you’re new to running or just got into running, try a high-intensity run to test your endurance capacity. Try to keep your pace consistent when doing so. Keep track of how long you were able to run at that pace without becoming fatigued. This is your starting point.

Improve Your Endurance

For beginners, maintaining the right pace for extended periods can be tough. We see this when athletes start too fast and fade at the end during a workout. An excellent way to learn how to maintain a new, faster pace is to do track-type workouts on a treadmill. Treadmill sessions are good for this because you’ll become used to holding your pace while dealing with fatigue. Short intervals on a treadmill while adjusting the incline can lead to an increase in your pace and speed without having to exert a ton of energy. This will especially help if your triathlon run has a hilly run course. During this time of focusing on your run, increase the number of run workouts you do in a week. Pro tip: be sure you’re warming up and cooling down for each session for the maximum payoff!

Get Used to Running on Tired LegsRunning on tired legs

Improve your run by incorporating brick workouts into your training and get out for a longer, more challenging run than usual after hard swimming or cycling sessions. Completing swimming or cycling workouts back to back with a run workout will help to familiarize your body with the movement patterns and expectations you’ll need for the day of your race. Because the run is the last leg of the tri, it’s important that you get used to running on tired legs.

Takeaway

Once you have mastered the running basics and established a starting point, you’ll start seeing improvements. Integrating these tips will likely increase your resistance to fatigue and improve your ability to run for longer periods of time at a steady pace. These tips are useful to triathletes because completing better quality speed training will lead to faster run time, and overall finishing time. With thought and planning, now is the perfect time to improve your triathlon run performance like never before.

USAT-Certified: Why It Matters and How It Benefits You

Benefits to CapTex Tri being USAT-Sanctioned and having a USAT-Certified Race Director

When researching triathlon events, you’ve probably come across the terms USAT-sanctioned and USAT-Certified Race Director. So what exactly do these terms mean and why should you care about the benefits of a USAT Certified race?

USAT-Sanctioned

USAT is an acronym for USA Triathlon, which is the governing body of the sport of triathlon in the United States. Additionally, since triathlon is a sport featured in the Olympic games, USA Triathlon is part of Team USA. Therefore, they must adhere to the rules and guidelines of the US Olympic and Paralympic Committees. When you see the phrase “This is event is sanctioned by USAT” or “This event is USAT-sanctioned” it means that the event organizer has completed a thorough questionnaire regarding how they plan to conduct the event. They have also received approval from the USA Triathlon Events staff. As a potential participant in a triathlon, the term USAT-sanctioned should give you confidence. You are registering for an event that meets minimum standards for safety and fairness.  

Participant benefits of a USAT-sanctioned event:

benefits of a USAT-sanctioned eventAs a participant in a USAT Sanctioned event, you must have a current membership with USA Triathlon.  Annual memberships and one-day memberships (purchased per event) are available. Most adult triathlons in the United States are sanctioned by USA Triathlon. This helps the individual event. It also helps keep the national governing body strong so that it can support race directors, growth of the sport initiatives, and Olympic and Paralympic athletes.

USAT-Certified Race Director

Additionally, USA Triathlon has created a Race Director Certification program that goes above the standard sanctioning process. Race Directors who choose to become certified go through approximately 16 hours of coursework and complete an exam. They are required to recertify every two years and complete a background check through NCSI and take SafeSport training. The recertification and coursework ensures that the race director remains current in their knowledge and engaged in the triathlon community.  There are two levels of Race Director Certifications. Level II is the most difficult to obtain and retain. Only the most qualified race directors reach this level. Dan Carroll of High Five Events was among the first race directors to achieve Level II certification. He has maintained that certification since the program was created in 2007.

Choose USAT Certified for Your Upcoming Tri

So the next time that you register for a triathlon like CapTex Tri, look to see if the event has the benefits of being USA-sanctioned and if it is produced by a Certified Race Director. That way you’ll know you’re safe in good hands and you’re in for an awesome experience!

Importance of Warming Up and Cooling Down

Warm-Up and Cool Down: The Basics

We know that each workout should start with a warm-up and end with a cool-down, but more often than not, athletes tend to skip one or both. Especially when pressed for time. Not incorporating a warm-up and cool-down into your training can be detrimental to your overall performance when it comes time for race day. While also puts you at the disadvantage of a much higher risk of injury. Just like giving your car time to warm up before cruising at 65 mph, your body needs this time to get in a higher gear for more intense workouts or fitness activities. Keep reading to know the importance of warming up and cooling down during your CapTex Tri training.

Why You Should Warm-Up

A warm-up before a training session or race is essential for preparing your body and mind for a workout session. The main point of a warm-up is to increase your body core temperature and muscles. Warming up will not only help you to perform better, but it will also protect your body from injury. A good warm-up gets your blood flowing and gives you a chance to get energized for the rest of your session. It also helps increase the range of motion to your joints and muscles, which should allow your muscles to feel less stressed and stiff when you start. A dynamic warmup should aim to increase blood flow to the areas which will be working and to wake up the nervous system throughout the body.

A guideline to a general warm-up routine would include:

Jogging, biking, etc. for about 5 minutes to just get your blood flowing and get those muscles and joints moving. You want to work at a comfortable pace that’s easy to moderate. For the bike, a good warm-up should consist of five to 10 minutes of easy spinning, and then slowly increasing to the gear you wish to complete your session in. This really helps “open up” your body before getting into the more strenuous part of your workout.

Why You Should Cool-Down

Don’t come to an abrupt stop when completing your exercise, especially if it has been high intensity. Instead, you should cool-down by exercising at a lower intensity than the main session to bring your body temp and heart rate back down to pre-exercise levels. The cool-down should last around five to 10 minutes no matter what discipline you are training for that day. Cooling down helps to gradually decrease your heart rate and get rid of the metabolic waste from your muscles.
Mentally, cooling down also allows you some space to reflect on your performance and gives you some time to set you up for the rest of the day. Don’t underestimate the importance of this! Pro tip: Add some stretches to your cool down while your muscles are warmed up for one of the best ways to improve your overall flexibility and mobility while also reducing post-workout pain.

Bottom Line

Group Warming Up and Cooling Down
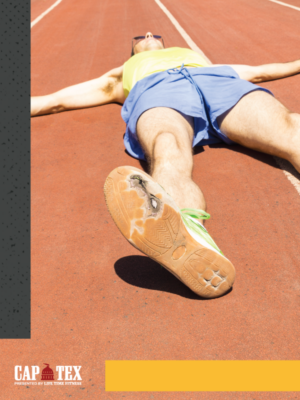
Adding a warm-up and cool down into your fitness routine is a simple, yet proven way to maximize your benefits when working out. The warm-up gives your body a chance to prepare for your session while the cool-down then helps you focus on slowing your breathing and return to your normal heart rate. Rather than seeing it as an optional part of your workout, think of warming up and cooling down as part of your session to get the most out of all the hard work you’ve put in!

Why You Should Wear Sunglasses When Riding Your Bike

Wearing sunglasses when riding isn’t just for looking cool

In addition to looking hip, wearing sunglasses regularly can have several benefits. This applies to running, hanging at the beach, driving a car, and especially when riding your bike. If you have some sweet specs that make you look cool, all the better! We recommend the UA Igniter II Sunglasses by Under Armour.

Protectionprotecting her eyes during a bike ride!

  • Dust and debris – You will encounter visible and non-visible projectiles whether you’re riding the trails or commuting to work. Wearing sunglasses when riding your bike to protect your eyes from flying debris might be the most important reason. Flying debris doesn’t care if you’re riding solo or with a group. Cars kick up rocks, bugs are everywhere, even other cyclists can kick up debris on the side of the road. Dust is everywhere. It’s often stirred up by cars, other riders, or Mother Nature. Glasses won’t protect you from all the dust, but it’ll surely help. If you wear shades when riding then you know you have to clean them after every ride.
  • UV exposure – Repeated exposure to UVA and UVB radiation from the sun will have negative consequences on your vision. Protecting your eyes is critical to the short-term, and in this case, the long-term health of your eyes. Make sure your lenses are polarized and have a coating that absorbs the sun’s rays. Lenses also need to be a neutral color, not crazy tints and extreme colors. Your goal is to protect your eyes while replicating what your eyes see naturally.

Safety

  • Clearer view – The correct lenses will help clear your view when cycling. Cyclists have a large amount of information to process when riding. You’re watching for vehicles, intersections, signaling turns, avoiding potholes, tracking other cyclists and runners, the list goes on. Any time you can eliminate distractions you free up the ability to pay attention and process more information. Proper lenses will also help reduce the sun’s glare. Glare could shine in your eyes from street signs, windows on buildings, or the hoods of cars. Proper fitting sunglasses will also reduce the amount of wind that hits your eyes. Wind alone can cause dryness and irritation when riding.

Next time you’re logging some miles for your CapTex Tri training, be sure to wear a pair of sunglasses when riding your bike. Even a cheap pair will provide protection until you can get a pair that you’ll love. Taking care of your eyes now will pay dividends down the road.