Posts

What to Eat and When During a Triathlon

This post was originally published on https://zone3.us/blogs/blog/what-to-eat-and-when-to-eat-during-a-triathlon

By Glen Gore, former pro triathlete and current coach.


If ever there was a hot topic of debate, it comes in the form of triathlon nutrition and more importantly, nutrition intake on race days.

What exactly do you need to eat and drink, and when?

To start this editorial piece, we need to agree that there is no magic formula that will work the same for everyone. Each of us differs in our body mechanics and the way we work with nutritional absorption that it’s almost impossible to pinpoint one clear plan that will work for everyone.

Having said that, you can still use sound advice and at least start on the right track. For us, nutrition is another important discipline in the sport of triathlon. The fastest and most finely tuned sports car in the world will go nowhere fast if there is no fuel in the tank. Similarly no matter how hard you have trained and prepared if you are going to race on zero nutrition, your body (engine) is going to slowly come to a complete stop and falter.

Rule no 1 – don’t neglect your nutritional intake on race days. It’s quite easy to “forget” to drink and eat when you are giving 100% during an all-out race effort. Just know that sooner or later, you will start to run out of energy stores and that is when racing becomes anything but fun.
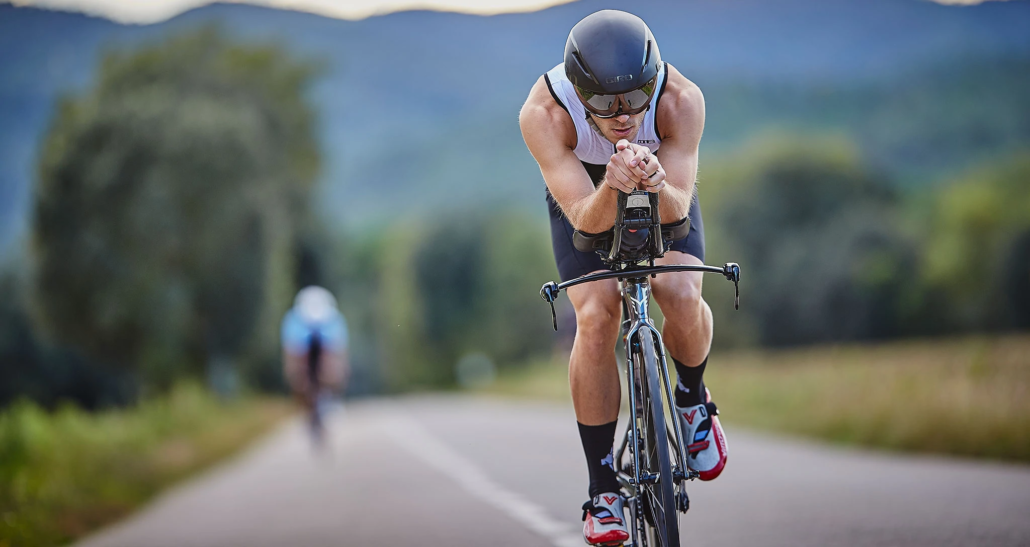
Fuelling is different depending on the distance

A Sprint Distance triathlon race is completely different from an Olympic, Half, or full Ironman distance event. These distances require different amounts of training loads to be fully prepared to take on the challenge. The same rule applies to how you fuel the body during an event that takes less than 60 mins compared to an event that may take up to 17hrs.

Sprint

A sprint race normally lasts anywhere between 52 minutes for the PRO’s up to say 1.5-2hrs for the backmarkers. Most of the time – depending on weather conditions, you can get away with next to nothing in the form of intake over the sprint distance. Some hydration via a small sports bottle and perhaps 1-2 gels for the bike and run should sufficiently see you through the event.

I have often found that my best results over the sprint distance come when I go in “light” – not much food in the tank – that empty feeling but with just enough energy stores from the previous night’s meal or early morning small breakfast to see me through the event.

Hydration is always important – you never want to start any event “thirsty” so make sure the fluid levels are topped up in the form of small sips. A huge intake of fluids just before the start is not a suggested best practice for an optimum result over short distances. 

These should be taken as pure guidelines and not as hard-fast rules – these suggestions come from trial and error on the battlefield.

Olympic

When you compete in an event that spans longer than 2hrs, then you need to start looking at a more efficient fueling system.

The Olympic distance event can take anywhere from 2hrs to 3hrs plus – eating and drinking now becomes more important. If you are not fuelling adequately over the 40km cycle, you will feel the burn when you enter the hunt on the 10km run.

Some athletes require less nutritional intake than others while others may require more fluid intake. The best place to learn what your body requires is by trial and error. The more you race over this distance, the more you will learn as to what you require and when. 

Half-Distance

When the event time spans over 4hrs in duration right up to 8h30, then you will need a tried and tested method, worked on in training, to see you adequately fuelled in a race that covers a whopping 113km.

The many trained brick sessions will give you a firm indication of what will work for you on race day and what will not. It does become quite expensive when your training sessions have to mimic race days but as the saying goes, practice makes perfect. The more you practice eating and drinking over the longer distances in training, the easier the transition will be from training days to half-distance racing days.

Full IM Distance

So many athletes have “bonked” or “hit the wall” over the full IM distance simply because they ran out of fuel. The body was prepared, the mental side was in place but the “engine” for some reason was neglected.

Firstly consider that a normal day at work would require someone to eat breakfast, lunch, and dinner. Now add in 3.8km of swimming, 180km of biking, and a 42.2km marathon to top it all off, covered in a time that may span at least 17hrs. Now it becomes apparent just how much food and drink is required to keep you moving along at an optimum level.
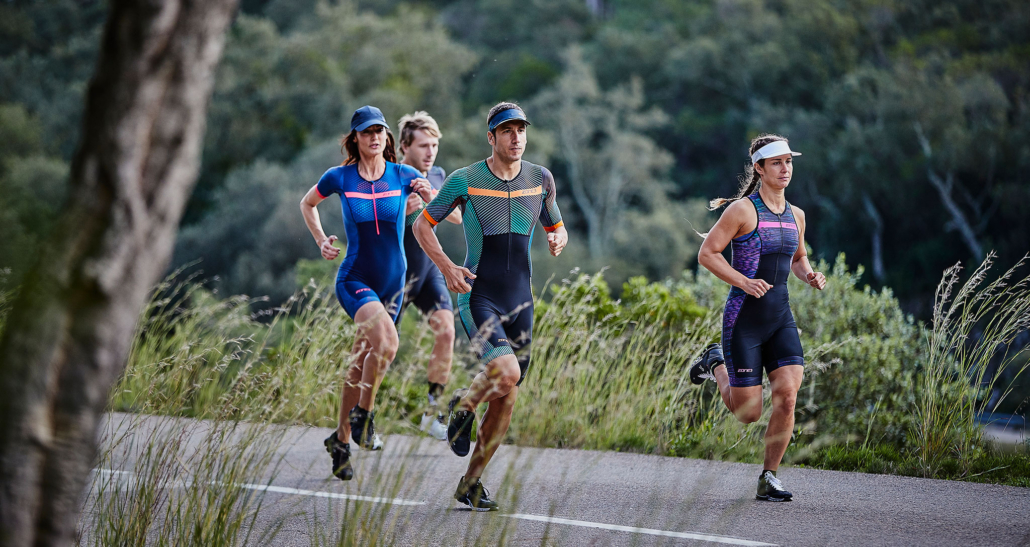
Best Fuelling Tactics during Training

  • Find a product that works and more importantly is cost-effective. Just because it’s expensive does not mean it’s better.
  • Trial and Error – the brick session will help you develop a suitable war plan for race days. If it works in training, more than likely it will work during the race.
  • Make sure you re-fuel within 15-30 minutes after a strenuous workout. As athletes, we often neglect the post-training refueling strategy. Remember you are not only eating for today but you are eating for tomorrow’s training session as well.

Best Fuelling Tactics during Racing

  • Eat small bits and drink small sips all the time – especially during the longer races – the reason being to keep the tank on full at all times and not deplete it before you think about replenishing. 
  • Cut up your energy bars into small bite-size pieces – this is much easier to eat and digest while on the move.
  • Get in some solid food sources quickly once you are done with the swim. The longer the duration of the event, the more advisable to start the cycle with something a little more substantial than just a gel.
  • Don’t overload your bike with too much nutrition and hydration. This makes that very expensive bike extremely heavy. The bigger races have more than an ample supply of nutrition along the way – make use of it even if you need to stop briefly and take some on-board.
  • Don’t start the run in a hurry. T2 over long distances is a time where you need to relax a little and consume some solid nutrition before you head out onto the run. Whatever time you lose in transition you will more than makeup, especially when the run distance is over a full standard marathon.

Common Fuelling Mistakes

  • Eating only when hungry – this means it’s already too late. It will take you a long time to get back those lost energy stores, time which you won’t have during the race days.
  • Drinking only when thirsty. Once again, this is too late – if you are feeling thirsty you are already on the way to partial dehydration. Keep on sipping water and juice so you never get to feel that thirst.
  • Trying new stuff on race day. Stick to what you know and what you have trained on.
  • Don’t alter the nutritional plan. What you practiced in training, do the same on race day. Don’t change the formula, there is a good chance it won’t work.
  • Drinking too much. This can be a problem worse than drinking too little so take the race weather conditions on the day into account and drink what is normal for you.

Nutrition is important, a successful race plan always has a well thought out nutritional plan that goes along with it, and remember, it takes trial and error to perfect – good luck!

Click here to shop ZONE3.

How Can I Speed Up My Triathlon Transitions?

A triathlon is a competition with three sports, which means there are two points in the race where you must transition from one sport to the next. It can take a lot of practice to get good at transitioning between the sports, but there are things you can do to make it faster!

We made a list of some simple strategies can that can help you speed up your triathlon transitions.


Visualize a Plan & Practice on it

Triathletes should be ready with a plan and train themselves accordingly beforehand. You should practice rigorously and leave no room for error. Learning to execute the plan perfectly will enable you to have quick transitions.

Getting the Wetsuit Off Faster

Applying a lubricant to your body before putting on the wetsuit will enable you to slide out of it easily during the first transition. Locating the zip cord quickly and kicking off the suit as soon as possible saves a lot of time.

Only the Essentials

Take things that are absolutely essential. Skipping unnecessary items reduces the number of tasks to be done and saves time.

Be Quick With the Helmet

Your helmet should be kept unfastened prior to the race. Make proper adjustments so that it fits your head and can be removed comfortably. Train yourself to secure the helmet on your head as quickly as possible.

Use This Bike Shoe Trick

Fastening your shoes to the pedals of your bike expedites the process of transition. Thin rubber bands can be used for this purpose. Keep the shoes fully loosened so that you can sit on the bike and put them on swiftly. 

Running With the Bike

In the transition zone between swimming and cycling, you are not allowed to ride your bike. Practice running safely and smoothly while holding your bike. By clearing this distance quickly you can deduct some seconds from your overall timing.

Putting on the Running Shoes

You can sprinkle some talcum powder on your running shoes to facilitate a smooth entry of your feet into the shoes. Swap your ordinary shoelaces with speed laces or lace locks.

Maintain Balance

Some of these strategies like wearing shoes while sitting on the bike may seem a little difficult to achieve. But proper training can help you achieve the perfect balance. Along with quick execution, steadiness is also important. Do not move too fast, maintain proper balance.

Study the Racetrack Properly

Have the map of the racetrack in your mind. Repeatedly play the whole scenario in your imagination and prepare yourself to take the right step at the right time.


Training your body and mind for faster triathlon transitions gives you an edge over others, which is why triathletes should incorporate transition practice and the suggestions above into their tri training sessions. 

Incorporate Mindfulness Into Your Training

Whether you’re training to be faster or are simply exercising to relax and destress, practicing mindfulness during your physical activities in order to better connect with your body is a great way to achieve a balanced state of mind and find joy in your training.

Often when we hear the word ‘mindfulness’ or ‘meditation’, we envision someone sitting on a yoga mat by the beach, practicing slow and thoughtful movements. But a mindful state can and should be achieved through any activity, especially in triathlon training.


What Do We Mean When We Say Mindfulness?

The simplest definition is the practice of being aware and present at the moment. When it comes to training it means we are being mentally connected to our bodies and train our minds and bodies together as one unit. When we only focus on our physical self without also training the mind, we can create a disconnect between the two, causing negative thoughts and a higher perceived exertion during an event.

Why is Mindfulness Important?

Mindfulness has been shown to help improve focus, decrease stress levels, and increase self-awareness. If you’re looking for a way to improve your performance, incorporating mindfulness into your training is definitely something you should consider. With mindfulness, you can learn how to be more patient, focused, and relaxed during physical activity- leading to better results overall.

How to Incorporate Mindfulness

1) Slow Down

Endurance activities are actually very conducive to achieving a meditative state of mind, and it starts with slowing down and focusing on your form. It’s important to be precise during swimming strokes and land lightly when running so that you can move more efficiently–don’t get frustrated if thoughts wander off while doing this! When we catch ourselves thinking about something else, just relax and refocus back onto the specific element of our movement.

2) Remember Your Goals

Also helpful while practicing mindfulness during workouts, is to have a goal for your workout and keep it top of mind. Maybe today’s goal is to add an extra mile on your run, or maybe it’s to focus on getting your core stronger. Whatever your reason may be for doing your workout, keep it locked in the forefront of your mind to help remind yourself why you’re doing the activity you’re doing.

3) Practice Belly Breathing

Another helpful tip is one we can learn from babies, which is the act of belly breathing. Inhale slowly, extending the belly outward. This helps draw the breath into the lower lungs and extend the diaphragm. By fully inflating the lungs, you’re also taking in the maximum amount of oxygen possible with each breath. These deeper inhalations keep the body relaxed and help you pace yourself and move most efficiently.


Mindfulness can be an important tool in your training arsenal, especially if you struggle with stress or focus. By practicing being aware and present, you can improve your connection to your body and train both the body and mind as one unit. When it comes to competition or a challenging workout, this can be the difference between success and failure. Give mindfulness a try and see how it impacts your performance!


5 Must Try Yoga Poses for Triathletes

Adding yoga to your life offers many benefits such as increasing mobility and range of motion, preventing injuries, and relieving pain. Hopefully, you already have some kind of stretching routine included in your training. If you don’t, the offseason is the perfect time to try some new things! We’ve compiled a list of the 5 most beneficial yoga poses for triathletes to combat the wear and tear we put our bodies through during training.

1. Downward Facing Dog

Purpose: This is a common pose but is especially beneficial for a triathlete with any built-up tension in your calves and feet from running. Also great for cyclists with lower back from riding. Hold this pose to help build strength in your shoulders, arms, and chest.

How To: Start on your knees with your hands out in front of you, push your bottom up until you feel a stretch in your calves and the bottom of your feet. Straighten your legs if you can, but the main thing to remember in this pose is to keep your back as flat as possible.

Downward Dog

2. Crescent Lunge

Purpose: This pose utilizes all the muscles in your body but focuses on getting a stretch in the back of your legs, groin, and hip flexors while building strength in the front of your legs. Practicing this pose will open your range of motion in your legs and hips.

How To: Start in a standing position, and go into a lunge until your front leg is bent at a 90-degree angle. Keep your core tight to remain balanced as you lift your arms above your head. During this motion, you will feel a stretch in your triceps and chest.  Take deep breaths as you hold this position, switch to your other leg, and repeat.Crescent Lunge

3. Pigeon Fold

Purpose: The Pigeon Fold is a great yoga pose for opening up your hips and getting a deep stretch in your hip flexors and glutes. Good for athletes who spend more time cycling to loosen and realign their hips after putting in hours on the bike.

How To: Start in a Downward Facing Dog, bend your right knee and sweep your leg down and place it on the mat beneath you. Lower yourself to a comfortable seated position with your left leg behind you as you feel the stretch in your quad and hamstring. Hold your chest high to focus the stretch in your legs. Pigeon Fold

4. Cross-Legged Twist

Purpose: This pose focuses on stretching your lats, shoulders, and neck. This will help reduce any pain you may have from constantly rotating your body side to side during your freestyle swim stroke.  Holding this pose will lengthen and help mobility along your spine which is great for increasing your range of motion during your swim training.

How To: Begin on the floor with both legs out in front of you. Bring your knees to your chest and place the bottom of your feet on the ground. Slide your left foot on the ground under your right leg to rest your foot beside your right hip. Bring your right arm across your body and place it against the inside of your left knee. Push slightly to twist your body until you feel a stretch in your lats and shoulder. Cross Legged Twist


5. Bridge Pose

Purpose: Offers relief from pain caused by the position you are in when training on your bike. Good stretch for your quads, chest, and abs while also strengthening your glutes and hamstrings. You will feel this pose strengthens your back muscles to reduce or prevent pain you may have from running and cycling.

How To: Lie flat on your back with your knees bent with feet on the floor shoulder-width apart. Place hands on either side of your body to help keep yourself balanced. Press your feet and arms firmly into the floor and push your hips up off the ground.Bridge Pose


These yoga poses work muscles that are often neglected in the repetitive movements you do while preparing for a triathlon. Get the most out of your training when you add in these 5 yoga poses that are best for triathletes before or after your next workout!

How to Fix a Squeaky Bike

You manage to get ready, on your bike, and ready to zen out for some miles when all of a sudden you hear it – squeak… squeak… squeak… AND IT IS SUPER ANNOYING!

Many of us have been annoyed by having a squeaky bike from time to time. The question is, what is it and how do we stop it? There are a few things we can re-tighten and re-grease that make a world of a difference.

First, check your pedals. They do come loose and will make a creaking noise. You should re-tighten and re-grease your pedals periodically, especially if you travel or ride in the rain. Using a bike specific pedal wrench will make it easy to get enough leverage to tighten the pedals properly.

Second, check your shoes and cleats. They may need to be lubed and tightened. Loose cleats can not only lead to annoying squeaks but can also be the cause of pain while riding. Speedplay’s are notorious for having noisy and “sticky” cleats and pedals when they are not lubed properly.

Third, your brakes and wheel alignment. Check both your front and back brake to make sure they are centered. Realign the brakes by pushing them with your hand. If you find your wheel leaning to one side, simply release the quick release lever and let the wheel center itself.

Forth, your chain. Rub your fingers along your bike chain. You should have a light amount of chain lube come off on your fingers. While it may have some color to it, it should not be gritty or thick. If it is, it’s time for a bath or possibly a new chain. If it is dry, be sure to get some chain specific lube on it.

Fifth, your saddle. Check the railing on your seat. If your seat is broken or the railings are loose they will move each time you pedal. If this is the source of your squeaky bike, then don’t keep riding. A loose or broken seat can be dangerous.

Last but not least, check the bolts on your crank arms and cranks. They do come loose and need re-tightening and re-lubing from time to time. If you are uncomfortable with tightening any of these, just stop in your local bike shop. The mechanics are happy to help with a quick safety/squeak check.

Bike transportation is a big culprit when it comes to stuff getting knocked loose. Take your time when loading and unloading your bike. It is also a good idea to do a pre-ride safety check each time you ride. Also, lube is your bike’s friend and it’s not a bad idea to add it to your saddle bag.

Now you can stop the squeaking and enjoy your noise-free ride.


Understanding Lactate Threshold

LACTATE THRESHOLD EXPLAINED

The burning, aching sensation that accompanies intense efforts is all too familiar to athletes. This feeling can also occur when bikers begin to increase their mileage and biking pace. Most athletes have probably heard the terms lactic acid or lactate threshold thrown around by coaches. What do these terms actually mean? Lactate was originally believed to only be produced when the body lacks oxygen. It’s now known you produce lactate even at rest. Far from the cause of fatigue, lactate is shuttled around the body to areas where it is needed as a fuel source such as the heart, muscles, brain, and liver.

During high-intensity training, muscle contractions result in a build-up of metabolites and depletion of glycogen (the fuel inside muscles). This is when lactate is associated with fatigue. At rest and during low-intensity activity, lactate doesn’t build up in the muscles. It is shuttled to areas where it is needed faster than it is produced. Lactate threshold is the point at which the rate of production of lactate is greater than the rate of removal from the muscles. Athletes can only sustain exercise above this threshold for a limited amount of time before exhaustion. Pro tip: this is great information for boosting your mental toughness.

WHY YOU SHOULD KNOW ABOUT THIS

While lactate does not directly cause fatigue, it is still the best metric available for detecting when the body shifts away from mostly aerobic metabolism to rely more heavily on anaerobic metabolism. Anaerobic metabolism can only be sustained for a short period of time before fatigue occurs. Studies show that lactate threshold, or the point at which this transition occurs, is the best predictor of overall endurance performance abilities. If two athletes have the same VO2max, but one athlete can maintain a higher fraction of that VO2max without build up of metabolites (i.e. lactate, hydrogen ions), the athlete with the higher lactate threshold will always win. It’s an objective performance metric that gives invaluable information about your endurance abilities.

Dr. Allen recommends athletes measure their lactate threshold at the beginning of the training season to get a baseline. This can be used to establish training zones unique to their individual physiology, optimize performance, and avoid overtraining. Additionally, he recommends athletes come in for testing once every 3-4 months. This allows the team to monitor training progress and reestablish training zones. As the racing season approaches, the lactate threshold pace can be used to determine exact pacing strategies, no matter the distance. For example, marathoners usually set their race pace right around their lactate threshold. Measuring your lactate threshold gives you the ability to establish your race pace while knowing it’s truly what you’re capable of.

HOW THE MEASUREMENT IS PERFORMED

Lactate threshold can be performed in a clinical setting or in the field depending on the athlete’s preference. Ascension Seton Sports Performance adheres to the most stringent COVID-19 policies. They are also happy to offer the service outdoors if athletes would prefer that. The test involves either running on a treadmill or outdoor track or cycling on a stationary ergometer. As you exercise at increasing intensities their team measures the changes in various physiological parameters. This includes changes in lactate as measured from a drop of blood from the finger or changes in expired gases collected from a mask over your mouth.

ABOUT DR. JAKOB ALLEN

Dr. Allen received his Doctoral training from the nationally ranked University of Texas at Austin. He was an 8x All-American collegiate swimmer at Stanford, American Record holder, NCAA and Pac-10 Champion, and 2x Olympic Trials qualifier. Dr. Allen is now an avid cyclist and triathlete, frequently placing in the top-5 overall amateurs in Central Texas triathlons. He is driven to bring about the greatest potential of all athletes whether you are a weekend warrior or an Olympian.

Dr. Allen currently serves as the Sports Scientist for the Austin Bold FC team in addition to his work in the clinic. He believes that exercise remains one of the best ways to improve every physiological system in the body throughout the lifespan. Whether it’s helping prevent changes in mental acuity or improving muscle function, the benefits of exercise continue to be supported by scientific studies. Dr. Allen specializes in designing exercise training programs for improving muscle and cardiovascular health for aging wellness and masters athlete performance.

6 Best Places to Train in Austin

Here is a list of what we think are the 6 best places to train in Austin. We broke them down by favorite spots to swim, bike, and run. These are great for all levels of triathletes.

Swim

1.Big Stacy

Tucked back in one of Austin’s oldest neighborhoods, this pool has been keeping Austinites of all ages cool and entertained since the 1930s.  The best part is it is free to use year-round, with the added bonus of being heated during the winter months. There are a limited number of lanes so be prepared to share or come during non-peak hours.


2.Barton Springs Pool

Constructed in 1940, it has been a summer staple for many years and is known for being Austin’s no. 1 natural pool.  It’s easy to see why.  The 3-acre, spring-fed pool remains 68°F degrees year-round, making it a refreshing way to shake the heat. It is also a great way to practice open water swimming and swimming in a wetsuit. Get there as early as 5 am on weekdays to swim without the crowds.

Bike


1. South Walnut Creek Trail

The Southern Walnut Creek Trail is Austin’s first Urban Trail. Not a car in sight!  The trail is open for public use and begins at Govalle Park and ends in the vicinity of Johnny Morris Road and Daffen Lane. The trail is approximately 7.3 miles in length and consists of a 10′ wide concrete trail with 2′ shoulders. There are several creek crossings and trailheads on the trail. The lush surroundings can make seeing around corners difficult at times so this is not a great place for a speed workout.


2. Veloway

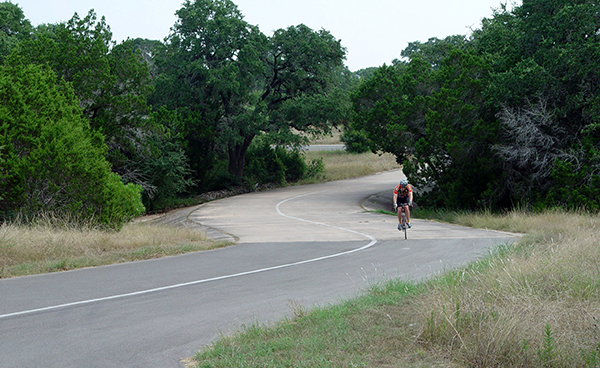
The Veloway at Circle C Ranch Metropolitan Park was constructed in the early ’90s and was the first facility of its kind in the United States.  The Veloway is a 23’ wide, 3.1 miles (5K) long bicycle tract that traverses the natural terrain.   People travel from all over the metropolitan region to cycle here on a daily basis. This path is great because it is for cycling and inline skating only. Still, be on the lookout for the rogue walker or slower cyclist, slower traffic keep to the right and always pass on the left.

Run

1.Violet Crown

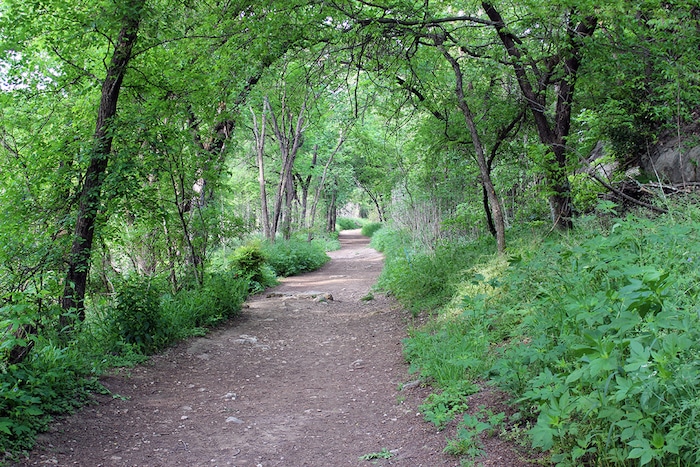
After years of strategic land acquisition and planning, the first six-mile segment is now open and the VCT is on its way to becoming the longest trail of its kind in Central Texas. Once complete, the 30-mile trail will provide a unique recreational experience as it passes through the urban wildlands of the Barton Creek Wilderness Park, the City of Sunset Valley, and eventually into Hays County. Be sure to bring your own water and prepare for off-road bathroom situations as there are no water fountains or bathrooms on the trail.


2. Ann and Roy Butler Hike and Bike Trail at Lady Bird Lake

The go-to spot in Austin. The urban path meanders along the water’s edge and passes by skyscrapers, neighborhoods, ball fields, and cultural attractions. With the completion of the Boardwalk portion of the Trail in June 2014, the trail no offers a full 10-mile loop. The different street crossings at Lamar, 1st Street, and Congress make scenic and convenient crossovers for making this distance you are looking for. With more than 1.5 million visits a year, the 10-mile trail is Austin’s most recognized and popular recreational area.

Celebs You Didn’t Know Were Triathletes

Ever wondered which of your favorite celebs share the love of triathlon with you??

The world of triathlon knows no bounds. With an estimate of 4 million people participating every year, the sport is constantly growing and adding new athletes to the mix. We see every type of person enter triathlons, but have you ever thought if any of your favorite stars are triathletes too? See if your favorite star made the list with these celebs that TRI!

1. Shawn Colvin

Shawn Colvin, Triathlete

Image: Getty Images

Shawn Colvin is a Grammy award-winning artist that was bitten by the tri-bug back in 2001. “It’s true, once you do one of them you want to do more!” She regularly participates in triathlons all over the country and was even at the 2019 Kerrville Triathlon Festival where she sang the national anthem to kick-off Saturday and Sunday of race weekend! Colvin holds a special place in our hearts because she’s one of our very own.


James Marsden

Image: Noel Vasquez

2. James Marsden

James Marden is a well-rounded actor, known for his roles in 27 Dresses, Enchanted, and X-Men, is also a regular participant of triathlons all over the States. He is constantly keeping up with his training and participates in various triathlons every year to maintain his muscular physique. Marsden says triathlons are a great way to stay in shape year-round so he is camera-ready at all times.  He even missed the 2017 Emmy awards because it conflicted with one of his triathlons!


3. Jennie Finch

Image: Matt Peyton

Jennie Finch is one of the best softball players the sport has ever seen. After retiring from her 11-year career earning her 2 Olympic medals, she hung up her cleats and traded them in for running shoes. She began by entering marathons before she participated in the 2013 New York City Triathlon as a way to get back in shape after her third child was born. She crossed the finish line of the Olympic-distance (we see what she did there) with an impressive time of 2:51:15!


Triathlete Gordon Ramsay

Image: Clara Molden

4. Gordon Ramsay

Hell’s Kitchen’s overlord, Gordon Ramsay, took his skills out of the kitchen to participate in the 2013 Hawaii Ironman. Since then, Ramsay has competed in several marathons, half-ironman, and other races throughout his journey. The competitive environment of the events is what keeps him coming back year after year. He trains throughout the year to keep up with his physical condition alongside his wife, Tana.


Jennifer Lopez Triathlete

Image: Jean Lacroix


5. Jennifer Lopez

Jennifer Lopez was inspired to begin her journey as a triathlete for a good cause. She participated in her first-ever triathlon at the Nautica Malibu Triathlon in 2008 to raise money for Children’s Hospital Los Angeles. New to the sport, she had to spend most of her time training for the swim portion. On race morning, her training certainly paid off with her finishing time being 2 hours, 23 minutes and 28 seconds!


Matthew McConaughey

Image: Gregg Deguire

6. Matthew McConaughey

Austin local Matthew McConaughey is no stranger to the sport, having completed several triathlons since his journey began. McConaughey started his journey in 2008 by completing an Olympic-distance tri. He showed off his athleticism by earning a time of 1:43:48. How would you like that for your first ever triathlon time?


7. Claire Holt

Claire Holt Triathlete

Image: Chris Polk

Best known for her role in the TV series The Vampire Diaries, Claire Holt was instantly hooked on triathlons. Like the other star triathletes, Claire Holt is a regular participant of the celebrity division at the Nautica Malibu Triathlon. Once she discovered her love for the sport, she found herself returning every year with the goal of improving her performance! She achieved her goal at the 2012 event by taking home first place with a time of one hour and 44 minutes.


Image: Noel Vasquez

8. Joel McHale

Joel McHale is the newest celeb to become a triathlete. He was especially impressed with his defeat of fellow triathlete and star, James Marsden, during the run portion of the race. He plans on returning to race triathlon again next year and plans on recruiting other celebs to join him!


9. Megyn Price

Megyn Price

Image: Chelsea Lauran

Rules of Engagement star, Megyn Price, started her triathlon career because she wanted to have a goal that would test her physical strength.  She finds it important for females to have goals that are based on something more than how you look. Her efforts paid off when she took home first place at a 2010 triathlon with a time of 2:10:23, just 3 years after her first tri! Way to go!


Brendan Hansen Triathlete

Image: Jamie Squire

10. Brendan Hansen

Brendan Hansen is best known for his professional swimming career. During all the chaos of winning 6 Olympic medals, breaking world records left and right, and starting a family, Hansen managed to find time to become a triathlete! Hansen competed alongside our Rookie Triathletes in 2010 and continues to participate in triathlons in and around Austin, Texas. When asked about his triathlon journey, Hansen told The Orange County Register, “Triathletes are great. They’ve got a screw loose, the way they train. But at the finish line, there is a beer tent. How great is that?” We couldn’t have said it better ourselves!


These folks may be superstars, but at the end of the day, their triathlon journey started just like everybody else. Maybe we can invite them to join us on the course this May with the CapTexTri!


Simple Steps to Eliminate Bike Shifting Issues

Derailleur Adjustment Tips

Experiencing issues shifting when hitting the road to log some miles on your bike? You most likely need to make some adjustments to your derailleur. Shifting problems are a common occurrence for cyclists and triathletes. So we’re going to give you some expert tips to fix your shifting problems yourself. Get ready to expand your bike mechanic skills and learn these quick, easy steps to adjust your derailleur and put a stop to your shifting issues! 

What’s a Derailleur?

A derailleur is a device on your bike that changes gears by moving the chain from one sprocket to another. There are several different styles and sizes when it comes to derailleurs. But when it comes to fixing shifting issues, the steps you should follow are often the same.

Derailleur Basics for Shifting Issues

Derailleur mechanics provide a simple way for you to dial in shifting in the middle of a ride. Although it’s easiest to make and check adjustments when the bicycle is supported in a repair stand, you can adjust your derailleur without any tools at all. 

If you suspect your derailleur may be damaged or bent, unfortunately, you won’t be able to fix this one yourself. You’ll need to take your bike to your favorite local bike shop to have a mechanic help you out. The following tips are for derailleurs that just need slight adjustments such as a tweak to the shifter, elimination of rubbing, or quieting that pesky squeaking sound. 

Identify the Problem

To adjust the derailleur, look at the point where the cable enters the rear derailleur. Here you’ll see a round, knob-like piece; that’s the cable adjustment barrel. This is used to tune the derailleur adjustment.

Standing behind the bike, turn the cable adjustment barrel either counterclockwise or clockwise in half-turn increments until the shifting hesitation is cured. The direction in which you turn your derailleur depends on what type of hesitation you’re experiencing.

The most common problem is slow-shifting into easier gears (toward the spokes) which is due to the stretching of the cable. But, it’s also possible that you’re experiencing difficulty with shifting into a higher gear, which means the cog isn’t allowing the chain to shift outward smoothly to the next gear.

So, which way do you turn it? Determine this to continue to your next steps to adjust your derailleur.

  • Experiencing slow shifting – turn the barrel adjuster counter-clockwise toward the spokes. This will tighten the space between the cogs or shifting increments.
  • Difficulty shifting into a higher gear – turn the barrel adjuster clockwise, away from the spokes to loosen the space between the cogs to allow for easier shifting.

Time to Adjust Your Derailleur

Commit this to memory to help you remember which way to turn the barrel adjuster the next time you experience shifting issues. 

  • If the derailleur is hesitating when shifting toward the spokes (the more common problem), turn the barrel toward the spokes (counter-clockwise). 
  • If it hesitates to shift away from the spokes, turn the adjuster away (clockwise) from the spokes. 
  • Turn it only a half turn, shift multiple times to check the adjustment, and repeat as needed to eliminate all hesitation. 

Pro tip: Be aware that there is a range of acceptable adjustments, so there may be more than one barrel adjuster position that results in good shifting performance.

No More Shifting Issues!

Now you have the right tips to adjust your derailleur back into place for a smooth ride with easy, noise-free shifting.  If you were experiencing trouble with your shifting, remember these tips to adjust your derailleur before your next ride. If you have a friend who is constantly dealing with shifting problems, help them out, and share this with them! Congrats! You have a mechanic you trust and know will keep you in good hands, YOU!

Now you’re ready to go and check out these fantastic cyclist-friendly routes in Austin.


Resistance Bands: How to Use Them Effectively

Add resistance bands to your training and learn to use them effectively

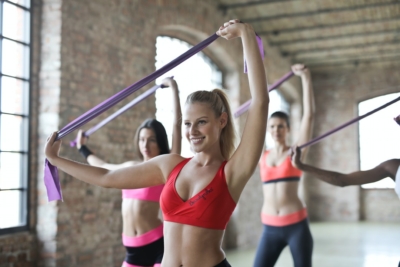
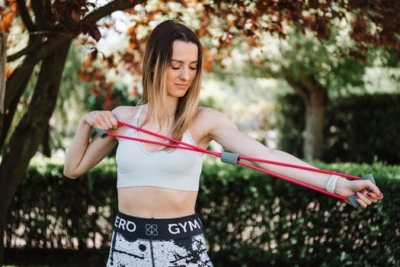
Resistance bands are known as workout bands or exercise bands. They’re used during training to build strength and increase flexibility. They can be beneficial whether you’re training for a triathlon or want another form of cross-training. They come in various lengths and different thicknesses. The two most common shapes you’ll encounter are flat and tubular-shaped resistance bands. The difference in shape and size helps people build strength in different areas of the body. Learn about the different types of bands. There are also a few exercises to get you started. They’re so easy you could complete them during your lunch break like these exercises.

Types of resistance bands

Therapy bands

Therapy bands are beneficial and have many uses.

Resistance bands were first used in physical therapy and rehabilitation. They still are, even though they’re now used in various ways during a workout. With a flat surface and no handles, therapy bands can be gentle on the body unless they bunch up and pinch the skin. They can be cut and tied together to create different lengths or used as one long piece.

Compact resistance bands

These tubular bands have two plastic handles and are typically longer than other bands. The additional length makes these bands ideal for upper- and lower-body workouts. The ability to strengthen most of the body makes these bands ideal for reaping the many benefits of cross-training.

Ring resistance bands

A small, tube-shaped ring with two soft handles on either side. It’s best used when working with the lower body. 

Figure 8 bands 

Figure 8 bands are good for strengthening the upper body.

These resistance bands come with two plastic handles that intertwine around each, giving the appearance of a figure 8. They’re shorter than other bands, making them a great tool for upper body strengthening. 

Fit loop bands 

These are also known as mini bands. Similar to therapy bands, they are a flat, continuous loop. However, they come as one piece and are not tied together. Use these during training to help you target specific muscles groups like the hips and glutes and improve your run performance.

Lateral resistance bands

Unlike the other bands with handles, lateral bands have velcro cuffs on either end. The cuffs can wrap around the ankle or the wrist, depending on the exercise. Best used with lower body workouts, strengthening the hips and thighs.

3 exercises to add to your training

Lateral band walk

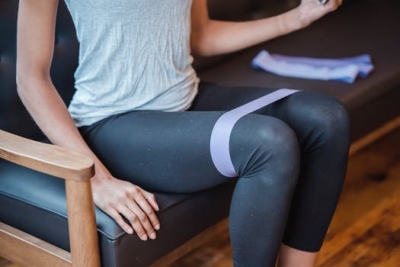
You can place the band above your knees for many lower body exercises.

Depending on the strength of the band, you can place it around your ankles and above your knees. Start with your feet shoulder-length apart. Extend your right leg out, place it on the ground, follow with your left leg. Repeat 10 steps to your right, then come back to the left. Best when using therapy bands (if tied together), fit loop bands, or lateral resistance bands.

Bicep curls

Hold the end of a band in either hand and put the other end underneath each foot. Lower your arms until they’re straight, then bend your elbows and raise your fists up. Repeat this for 10 reps. Best when using therapy or compact resistance bands.

Flutter kicks

This is a great core exercise. Lay down on your back on the ground or on a bench. Place your hands by your side or under your butt. Put a band around your ankles. Raise your feet a few inches off the ground, alternate kicking each foot 6-8 inches into the air. Repeat this for 10 reps with each leg. Best when using therapy bands (if tied together), fit loop bands, or lateral resistance bands. 

There’s no doubt you strengthen your body by swimming, cycling, and running. But working seldom-used muscle groups with resistance bands is just as important. It’ll allow other muscle groups the chance to recover as well. If you want to build a healthy physique with tone muscles, then resistance training could be exactly what you’re looking for.