Posts

What to Eat and When During a Triathlon

This post was originally published on https://zone3.us/blogs/blog/what-to-eat-and-when-to-eat-during-a-triathlon

By Glen Gore, former pro triathlete and current coach.


If ever there was a hot topic of debate, it comes in the form of triathlon nutrition and more importantly, nutrition intake on race days.

What exactly do you need to eat and drink, and when?

To start this editorial piece, we need to agree that there is no magic formula that will work the same for everyone. Each of us differs in our body mechanics and the way we work with nutritional absorption that it’s almost impossible to pinpoint one clear plan that will work for everyone.

Having said that, you can still use sound advice and at least start on the right track. For us, nutrition is another important discipline in the sport of triathlon. The fastest and most finely tuned sports car in the world will go nowhere fast if there is no fuel in the tank. Similarly no matter how hard you have trained and prepared if you are going to race on zero nutrition, your body (engine) is going to slowly come to a complete stop and falter.

Rule no 1 – don’t neglect your nutritional intake on race days. It’s quite easy to “forget” to drink and eat when you are giving 100% during an all-out race effort. Just know that sooner or later, you will start to run out of energy stores and that is when racing becomes anything but fun.
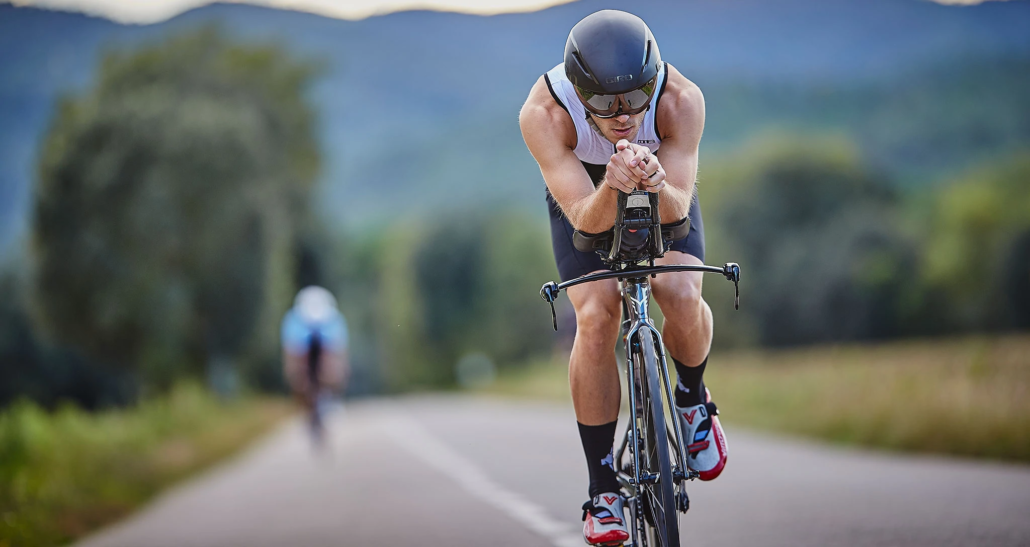
Fuelling is different depending on the distance

A Sprint Distance triathlon race is completely different from an Olympic, Half, or full Ironman distance event. These distances require different amounts of training loads to be fully prepared to take on the challenge. The same rule applies to how you fuel the body during an event that takes less than 60 mins compared to an event that may take up to 17hrs.

Sprint

A sprint race normally lasts anywhere between 52 minutes for the PRO’s up to say 1.5-2hrs for the backmarkers. Most of the time – depending on weather conditions, you can get away with next to nothing in the form of intake over the sprint distance. Some hydration via a small sports bottle and perhaps 1-2 gels for the bike and run should sufficiently see you through the event.

I have often found that my best results over the sprint distance come when I go in “light” – not much food in the tank – that empty feeling but with just enough energy stores from the previous night’s meal or early morning small breakfast to see me through the event.

Hydration is always important – you never want to start any event “thirsty” so make sure the fluid levels are topped up in the form of small sips. A huge intake of fluids just before the start is not a suggested best practice for an optimum result over short distances. 

These should be taken as pure guidelines and not as hard-fast rules – these suggestions come from trial and error on the battlefield.

Olympic

When you compete in an event that spans longer than 2hrs, then you need to start looking at a more efficient fueling system.

The Olympic distance event can take anywhere from 2hrs to 3hrs plus – eating and drinking now becomes more important. If you are not fuelling adequately over the 40km cycle, you will feel the burn when you enter the hunt on the 10km run.

Some athletes require less nutritional intake than others while others may require more fluid intake. The best place to learn what your body requires is by trial and error. The more you race over this distance, the more you will learn as to what you require and when. 

Half-Distance

When the event time spans over 4hrs in duration right up to 8h30, then you will need a tried and tested method, worked on in training, to see you adequately fuelled in a race that covers a whopping 113km.

The many trained brick sessions will give you a firm indication of what will work for you on race day and what will not. It does become quite expensive when your training sessions have to mimic race days but as the saying goes, practice makes perfect. The more you practice eating and drinking over the longer distances in training, the easier the transition will be from training days to half-distance racing days.

Full IM Distance

So many athletes have “bonked” or “hit the wall” over the full IM distance simply because they ran out of fuel. The body was prepared, the mental side was in place but the “engine” for some reason was neglected.

Firstly consider that a normal day at work would require someone to eat breakfast, lunch, and dinner. Now add in 3.8km of swimming, 180km of biking, and a 42.2km marathon to top it all off, covered in a time that may span at least 17hrs. Now it becomes apparent just how much food and drink is required to keep you moving along at an optimum level.
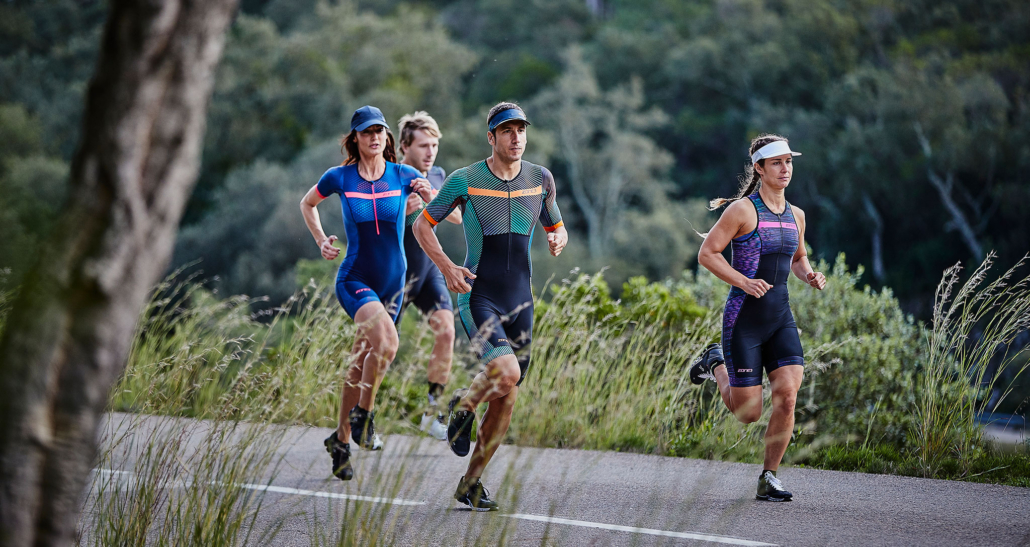
Best Fuelling Tactics during Training

  • Find a product that works and more importantly is cost-effective. Just because it’s expensive does not mean it’s better.
  • Trial and Error – the brick session will help you develop a suitable war plan for race days. If it works in training, more than likely it will work during the race.
  • Make sure you re-fuel within 15-30 minutes after a strenuous workout. As athletes, we often neglect the post-training refueling strategy. Remember you are not only eating for today but you are eating for tomorrow’s training session as well.

Best Fuelling Tactics during Racing

  • Eat small bits and drink small sips all the time – especially during the longer races – the reason being to keep the tank on full at all times and not deplete it before you think about replenishing. 
  • Cut up your energy bars into small bite-size pieces – this is much easier to eat and digest while on the move.
  • Get in some solid food sources quickly once you are done with the swim. The longer the duration of the event, the more advisable to start the cycle with something a little more substantial than just a gel.
  • Don’t overload your bike with too much nutrition and hydration. This makes that very expensive bike extremely heavy. The bigger races have more than an ample supply of nutrition along the way – make use of it even if you need to stop briefly and take some on-board.
  • Don’t start the run in a hurry. T2 over long distances is a time where you need to relax a little and consume some solid nutrition before you head out onto the run. Whatever time you lose in transition you will more than makeup, especially when the run distance is over a full standard marathon.

Common Fuelling Mistakes

  • Eating only when hungry – this means it’s already too late. It will take you a long time to get back those lost energy stores, time which you won’t have during the race days.
  • Drinking only when thirsty. Once again, this is too late – if you are feeling thirsty you are already on the way to partial dehydration. Keep on sipping water and juice so you never get to feel that thirst.
  • Trying new stuff on race day. Stick to what you know and what you have trained on.
  • Don’t alter the nutritional plan. What you practiced in training, do the same on race day. Don’t change the formula, there is a good chance it won’t work.
  • Drinking too much. This can be a problem worse than drinking too little so take the race weather conditions on the day into account and drink what is normal for you.

Nutrition is important, a successful race plan always has a well thought out nutritional plan that goes along with it, and remember, it takes trial and error to perfect – good luck!

Click here to shop ZONE3.

When to Wear a Wetsuit

Sometimes because of colder water temperatures, a tri suit is not enough and triathletes will opt to add a wetsuit to wear during the swim. Wearing a wetsuit has many advantages and a few disadvantages, so what are they? When are they helpful or even required? Should I go for a two-piece or one-piece? We created this wetsuit guide to help you make the right decision for your event.

Remember the golden rule: Nothing new on race day. Unless you have an opportunity to swim in the exact wetsuit you will wear on race day at least once before, it is advised to not try something new the day of the race. 

Types of wetsuits

A wetsuit is a neoprene insulation suit made for warmth during the swim portion of a triathlon. Triathlon wetsuits are different from other water sports wetsuits and are regulated by governing bodies like USAT. Wetsuits for a triathlon cannot be more the 5mm thick.

The two most common types are sleeved and sleeveless. Full-sleeved wetsuits are better for the coldest water temperatures and are the most efficient. Sleeveless is great for cooler water temperatures but lets in water which can cause drag. Short “jammer” styles have gained in popularity for short-distance triathlons since they are the easiest to put on and take off.

In terms of cost, sleeveless is usually less expensive. Less expensive wetsuits will also typically have uniform neoprene while the materials in high-end suits will vary across the body and incorporate more technology into the fabric.

Remember, you want the fit to be snug, but not restrict breathing or inhibit arm movement.

Why Wear a Wetsuit?

“Free” Speed

Wearing a wetsuit is one of the easiest ways to get faster swim times. The suit allows the wearer to swim faster and reduces the effort the swimmer has to put in. The better the swimmer the less advantage the wetsuit may show. A swimmer can expect to save anywhere from a few seconds to tens of seconds per 100 meters. Usually, the longer the distance the more the savings are noticeable. With less exertion in the water, you will feel less of an energy drain as you are heading up to T1.

Warmth

The wetsuit can provide warmth to the swimmer in the cold water. If you are sensitive to the cold the coverage can be great at making you more comfortable in the water. Wetsuits are highly advised for water temps between 50 to 65 degrees.

Why Not Wear a Wetsuit?

Cost

Wetsuits can be a big investment costing anywhere from just over $100 to almost $1000. You can check with local stores to see if they rent suits or try and find second-hand wetsuits through Facebook groups. It is also important that you take proper care of the wetsuit as the neoprene can degrade over time.

Constricting

Wetsuits should fit snugly without restricting breathing. That said, some people still find them to cause a claustrophobic feeling especially once they start warming up from swimming. Practicing is important so you can see how your body reacts. If you panic or feel uncomfortable in a full sleeve, you might try a sleeveless wetsuit or wetsuit jammers.

Added Time For Taking Off

While they may save you time while swimming, you still have to get out of the wetsuit. This can add minutes to your transition time.

So, to sum it up, for a short swim of a super sprint or sprint triathlon, the time savings of wearing a wetsuit can be negligible. It is really a toss-up to how you feel on race morning and what you have trained for. Pack it in your bag and if it comes time to leave transition and you don’t want to wear it, simply leave it by your bike. For longer distances like an Olympic or Half Distance, a wetsuit will have clear time-saving benefits that outweigh the extra time of removing the suit.

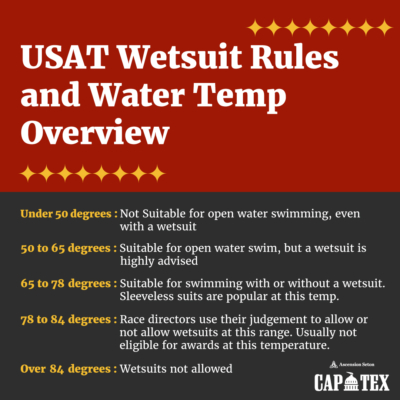
USAT’s Rule on Wetsuits and Water Temperatures

All temps refer to surface water temperatures

Under 50 degrees: Not suitable for open water swimming, even with a wetsuit

50 to 65 degrees: Suitable for open water swim, but a wetsuit is highly advised

65 – 78 degrees: Suitable for swimming with or without a wetsuit. Sleeveless suits are popular at this temp.

78 – 84 degrees: Race directors use their judgment to allow or not allow wetsuits at this range. Usually not eligible for awards at this temperature.

Over 84 degrees: Wetsuits not allowed

5 Must Try Yoga Poses for Triathletes

Adding yoga to your life offers many benefits such as increasing mobility and range of motion, preventing injuries, and relieving pain. Hopefully, you already have some kind of stretching routine included in your training. If you don’t, the offseason is the perfect time to try some new things! We’ve compiled a list of the 5 most beneficial yoga poses for triathletes to combat the wear and tear we put our bodies through during training.

1. Downward Facing Dog

Purpose: This is a common pose but is especially beneficial for a triathlete with any built-up tension in your calves and feet from running. Also great for cyclists with lower back from riding. Hold this pose to help build strength in your shoulders, arms, and chest.

How To: Start on your knees with your hands out in front of you, push your bottom up until you feel a stretch in your calves and the bottom of your feet. Straighten your legs if you can, but the main thing to remember in this pose is to keep your back as flat as possible.

Downward Dog

2. Crescent Lunge

Purpose: This pose utilizes all the muscles in your body but focuses on getting a stretch in the back of your legs, groin, and hip flexors while building strength in the front of your legs. Practicing this pose will open your range of motion in your legs and hips.

How To: Start in a standing position, and go into a lunge until your front leg is bent at a 90-degree angle. Keep your core tight to remain balanced as you lift your arms above your head. During this motion, you will feel a stretch in your triceps and chest.  Take deep breaths as you hold this position, switch to your other leg, and repeat.Crescent Lunge

3. Pigeon Fold

Purpose: The Pigeon Fold is a great yoga pose for opening up your hips and getting a deep stretch in your hip flexors and glutes. Good for athletes who spend more time cycling to loosen and realign their hips after putting in hours on the bike.

How To: Start in a Downward Facing Dog, bend your right knee and sweep your leg down and place it on the mat beneath you. Lower yourself to a comfortable seated position with your left leg behind you as you feel the stretch in your quad and hamstring. Hold your chest high to focus the stretch in your legs. Pigeon Fold

4. Cross-Legged Twist

Purpose: This pose focuses on stretching your lats, shoulders, and neck. This will help reduce any pain you may have from constantly rotating your body side to side during your freestyle swim stroke.  Holding this pose will lengthen and help mobility along your spine which is great for increasing your range of motion during your swim training.

How To: Begin on the floor with both legs out in front of you. Bring your knees to your chest and place the bottom of your feet on the ground. Slide your left foot on the ground under your right leg to rest your foot beside your right hip. Bring your right arm across your body and place it against the inside of your left knee. Push slightly to twist your body until you feel a stretch in your lats and shoulder. Cross Legged Twist


5. Bridge Pose

Purpose: Offers relief from pain caused by the position you are in when training on your bike. Good stretch for your quads, chest, and abs while also strengthening your glutes and hamstrings. You will feel this pose strengthens your back muscles to reduce or prevent pain you may have from running and cycling.

How To: Lie flat on your back with your knees bent with feet on the floor shoulder-width apart. Place hands on either side of your body to help keep yourself balanced. Press your feet and arms firmly into the floor and push your hips up off the ground.Bridge Pose


These yoga poses work muscles that are often neglected in the repetitive movements you do while preparing for a triathlon. Get the most out of your training when you add in these 5 yoga poses that are best for triathletes before or after your next workout!

Avoid Knee Pain During Triathlon Training

If you experience knee pain during your training, you’ll want to make some changes to the way you train as well as look into what could be causing the pain. The source of the pain can come from any of the three tri disciplines, so you’ll want to pay close attention to when you feel discomfort to address the problem source. While you do not have to stop training, it’s important to ease up on your training intensity and make some adjustments to the way you train to combat the pain and prevent further harm/damage to your knees. Follow these tips to avoid knee pain during your tri training.

What’s the Problem?

Tips to avoid knee pain while training for a triathlon

Knee pain is a common problem we hear about in the world of triathlon because you’re training for two sports known to cause knee pain. Best described as pain felt above, below, or behind the kneecap that is caused by overuse or misuse during specific physical activities. Knee pain is very common for triathletes, but most often stems from the incorrect form while running or cycling.  It can lead to swelling and even grinding or cracking sounds when doing any physical activity, so it’s best to get to the root of the problem before it’s too late.

Train Without the Pain

Swim

Swimming is the lowest impact on your body in a triathlon. For this reason, it’s the safest alternative to turn to when dealing with knee pain. When hitting the pool for a workout, find a swim stroke style that causes the least amount of discomfort in your knees. Swimming is also an excellent way to alleviate current pain and help you avoid causing any further damage. You can also try focusing on arm-only workouts and use a pull-buoy to avoid making the problem worse.

Bike

Knee pain is typical when riding for extended periods for any athlete. Avoid riding on hilly terrain or unpaved roads to avoid putting too much strain on your knees. Another thing that could be the cause of your knee pain is incorrect bike fit. You can fix this with minor tweaks, like correctly adjusting your saddle height. While this seems minuscule, it impacts your knees much more than you may think. Suppose you are experiencing more pain than usual when out for a ride, this is an indicator to ease up on your training rides. Deal with your current injury to prevent permanent damage.

Run

Typically, running is where athletes feel the most pain and discomfort during training. Running is known to be hard on your joints, but there are ways to reduce this to keep reaching your triathlon goals. An alternative workout for knee pain we recommend is aqua running. If running is especially painful for you, take some time to evaluate your form when you run. Make sure you’re running lightly while maintaining a comfortable stride to avoid heel-striking.

Try training with a group or with a professional coach who can watch your technique and form to help find the source of your problem. It’s always great to have people looking out for you. Plus, you’ll enjoy getting advice from those more familiar to the sport if you are just starting.

When in Doubt, Stretch It Out

Tips to avoid knee pain while training for a triathlon stretches

Pain in any joint is attributed to the tightness and strength, or lack-there-of, in the muscles around it. This is why flexibility and mobility are so essential to avoid further knee pain. There are a number of knee-specific stretches you can do. Most athletes find the effects of stretching properly essential to dealing with knee pain during training. These stretches almost instantly alleviate knee pain and can be done in front of the tv, or anywhere you’d like. You can also incorporate yoga for triathletes into your training to work on strengthening the knee while increasing your flexibility.

Take a Break When Needed

If you are experiencing extreme knee pain, take some time off when training to prevent causing permanent damage. While this may be tough or feel counteractive, you’ll thank yourself in the long run (pun intended). Pay attention to your body, and take a break if you need to. With the help of these tips, save yourself the trouble and avoid knee pain from happening down the road.

Understanding Lactate Threshold

LACTATE THRESHOLD EXPLAINED

The burning, aching sensation that accompanies intense efforts is all too familiar to athletes. This feeling can also occur when bikers begin to increase their mileage and biking pace. Most athletes have probably heard the terms lactic acid or lactate threshold thrown around by coaches. What do these terms actually mean? Lactate was originally believed to only be produced when the body lacks oxygen. It’s now known you produce lactate even at rest. Far from the cause of fatigue, lactate is shuttled around the body to areas where it is needed as a fuel source such as the heart, muscles, brain, and liver.

During high-intensity training, muscle contractions result in a build-up of metabolites and depletion of glycogen (the fuel inside muscles). This is when lactate is associated with fatigue. At rest and during low-intensity activity, lactate doesn’t build up in the muscles. It is shuttled to areas where it is needed faster than it is produced. Lactate threshold is the point at which the rate of production of lactate is greater than the rate of removal from the muscles. Athletes can only sustain exercise above this threshold for a limited amount of time before exhaustion. Pro tip: this is great information for boosting your mental toughness.

WHY YOU SHOULD KNOW ABOUT THIS

While lactate does not directly cause fatigue, it is still the best metric available for detecting when the body shifts away from mostly aerobic metabolism to rely more heavily on anaerobic metabolism. Anaerobic metabolism can only be sustained for a short period of time before fatigue occurs. Studies show that lactate threshold, or the point at which this transition occurs, is the best predictor of overall endurance performance abilities. If two athletes have the same VO2max, but one athlete can maintain a higher fraction of that VO2max without build up of metabolites (i.e. lactate, hydrogen ions), the athlete with the higher lactate threshold will always win. It’s an objective performance metric that gives invaluable information about your endurance abilities.

Dr. Allen recommends athletes measure their lactate threshold at the beginning of the training season to get a baseline. This can be used to establish training zones unique to their individual physiology, optimize performance, and avoid overtraining. Additionally, he recommends athletes come in for testing once every 3-4 months. This allows the team to monitor training progress and reestablish training zones. As the racing season approaches, the lactate threshold pace can be used to determine exact pacing strategies, no matter the distance. For example, marathoners usually set their race pace right around their lactate threshold. Measuring your lactate threshold gives you the ability to establish your race pace while knowing it’s truly what you’re capable of.

HOW THE MEASUREMENT IS PERFORMED

Lactate threshold can be performed in a clinical setting or in the field depending on the athlete’s preference. Ascension Seton Sports Performance adheres to the most stringent COVID-19 policies. They are also happy to offer the service outdoors if athletes would prefer that. The test involves either running on a treadmill or outdoor track or cycling on a stationary ergometer. As you exercise at increasing intensities their team measures the changes in various physiological parameters. This includes changes in lactate as measured from a drop of blood from the finger or changes in expired gases collected from a mask over your mouth.

ABOUT DR. JAKOB ALLEN

Dr. Allen received his Doctoral training from the nationally ranked University of Texas at Austin. He was an 8x All-American collegiate swimmer at Stanford, American Record holder, NCAA and Pac-10 Champion, and 2x Olympic Trials qualifier. Dr. Allen is now an avid cyclist and triathlete, frequently placing in the top-5 overall amateurs in Central Texas triathlons. He is driven to bring about the greatest potential of all athletes whether you are a weekend warrior or an Olympian.

Dr. Allen currently serves as the Sports Scientist for the Austin Bold FC team in addition to his work in the clinic. He believes that exercise remains one of the best ways to improve every physiological system in the body throughout the lifespan. Whether it’s helping prevent changes in mental acuity or improving muscle function, the benefits of exercise continue to be supported by scientific studies. Dr. Allen specializes in designing exercise training programs for improving muscle and cardiovascular health for aging wellness and masters athlete performance.

3 Tips for Running During the Holidays

Stay on top of your running during the holidays with our advice

The holiday season is fast approaching. You might wonder if you can keep your running schedule going without any disruptions. Spending time with your family and friends, eating your favorite Christmas meals, late nights, and drinking can make running during the holidays quite the challenge.

If you don’t go for a run regularly, you can feel out of shape. So how can you keep running during the holidays? Follow the advice below! Prepare accordingly, stay on track with your running schedule, and have a wonderful time this holiday season. Pro tip: preparation is crucial and one of the main habits of successful triathletes.

Set a goal

One of the best ways to keep yourself running during the holidays is to set a goal. For instance, a goal can include a specific number of miles or a fixed amount of time every week. Another option would be to start a running streak by setting a schedule. Feel like your running is in a rut? These training tweaks could improve your performance.

You can register for an event, like the Ascension Seton Austin Marathon. Having a goal race on your calendar will push you to run regularly. Keep in mind that it doesn’t have to be a big event to get you running during the holidays. Even registering for the Run Austin Virtual Series’ Armadillo 5K or Makin’ Music 4-Miler can do the trick. All you need is to create goals that will motivate you to go for a run regularly.

Go with the flow

During the holiday season, you are bound to have family, work, and travel commitments. They affect how much time you can spend training and keeping your body healthy and fit. When it comes to running, the first thing you should do is take a look at your schedule. If you have any commitments, avoid canceling your run. Instead, make adjustments to your running schedule. If you feel like going for a run outside of your “planned time,” do it. You never know what might happen to prevent you from running. Pro tip: remember to leave some time for the important warm-up and cool-down.

Have fun

The most important thing when it comes to winter training is to have fun. Although the holiday season is a time to enjoy and relax, it may not always be the case. Sometimes, you have to crunch extra hours at work to spend time with your family and friends. For a lot of people, the holiday season comes with a lot of stress. The best way to deal with anxiety-inducing situations is to take a break from them. You need to relax to recharge your mind and be ready to deal with anything that comes your way.

When you are suffering from a mental block, going for a run can help you significantly. By taking your mind off the situation, you can come back and visit it with a fresh and new perspective.

At the same time, you should also make sure you get adequate amounts of sleep. This helps your body recover and should be a major part of your winter training schedule. After all, you don’t want to burn your candle at both ends, as this will make it harder to go for a run regularly.

Don’t stress out if you miss a run or two. As long as you do as much as you can every day, you’re doing a wonderful job!

Adjusting Your Saddle Height Can Make All the Difference

Learn why adjusting your saddle height matters and how it can be done

Many people don’t realize that adjusting your saddle height by a few millimeters can make a huge difference in how they feel on their bike. If you feel like you are not making gains or if you have pain after riding, you may want to try adjusting your saddle height. Properly adjusting your saddle height could help you improve these 5 bike handling skills.

Saddle height explained

Saddle height is the distance between the heart of the pedal axle and the top of the saddle. It is set by adjusting the seat post to an ideal height that balances comfort and power on the bike. Remember, adjusting your saddle height is important like making sure your helmet always fits!

Reasons to change

Saddle height is arguably the single most important adjustment on your bicycle. Incorrect saddle height can contribute to saddle discomfort and anterior and posterior knee pain. The poor leverage can also limit your power production. 

Adjusting your saddle height

There are many methods and formulas to find your “proper” saddle height. One of the best approaches is to establish it based on the rider’s individual ride characteristics and flexibility. If you are looking for recommendations, visit Josh at Jack & Adam’s Fredericksburg or with the crew over at Mellow Johnny’s. A bike fit specialist can explain your individual characteristics. They can also highlight what equipment may be contributing to any performance or biomechanical limitations. If you can’t make it to a bike fit there is still a solution. 

At home fix

Before your next ride, experiment at home with the “heel to pedal method.” This will get you in the ballpark range before you can see a professional. First, mark the current height. Then, put your bike on the trainer. Pedal around to make sure you are in the position you normally ride in. Place your heel on the pedal and pedal backward to reach the six o’clock position. Your knee should be completely straight. If your heel has trouble making contact with the pedal, the seat is too high. If your knee is bent it is too low. Make very small adjustments, in millimeters, until your leg is straight with the heel on the pedal.

Adapting to your new saddle height

When you’re done adjusting your saddle height, wrap a strip of electrical tape around the base of the post where it meets the seat clamp. Take measurements and keep them for future reference. Make the first few rides with your new saddle height short and sweet. It can take a few rides before your body fully adapts. It is good to get your bike fit looked at at least every few years or if you get new equipment such as new shoes or pedals. Pro tip: when you’re ready for longer rides, check out these 3 cyclist-friendly routes in Austin.

3 Cyclist-Friendly Routes in Austin to Ride

Get more comfortable on your bike when you ride these cyclist-friendly routes in Austin

Avoid traffic and become more comfortable on your bike on these cyclist-friendly routes. These 3 Austin spots are located throughout town, making them accessible to many cyclists. They’re ideal for enjoying a scenic route and mastering your bike handling skills. New to cycling or just purchased your first bike? Nice! The more routes you ride, the more familiar you will become with your new bike. If switching gears is new to you, using them can be tricky on your first few rides. Your bike presents a new feel. Leaning into the curves, becoming comfortable with the handling, and eating and drinking on the bike are all things you should practice. Pro tip: always check that your helmet fits before every ride.

Veloway

This 3-mile looped, one-way roadway is an ideal cyclist-friendly route. The Veloway is located in southwest Austin off LaCrosse Avenue and is closed to traffic. Parking is ample. Most noteworthy, this route is strictly for cyclists and rollerbladers, no runners or walkers (watch out for the wildlife!). The roadway is bisected with a continuous white line (slower cyclists keep to the right). Everyone moves in the same clockwise manner. You can relax a little knowing you don’t have to keep an eye out for non-wheeled individuals or riders coming in your direction. There are gorgeous views, a few tight turns, and some nice straightaways. Make sure you get into the right gear for a nice climb around Mile 2! Porta-potties are available.

Southern Walnut Creek Trail

The Southern Walnut Creek Trail begins at Govalle Neighborhood Park off Bolm Road in east Austin. It features nearly 7.5 miles of 10-foot wide concrete paths and splendid views. Like the Veloway, there is plenty of parking. Be advised, runners and walkers are allowed on the trail and traffic flows both ways. Ensure the other lane is clear and yell out “on your left” if you plan to pass others. There are a few road crossings along the trail to be aware of as well. Add 11 miles and some nice climbs to your bike ride when you preview the Rookie Tri and Jack’s Generic Tri bike courses! The trail rides alongside Daffan Lane and eventually hits Decker Lane.

Brushy Creek Regional Trail

Representing north Austin, the Brushy Creek Regional Trail reaches Round Rock to the east and Cedar Park to the west. Check out Stone Canyon Pool if you park to the east. Park to the west at Twin Lakes Family YMCA. Be aware of runners and walkers on this 6.75-mile multi-use trail that connects neighborhoods and existing parks. Traffic flows in both directions and there are multiple restrooms along the trail. Make sure the other lane is clear and yell out “on your left” if you plan to pass others. BCRT images from cedarparktexas.gov.

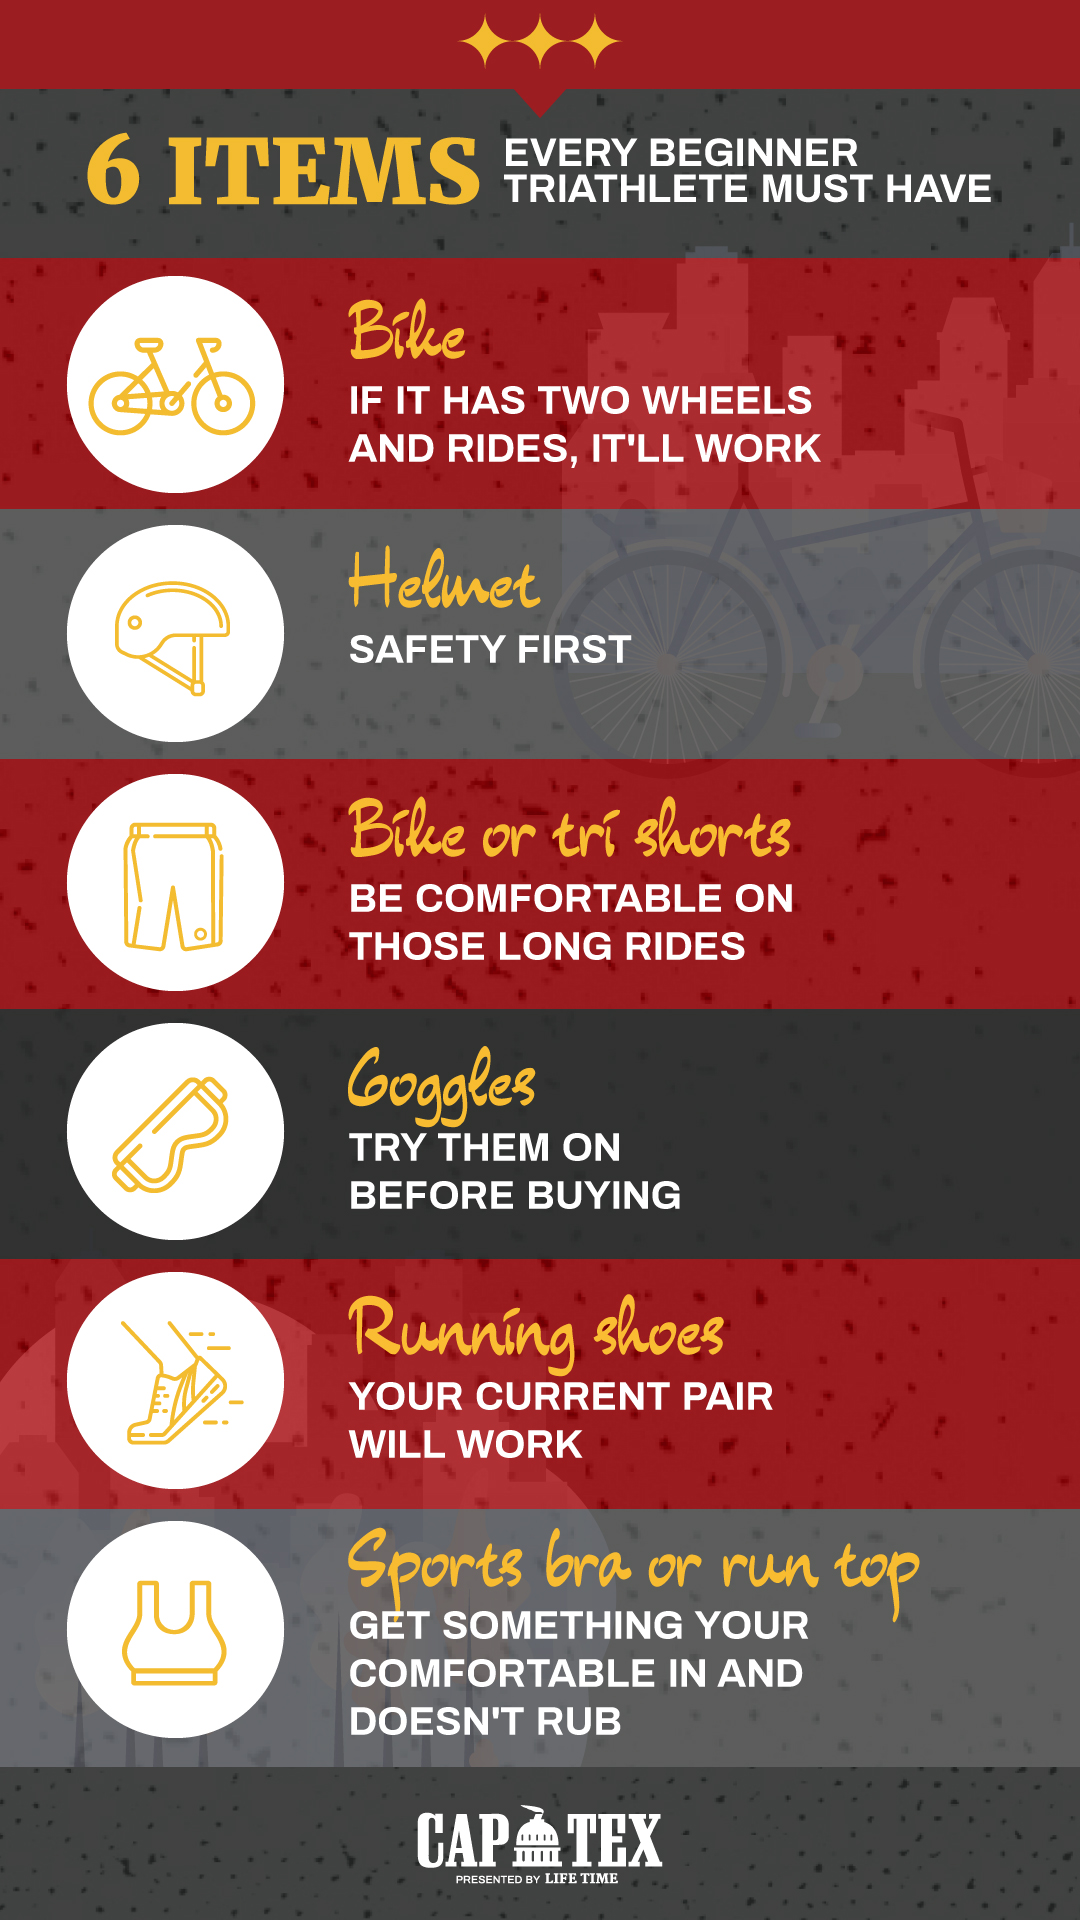
6 Items Every Beginner Triathlete Must Have

Every beginner triathlete needs these 6 items before they can train

You’ve decided to start training for your first triathlon, congrats! Now what? Before you get started you’ll need some specific gear for all phases of training. This 6-item checklist is a great start for every beginner triathlete! It’s got you covered from the swim to the bike to the run. You might even have some of these items already. If that’s the case, we’ve added a few more recommendations at the end. Below are the 6 items every beginner triathlete must-have. Pro tip: pair the items with these 8 habits to successfully train and crush it on race day! 

Bike

Infographic listing the 6 items every beginner triathlete must have. List includes bike, helmet, tri shorts, goggles, running shoes, and sports bra. Read more at https://captextri.com/6-items-beginner-triathlete/Any bike. It can be anything from your uncle’s old bike that has been in the garage or the mountain bike you take out riding with your kids. Be sure that the bike is in good repair by taking it to a local shop. If the bike is really old or in disrepair, you may spend just as much on fixing it as you will buying a beginner bike. Pro tip: a road bike with gears will make your training a lot more comfortable. You will be able to go further with less effort and have more “in the tank” when you head out for the run. Remember to practice these 5 bike handling skills.

Helmet

Helmets should be replaced every 5-8 years and definitely after any crash — no matter how small. Helmets provide the same safety level at any price tag so you don’t need anything expensive. The higher-end helmets are equipped with more ventilation and aerodynamics. Some helmets are specifically sized so make sure and check when you purchase. A loose-fitting helmet is not safe. Pro tip: follow these easy steps to ensure your helmet properly fits.

Bike or tri shorts

Really you can wear what you want, just remember that transition is open and there is nowhere to change in private. If you want to be comfortable while training and racing get a nice pair of athletic shorts. These can really be anything but cotton as cotton will not wick away sweat and can lead to chaffing. Ouch! A basic tri short with a little bit of padding will make your bike-riding experience much more enjoyable. The best part is that these shorts will last long after your triathlon debut. They are perfect for cross-training, cycle classes, and even going for runs.

Goggles

There is no perfect goggle since everyone’s face is shaped a little differently. Visit a local swim shop and try on a few models to find what works for you. Leaky goggles will derail your swim and can make swimming a lot more difficult. Especially if you are having to stop and constantly adjust for goggles. Don’t skimp and just buy the cheapest ones at the store. Once you have tested them out a few times, we suggest buying a second pair in a different tint so that you have something for all conditions. Here’s some more advice to follow when searching for your goggles.

Running shoes

If they are comfortable, they are good to go. Even if they are just the shoes you got because you liked the way they looked. Have some shoes that aren’t comfortable? Well, you can still run in those — you will just be, well uncomfortable at the end of your run.

Sports bra

Ladies, even if you decide to use your swimsuit for your first triathlon you are going to want to wear a good sports bra underneath. You will want something you are comfortable running in. If you have some areas that rub, like under the armpits, you can put some Vaseline or Body Glide on in the morning to help with chaffing.

Beginner triathlete extras

Recommended

  • Flat kit – you’ll want this if you get a flat
  • Hat/visor – protect yourself from the sun
  • Water bottle for the bike – stay hydrated
  • Bright towel – find your spot easier in transition
  • Sunscreen – don’t get burnt 
  • Race belt – carry your nutrition and your bib

Optional

  • Socks – keep your feet comfortable
  • Bike shoes with clip-in pedals – make sure you practice first
  • Sports watch – track your time
  • Sunglasses – protect from debris on your ride
  • Transition bag – carry all your stuff
  • Wetsuit – can be expensive, but could help in the water

5 Bike Handling Skills Every Triathlete Should Know

Why triathletes should focus on bike handling skills

Competency with your bike handling skills gives you a decisive advantage over your competition. You gain the experience, knowledge, and practical ability to bike better and more efficiently. Success at a triathlon depends on how well you can gauge your environment. You’ll be surrounded by people, have to traverse across various kinds of terrain, and your journey will be long. That is why you should be completely comfortable with riding your bike for long hours. Here are five key bike handling skills that will help you become a more successful triathlete.

Pro tip: follow these steps before every ride to ensure your helmet fits.

The skills every triathlete should nail

  • Starting and Stopping

These are the most basic bike skills that you must master. Without having solid control over your bike, you could end up in an accident. If your bike uses clip-on pedals, then you should become familiar with them. Practice clipping and unclipping your pedals while riding until you perfect it.

  • Braking and Corners

Speed isn’t always your best friend when it comes to triathlon. This really applies to corners. Instead of pressing down on the brake once you reach the corner, try slowly braking as you near it. This way, you get time to think about the turn you’ll make and pre-emptively react to any dangers ahead.

  • Bike Handling and Shifting gears

Your timing with gear handling should be impeccable. You can achieve this by spending as much time riding on the roads as you can. The natural environment will teach you how to gauge the timing of your shifting. Once you develop this skill, you’ll begin to shift your gears more naturally as you get to your location.

  • Know your Cadence

The cadence in a bike is the number of times you can pedal per minute. Cadence is also known as pedaling rate. Triathletes should be able to maintain a consistent pedaling rate between 90-100 revolutions per minute. By practicing every day, you should be able to get to this level.

  • Drinking while biking

If you’re going to compete in a triathlon, your nutritional intake should be right. You don’t want to get dehydrated during the event nor do you want to feel anything less than your best. That is why you should practice grabbing your water bottle while your biking. You can do this by biking slowly at first, as you reach to your water bottle holder to grab the bottle, drink from it, and place it back. Over time, you will gain the confidence to do this with ease. Pro tip: you will spill and your bike will get dirty. Take the time to clean it with these simple steps!

These basic bike handling skills will take you from a cyclist to a real competitor. You need more than a better bike to succeed at triathlon. Developing your skills is what will help you achieve success. If you’re in the market for a new bike, make sure you know the differences between triathlon and road bikes.